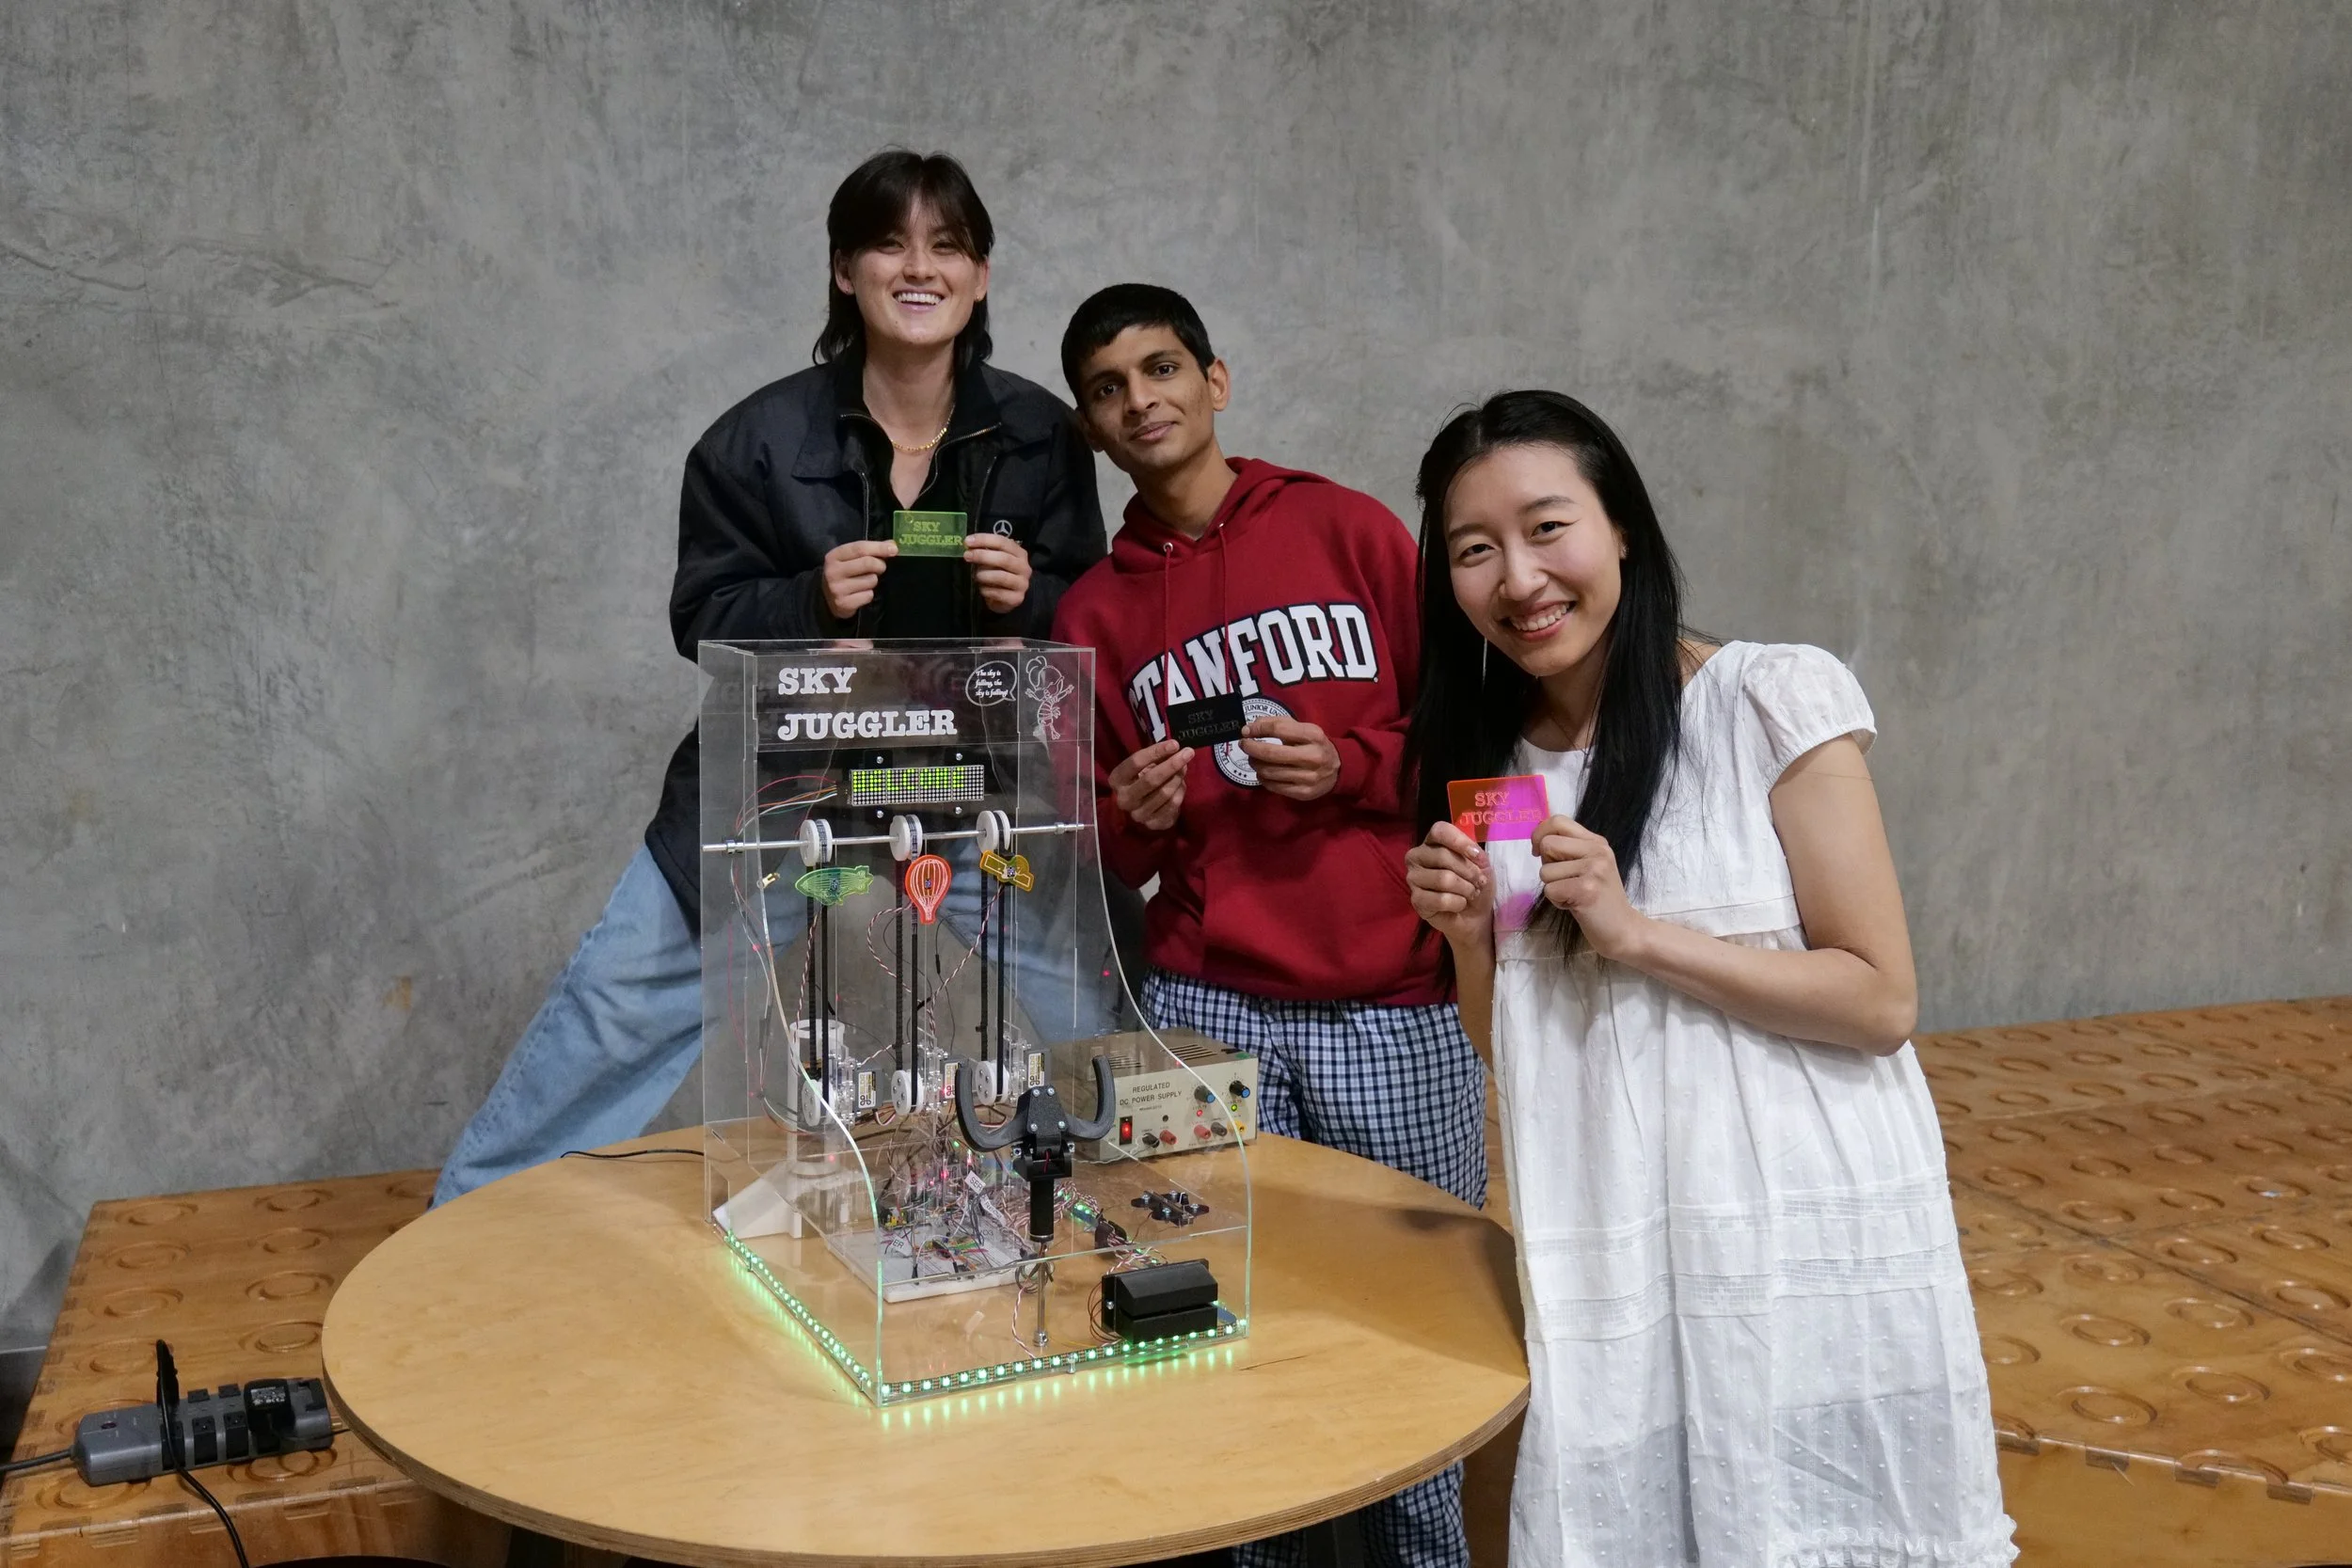
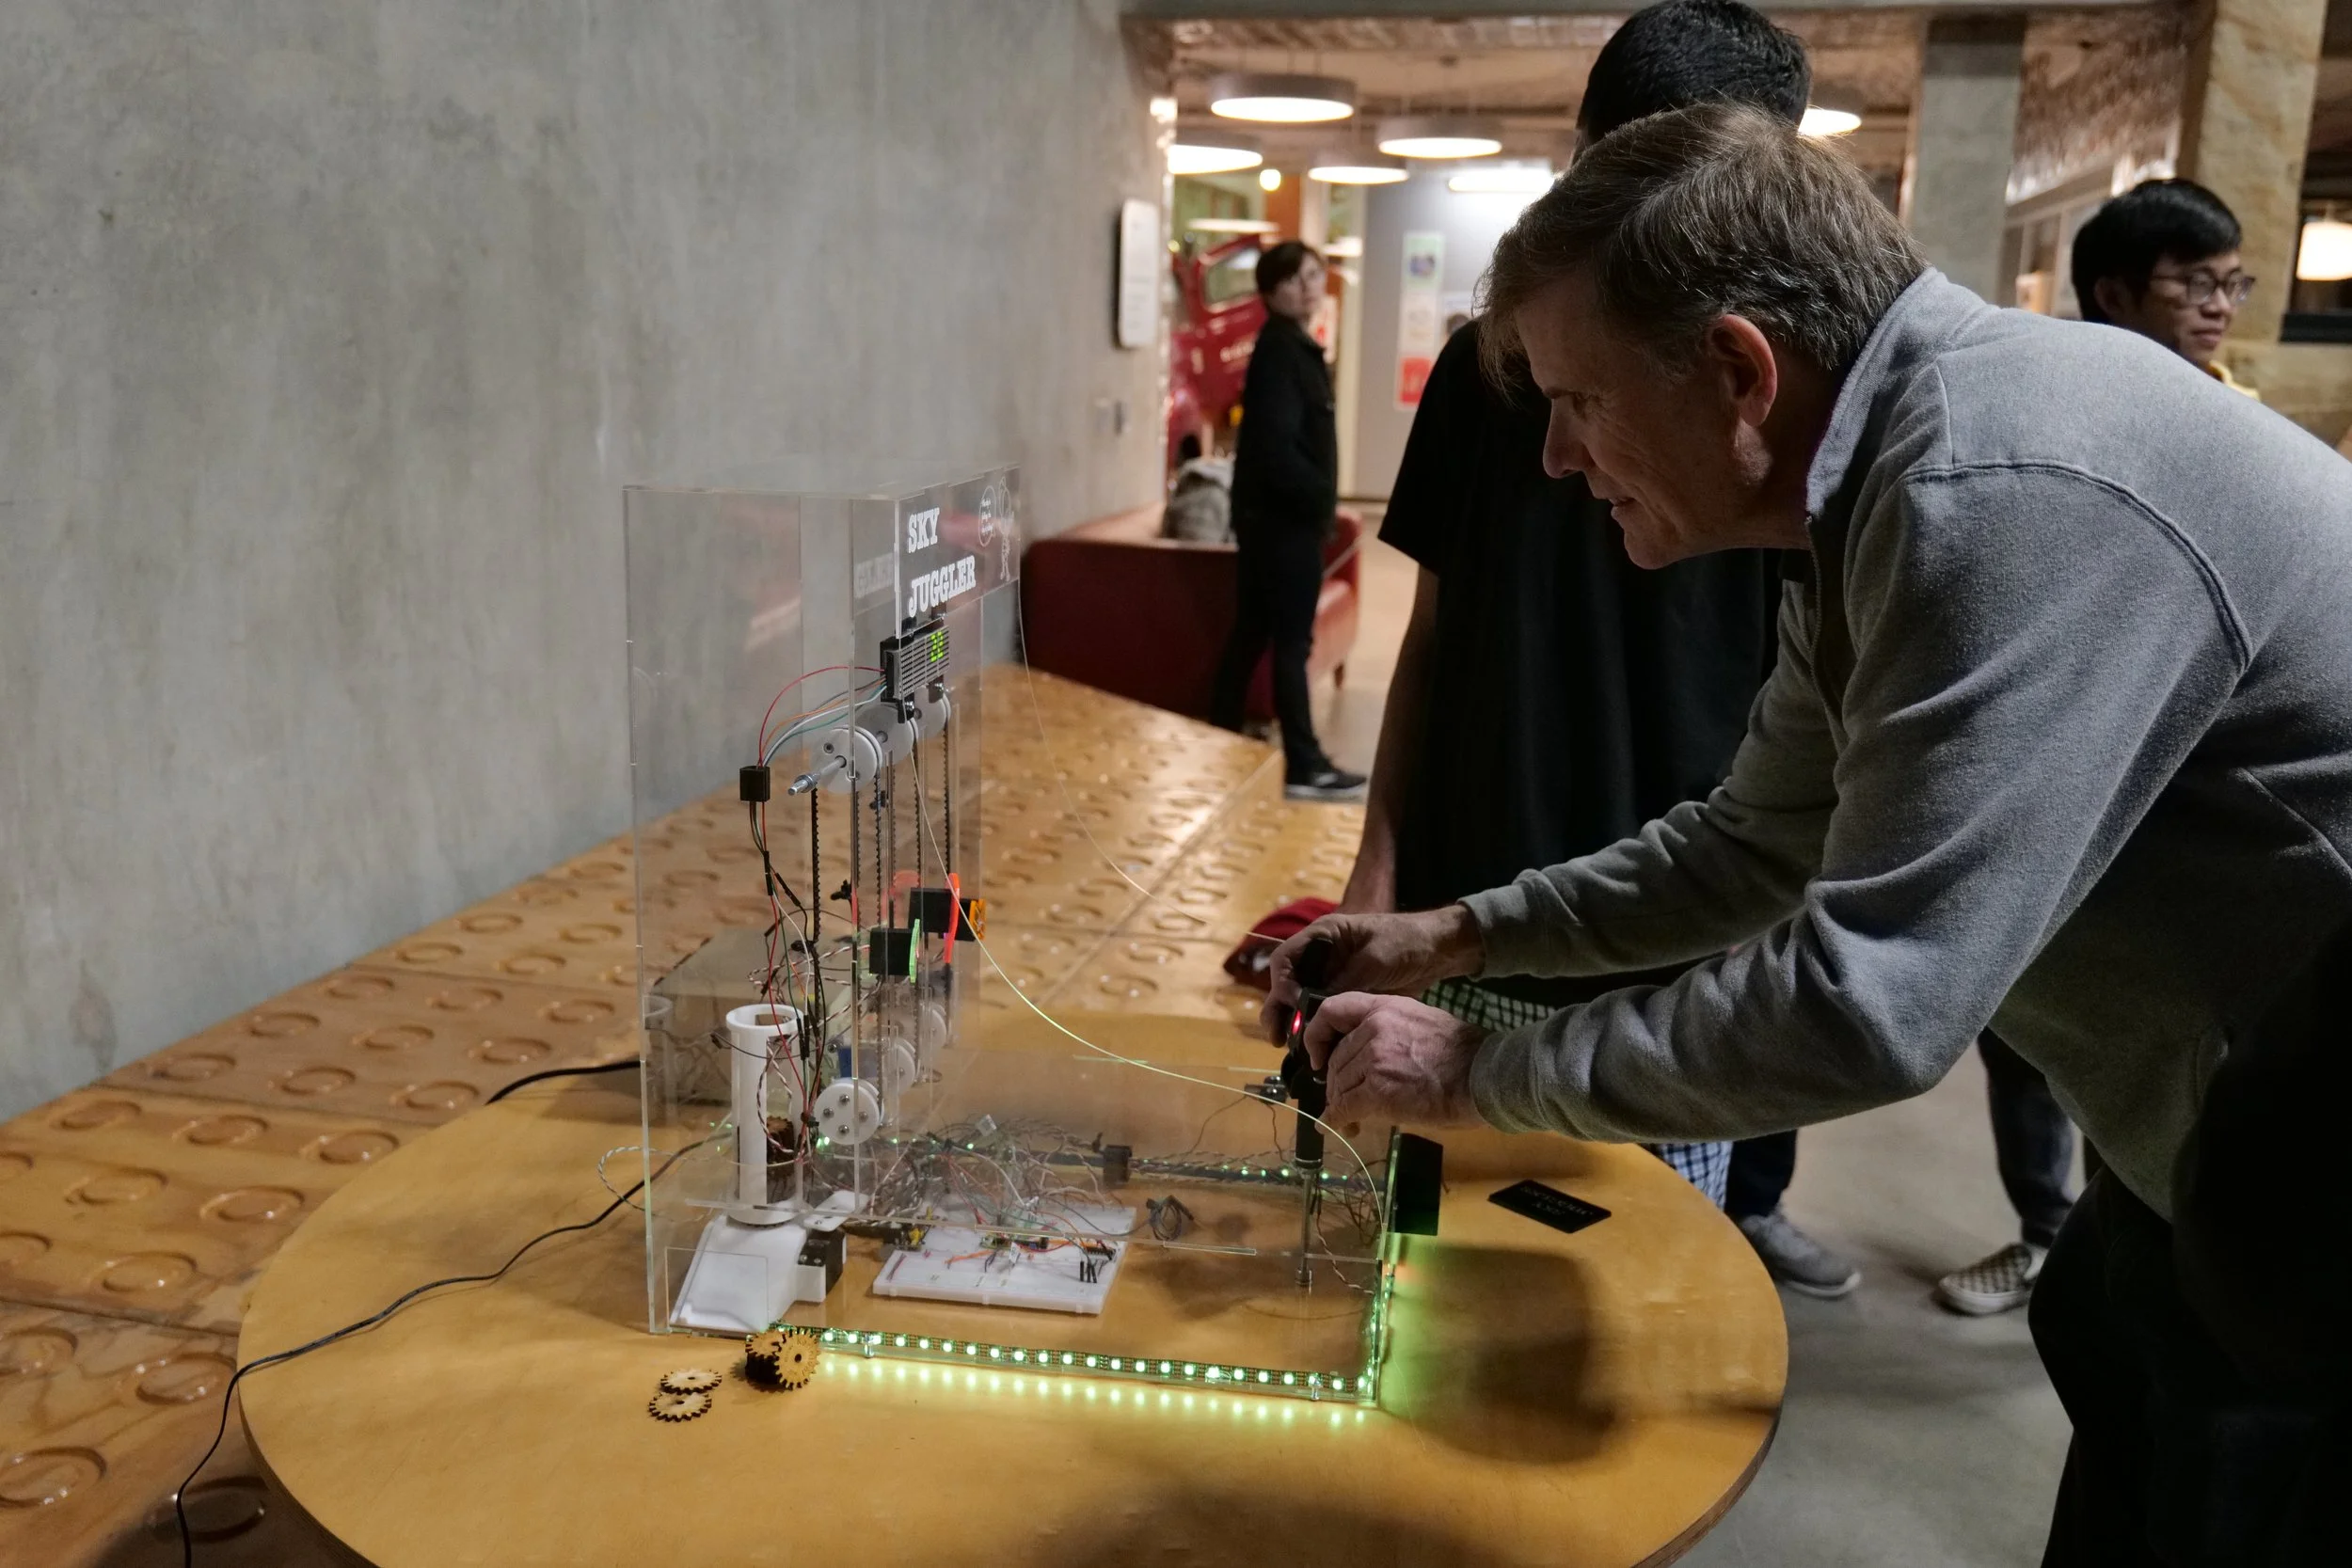
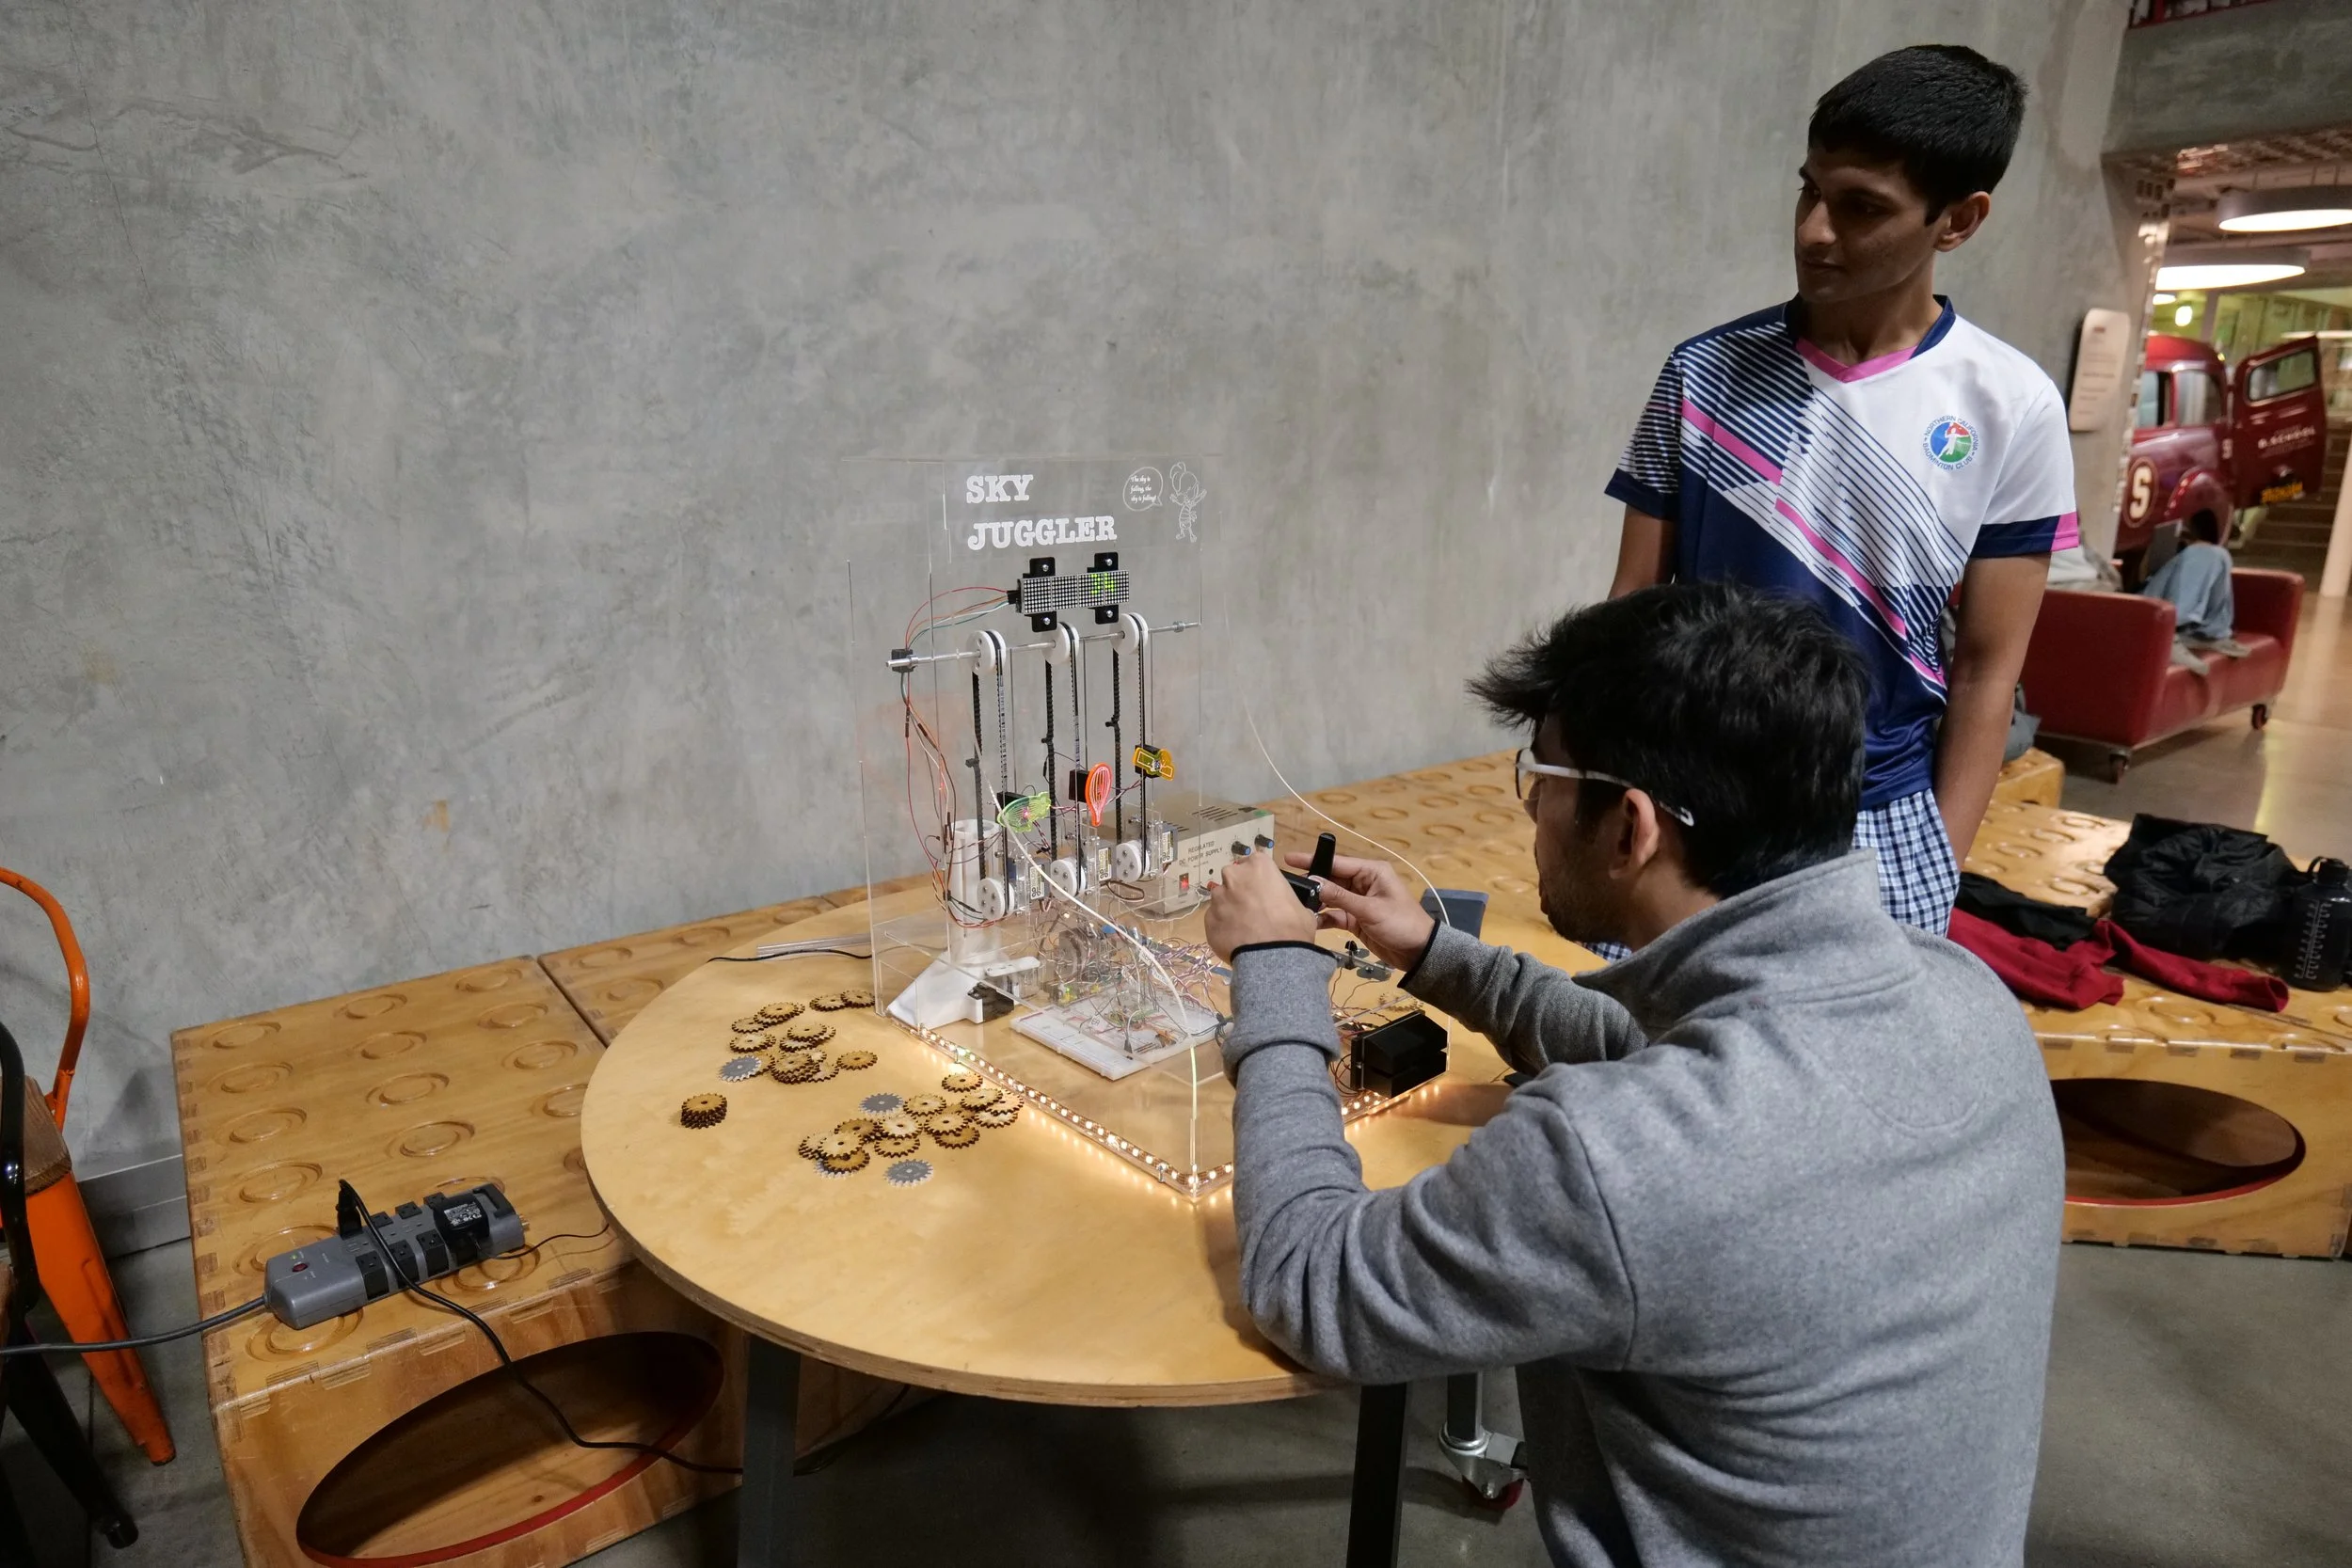
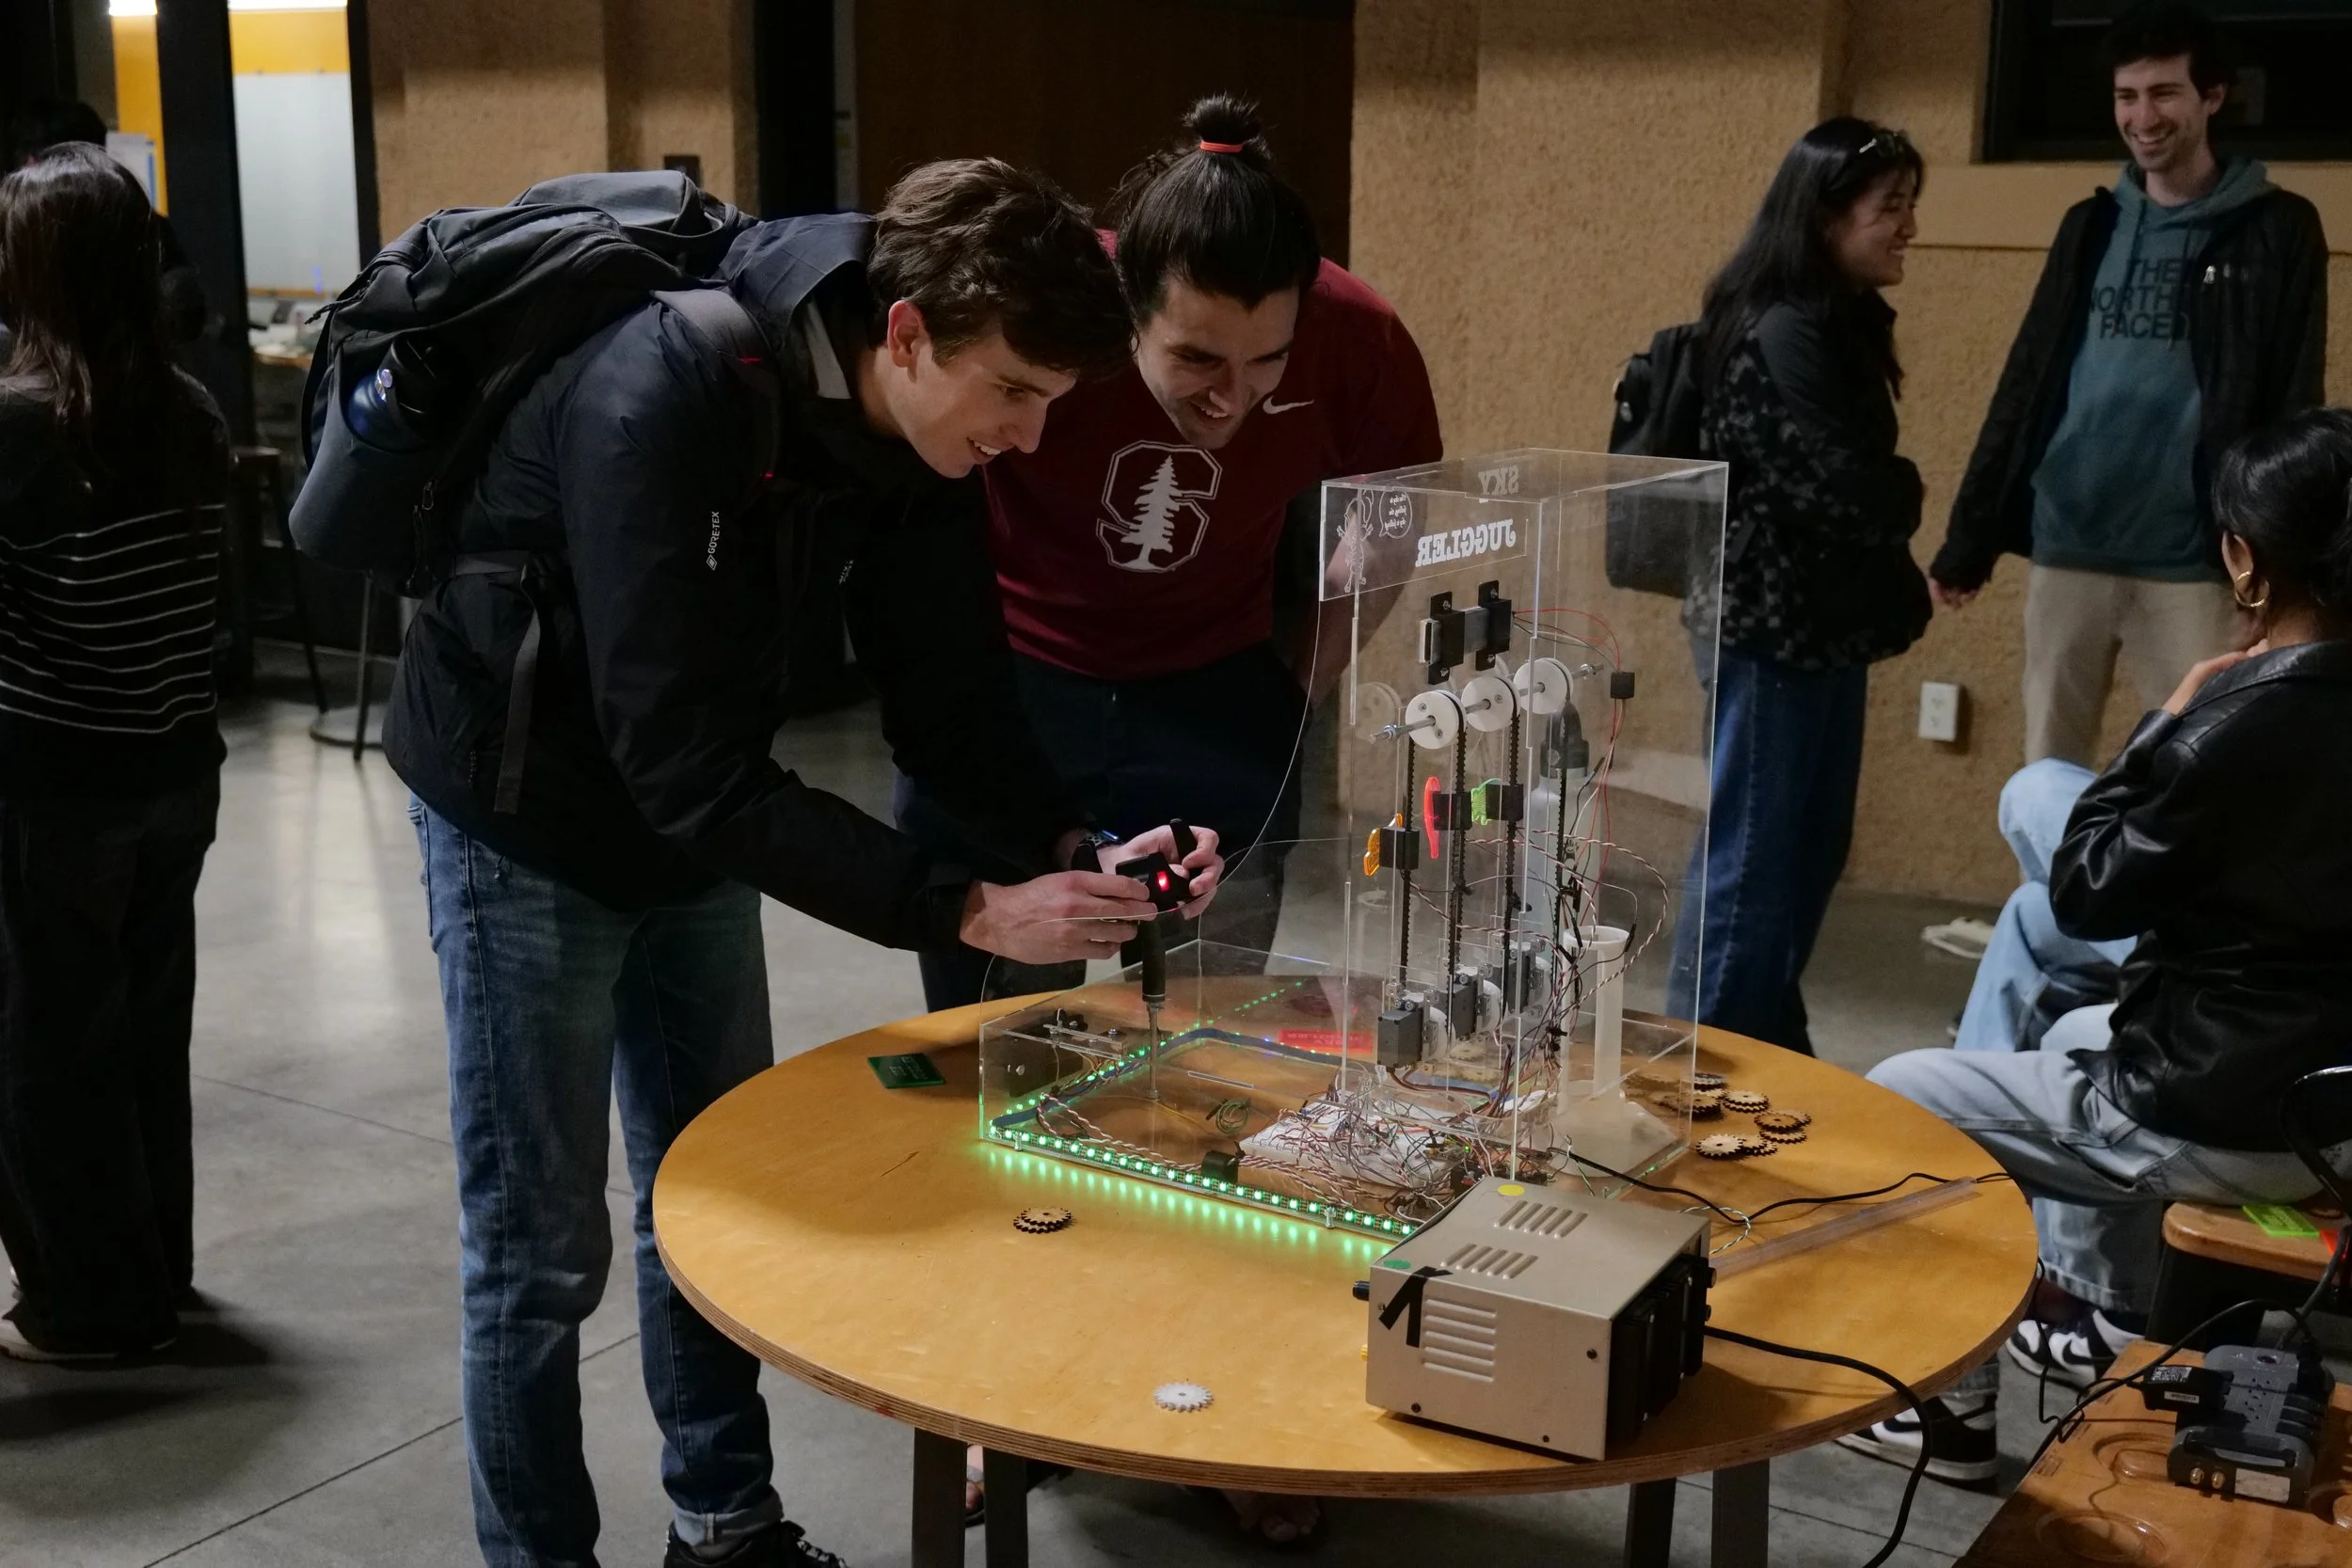
Sky Juggler
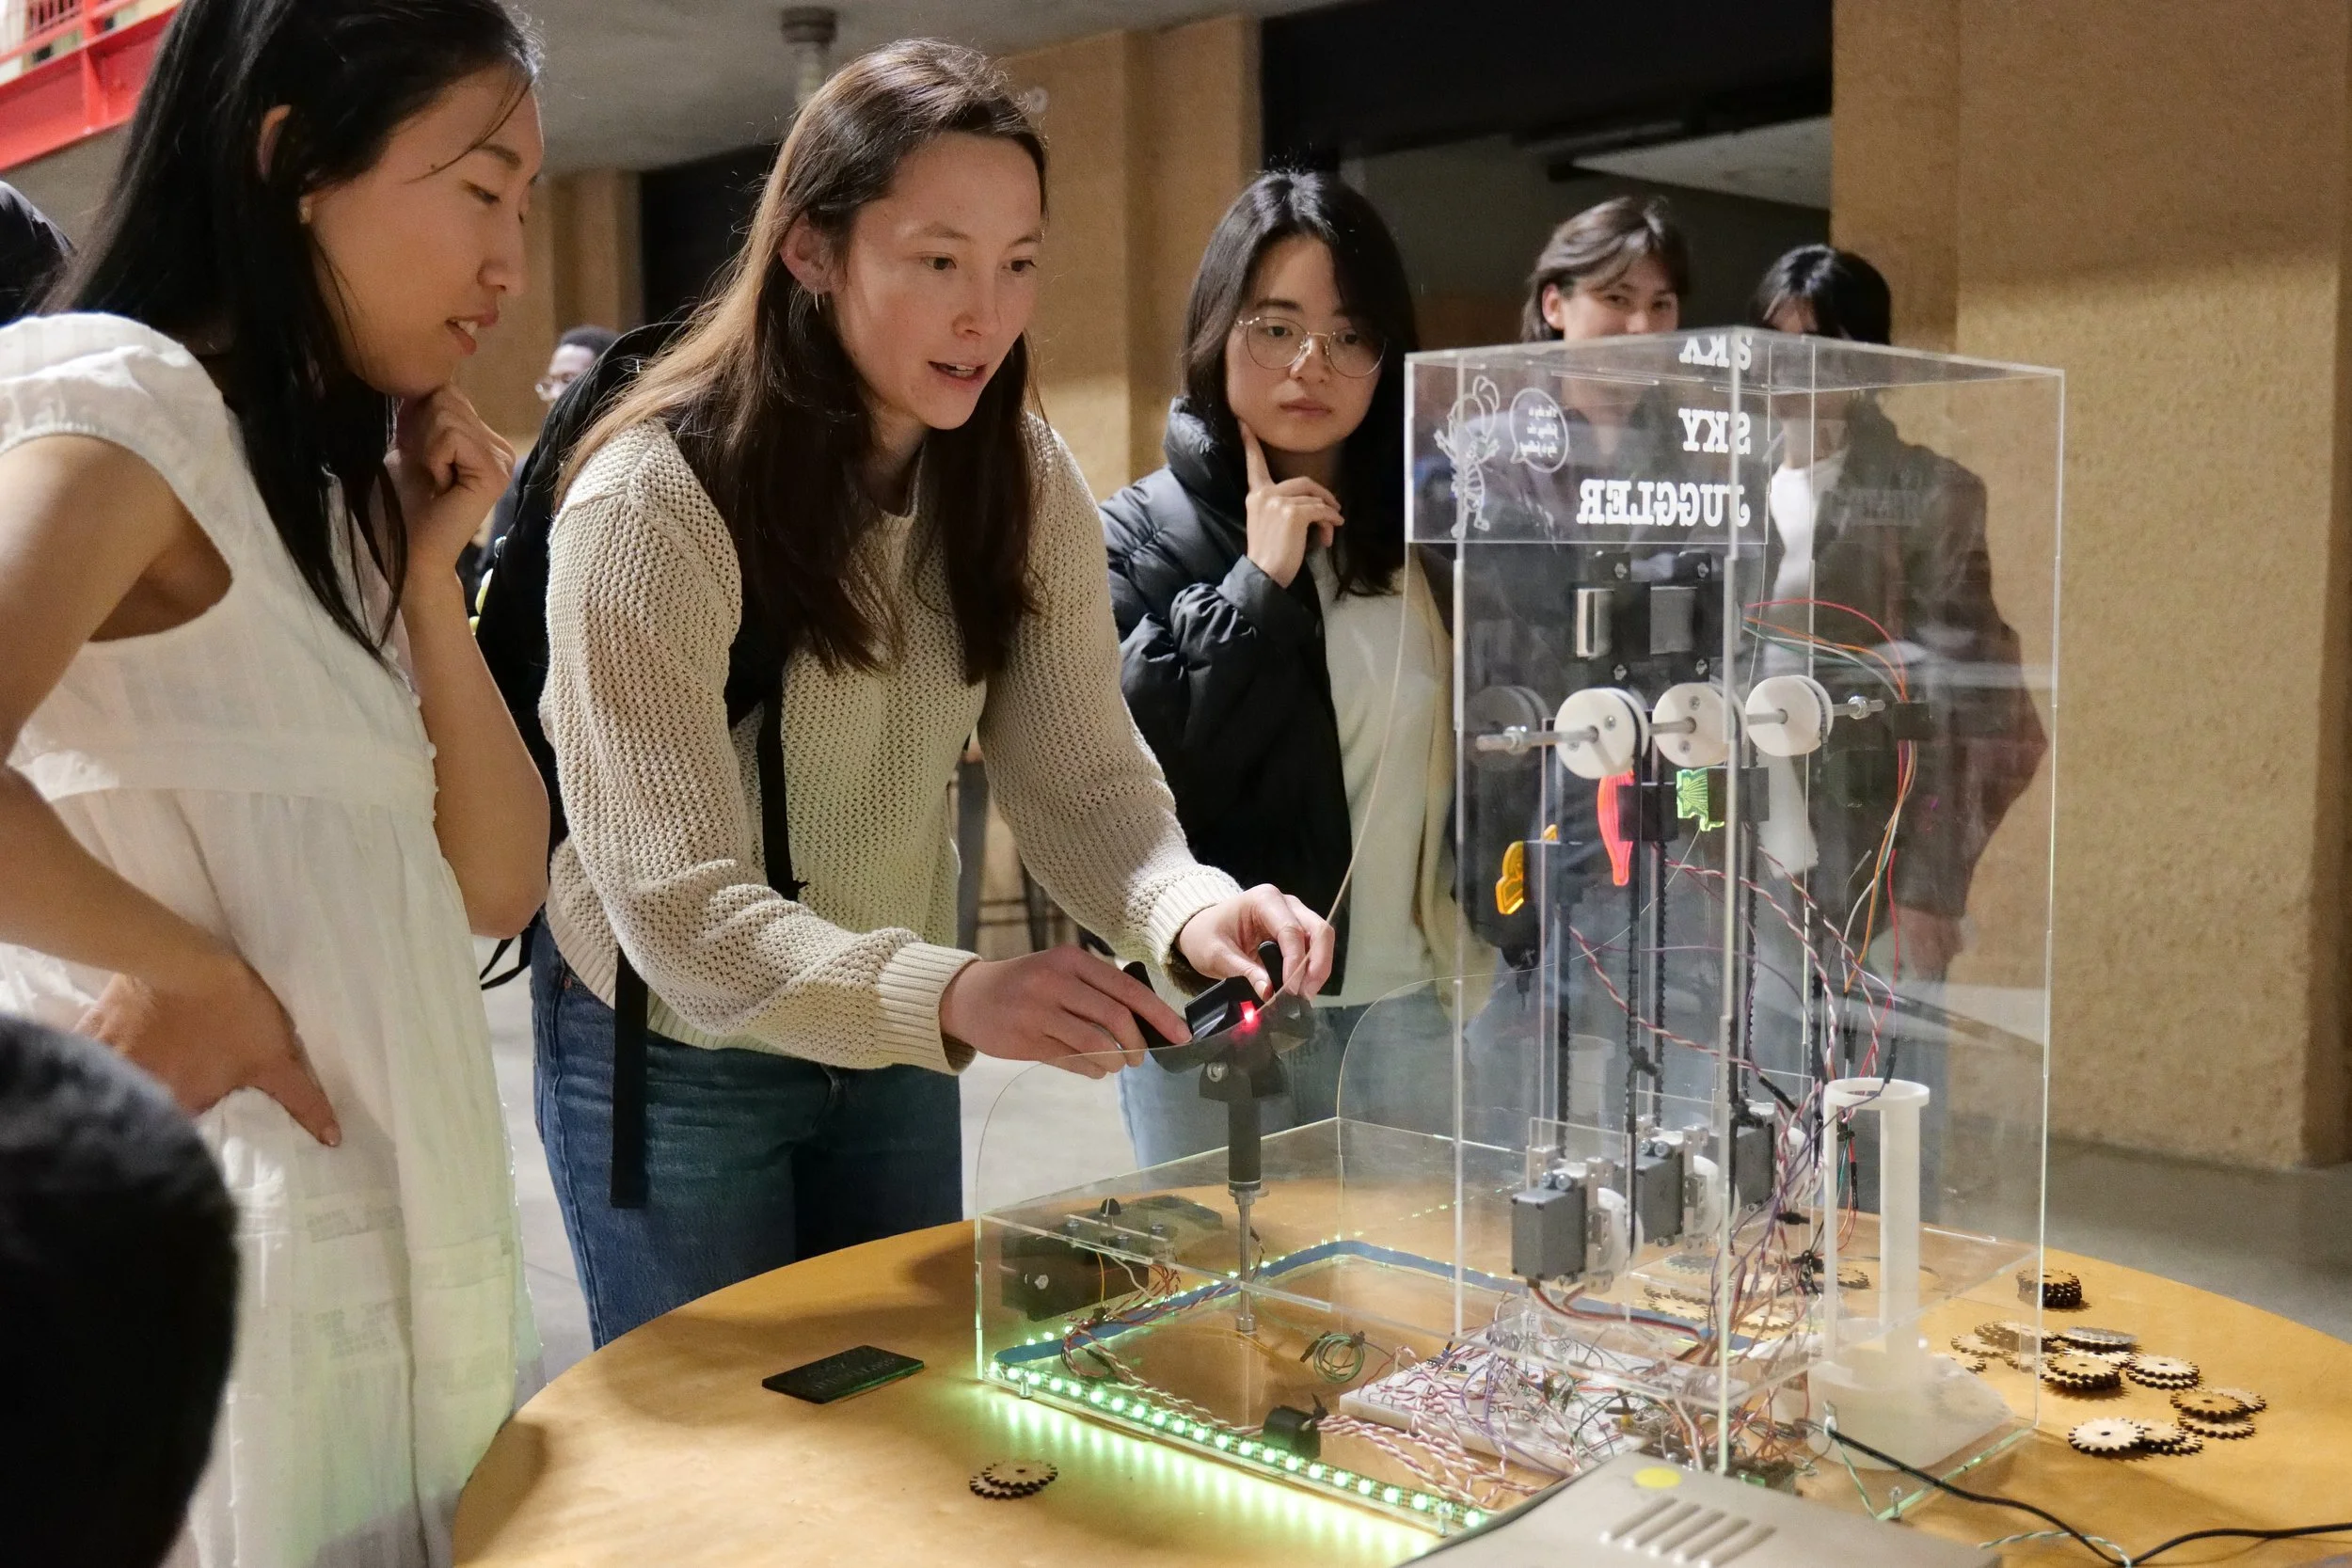
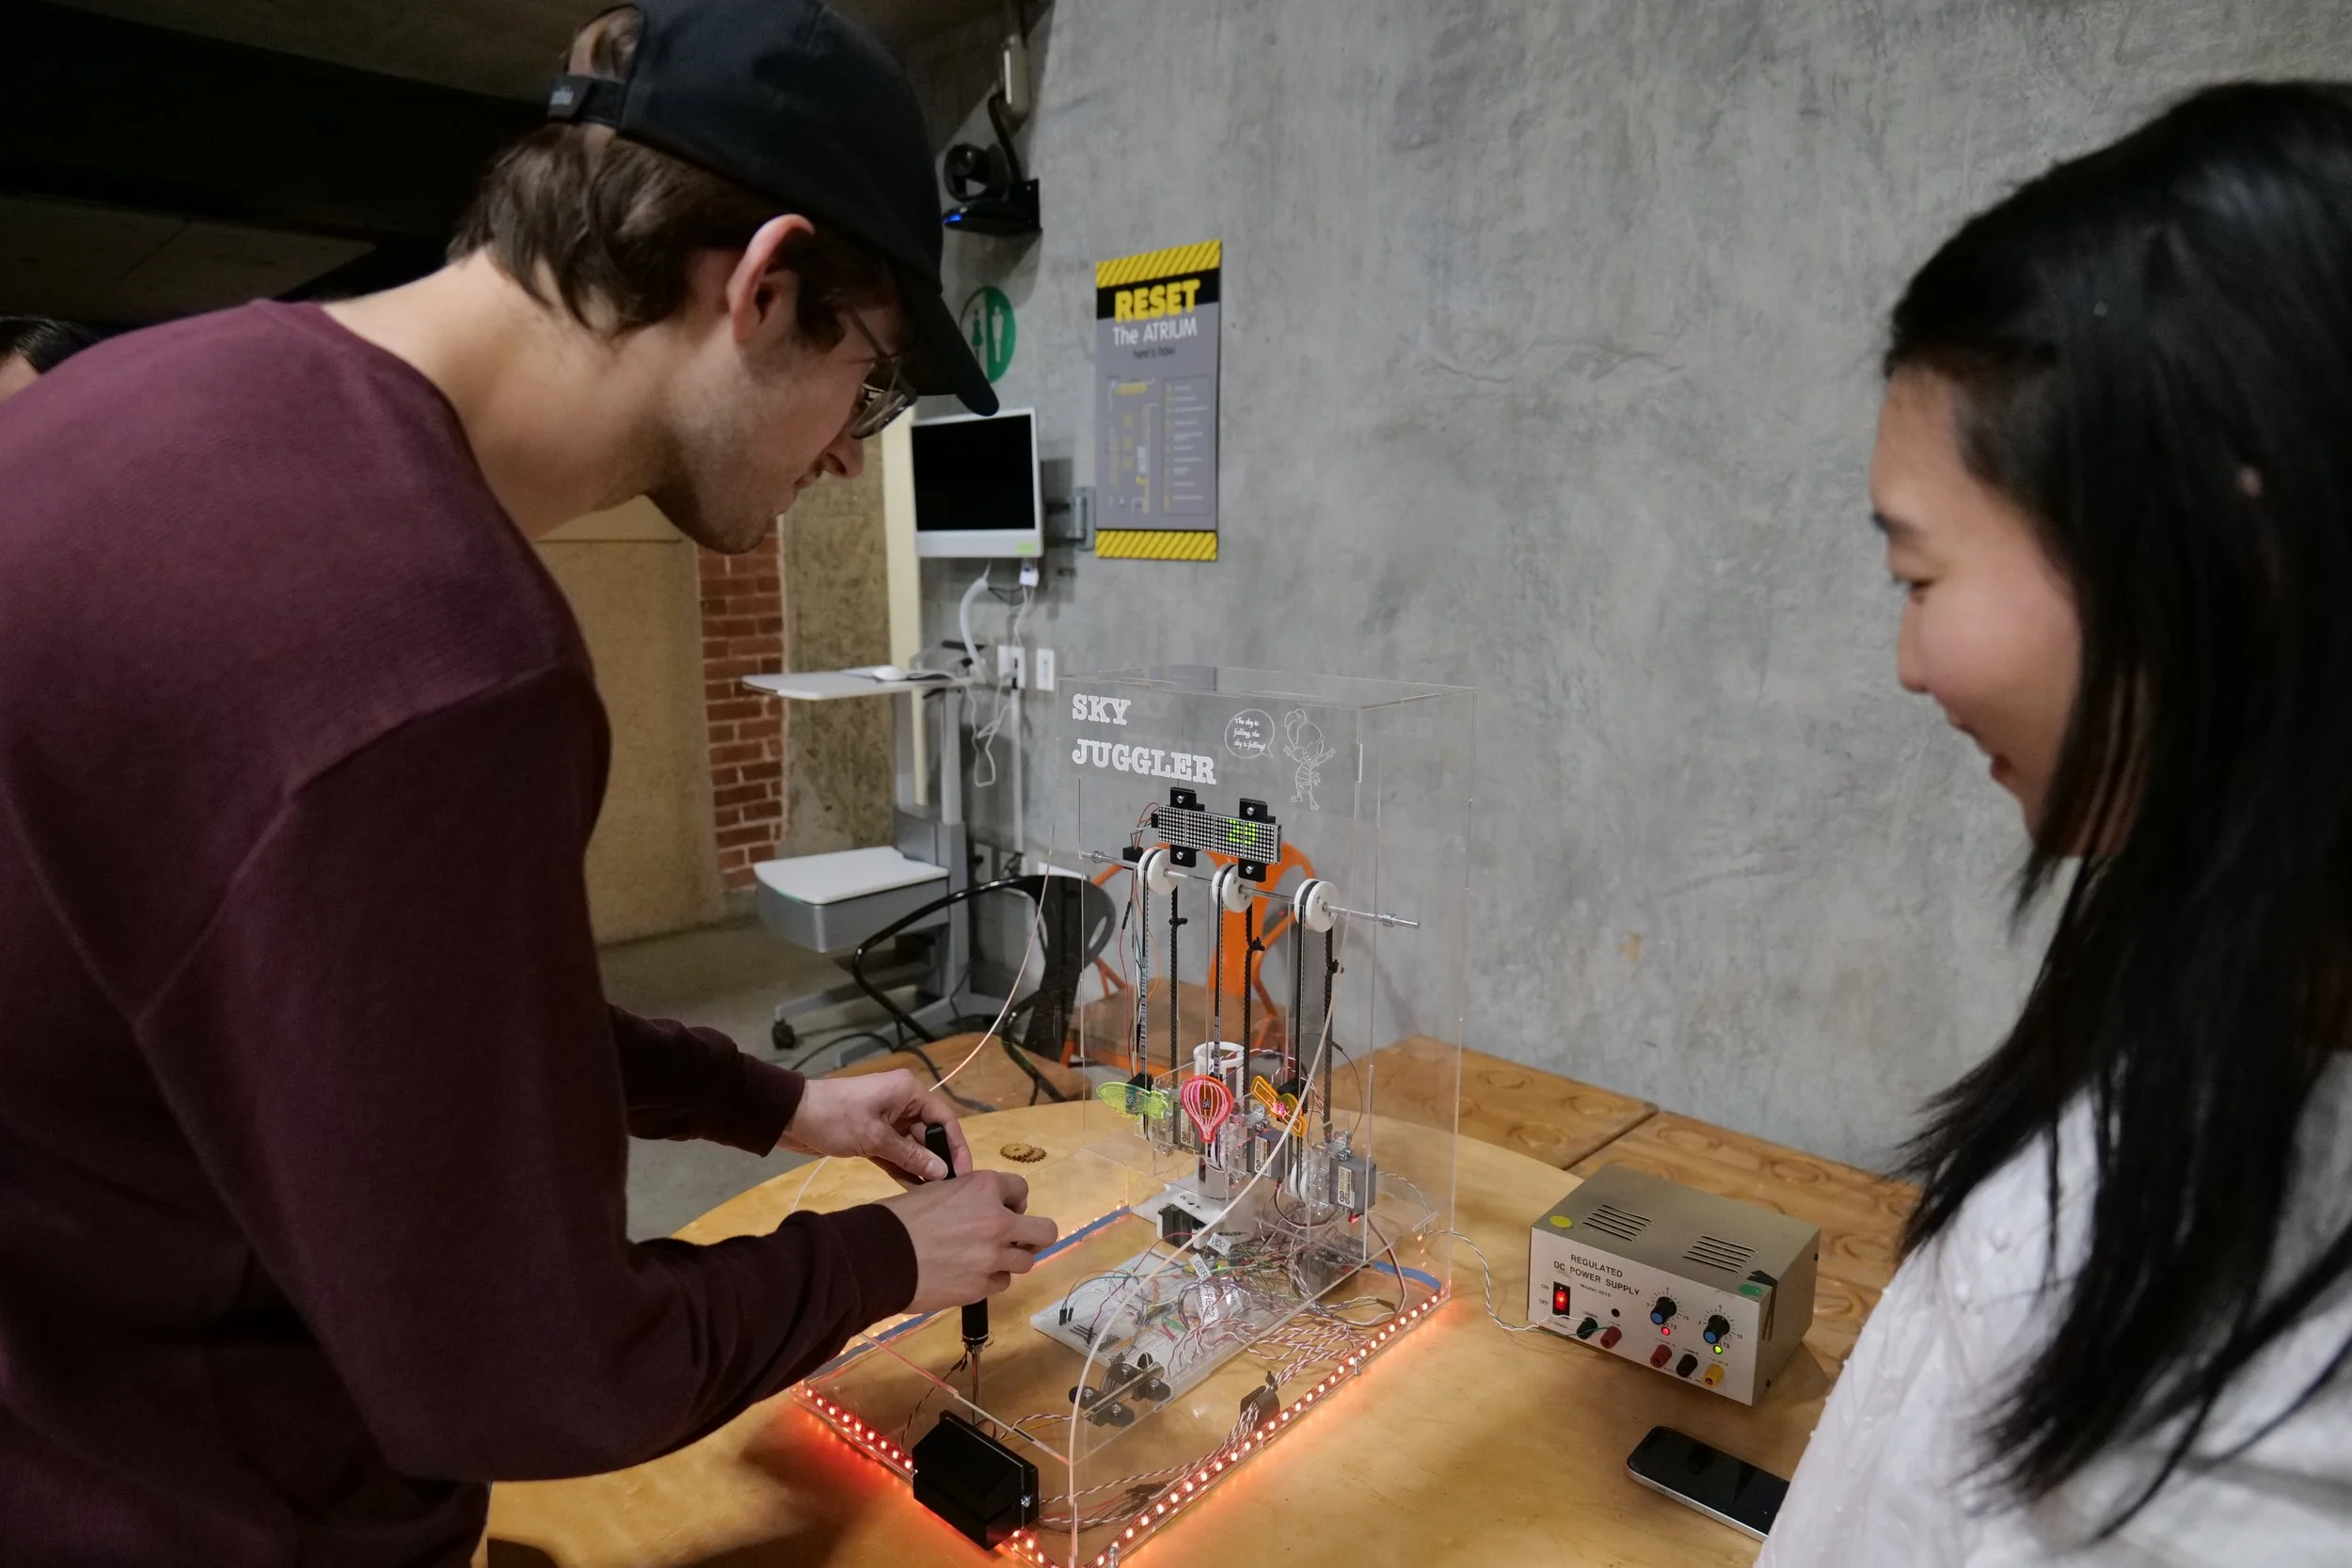
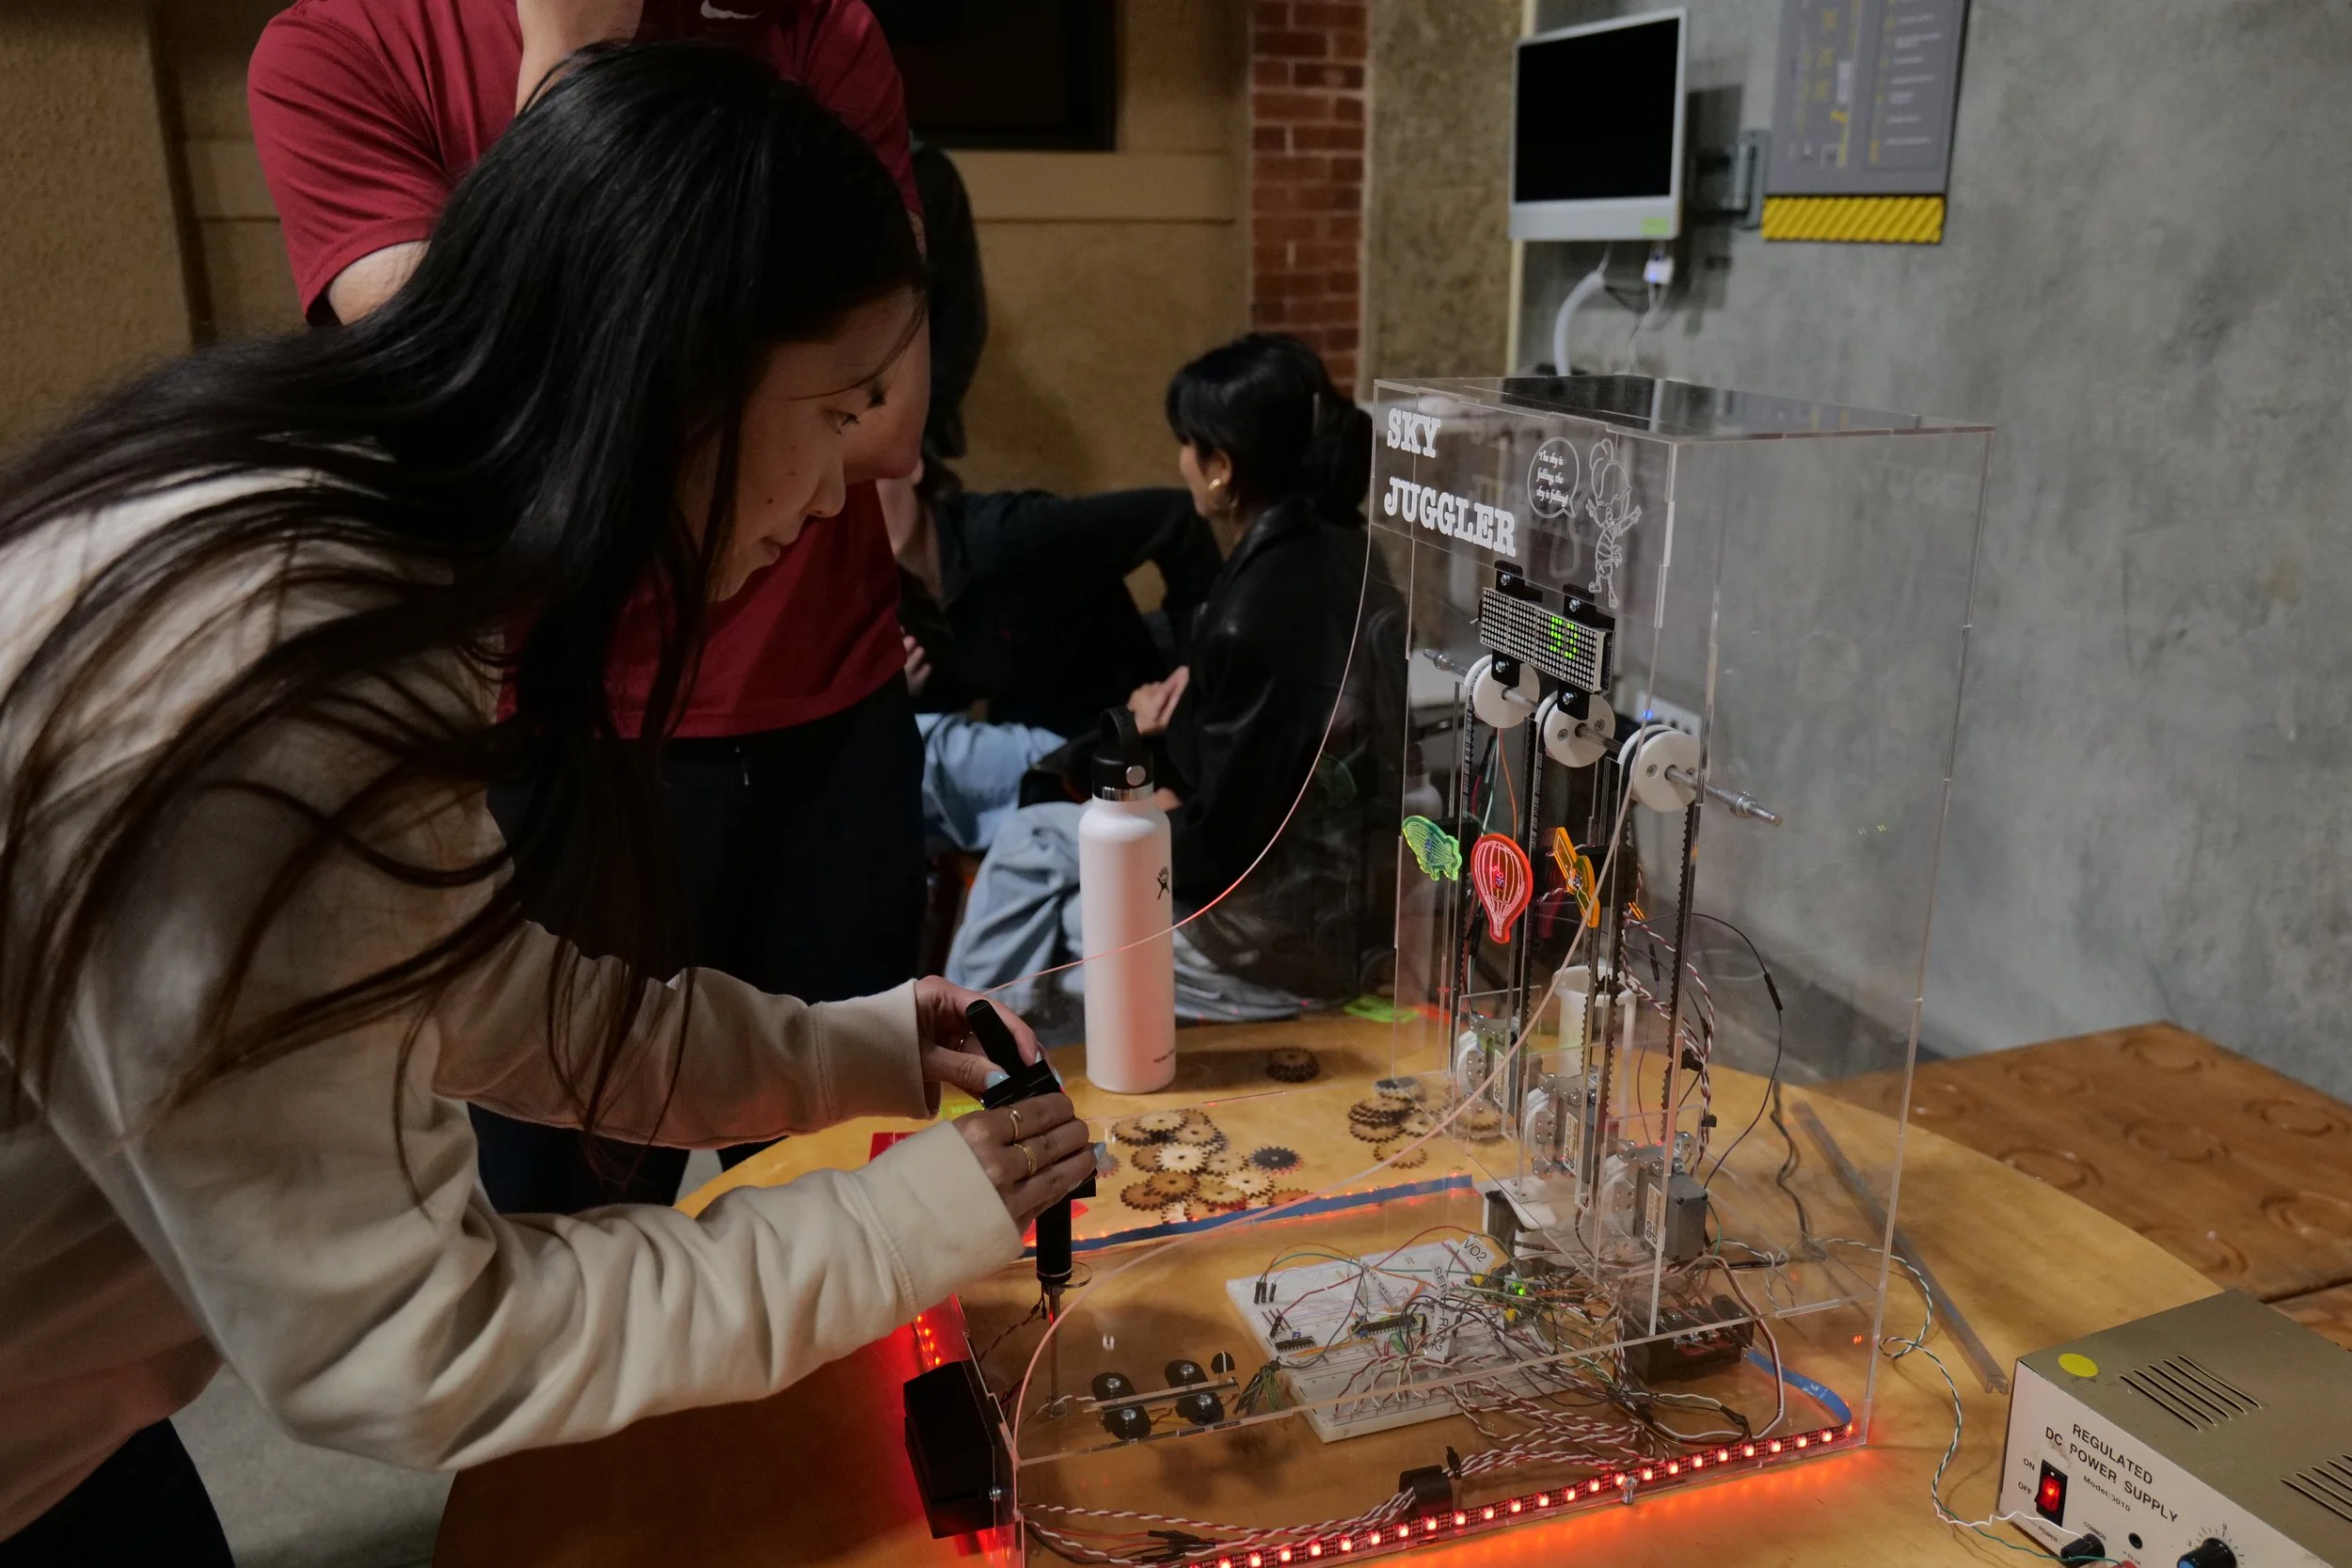
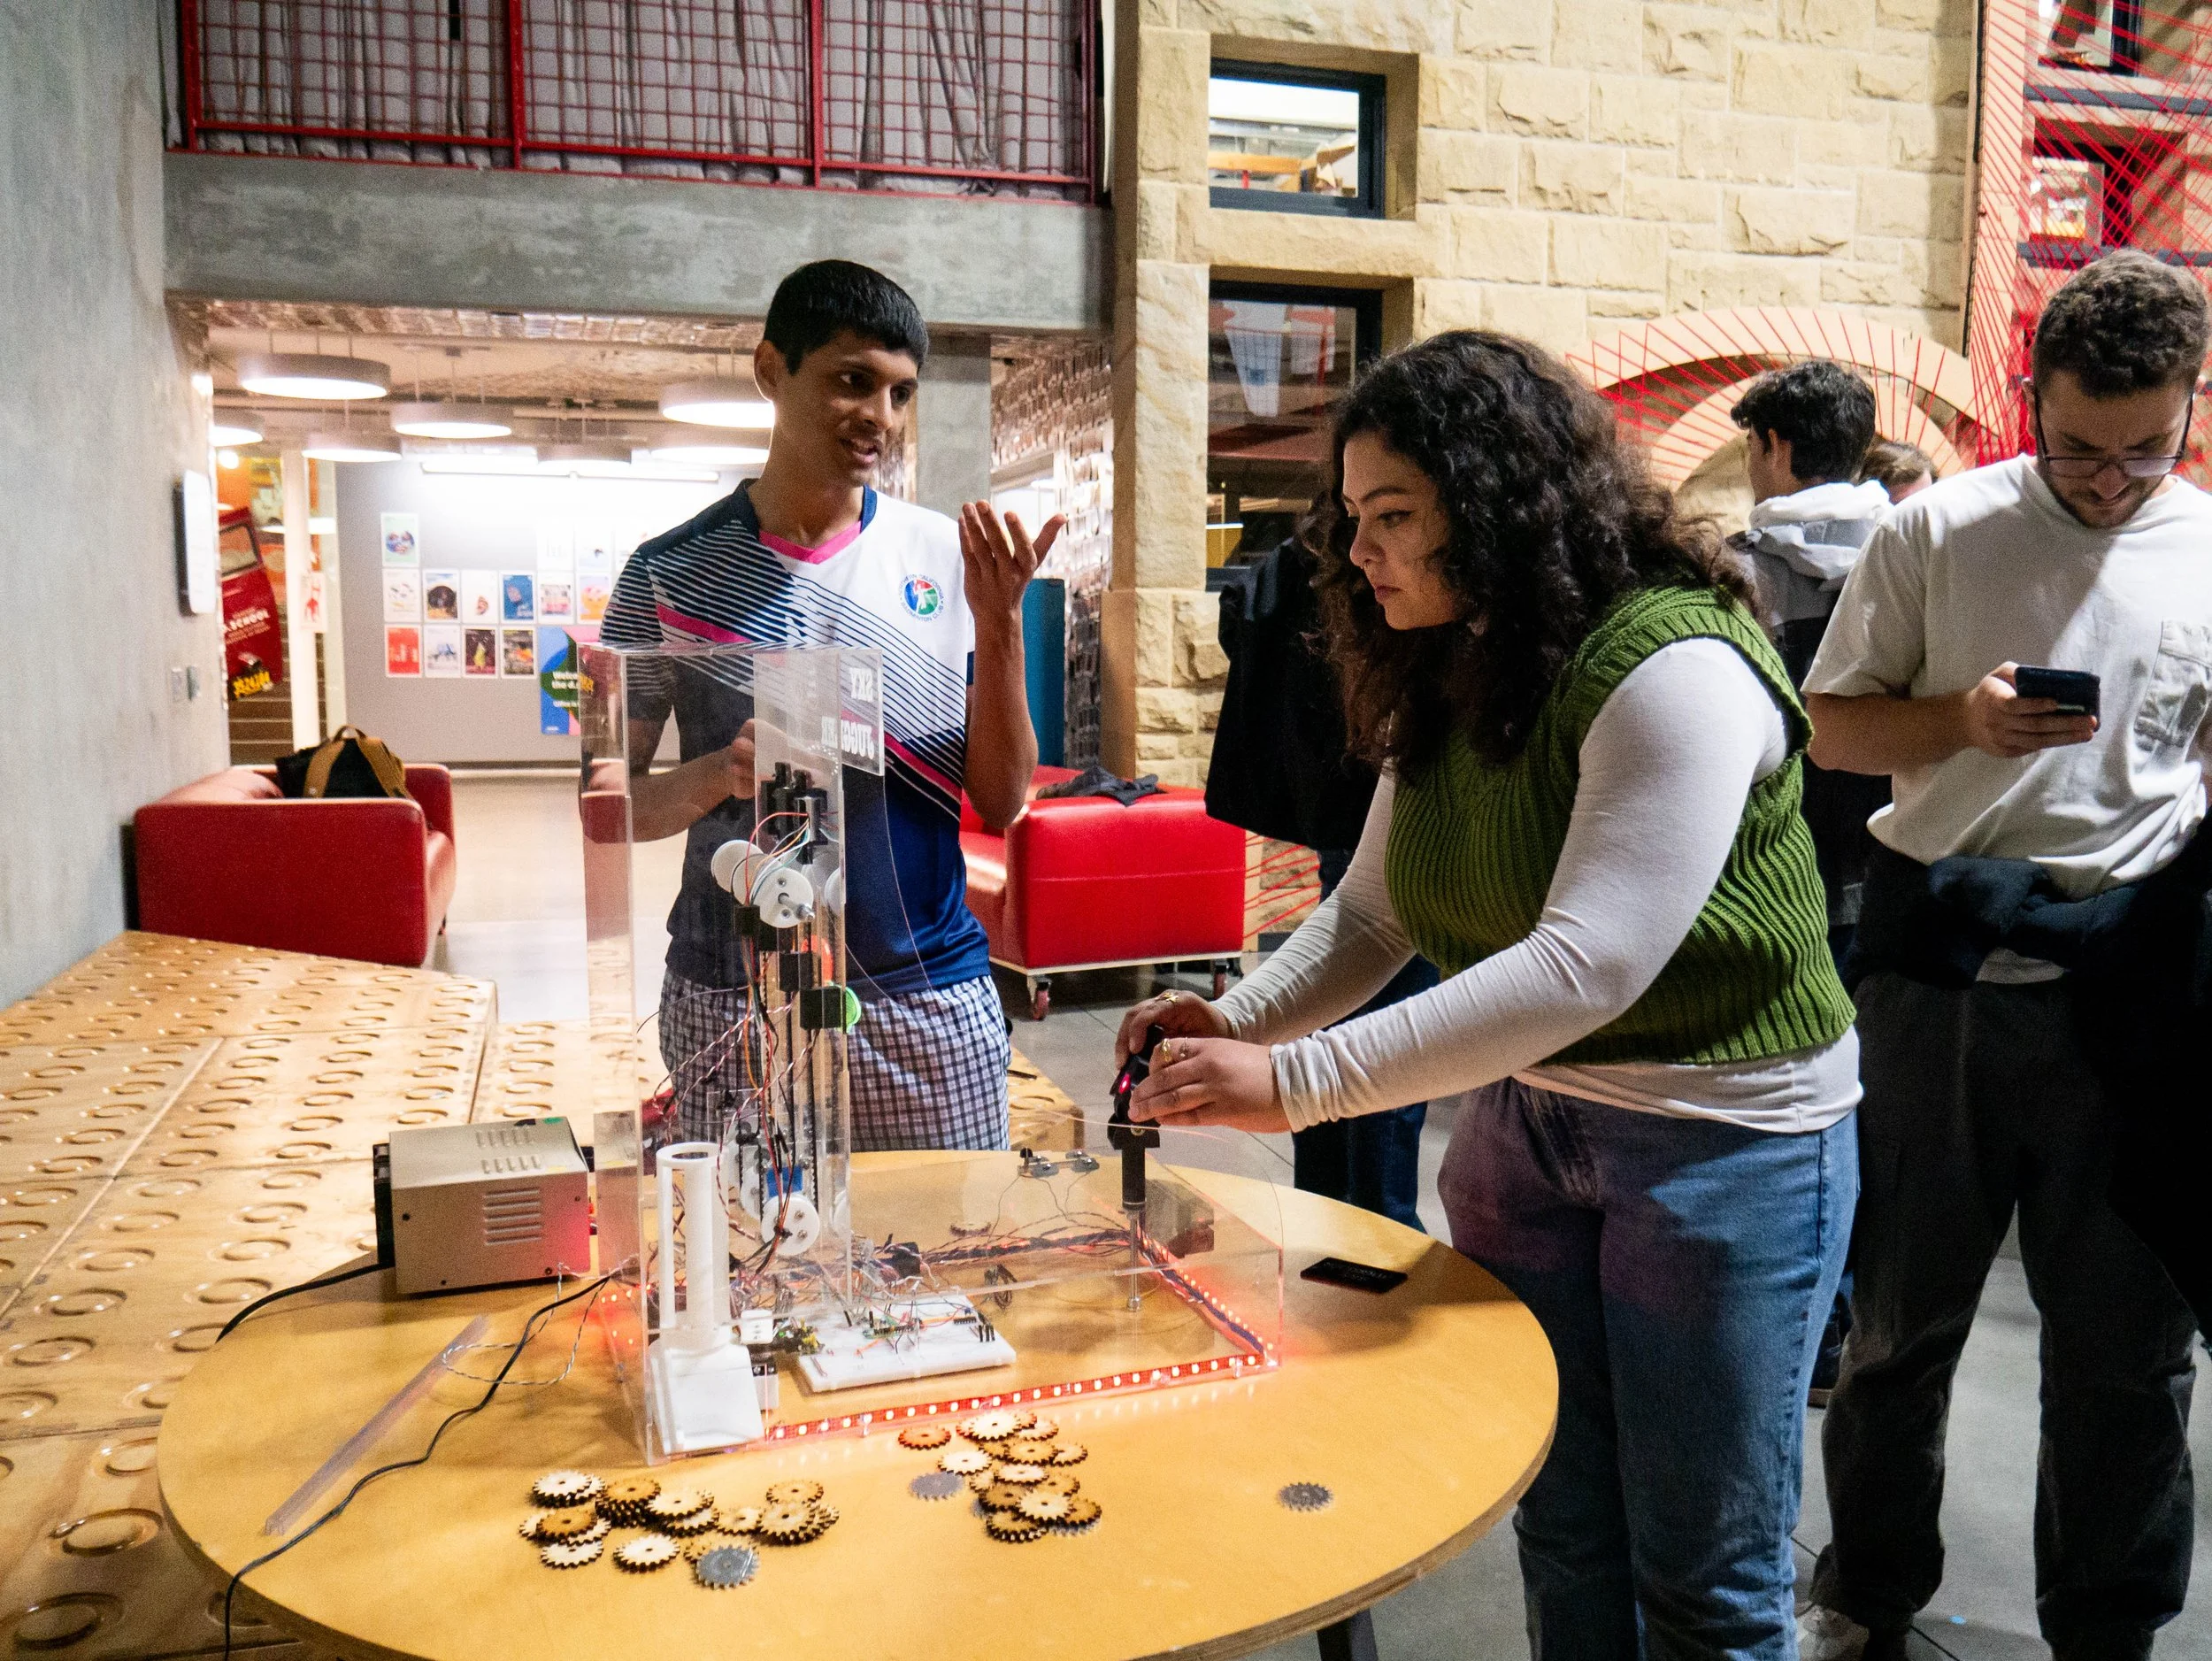
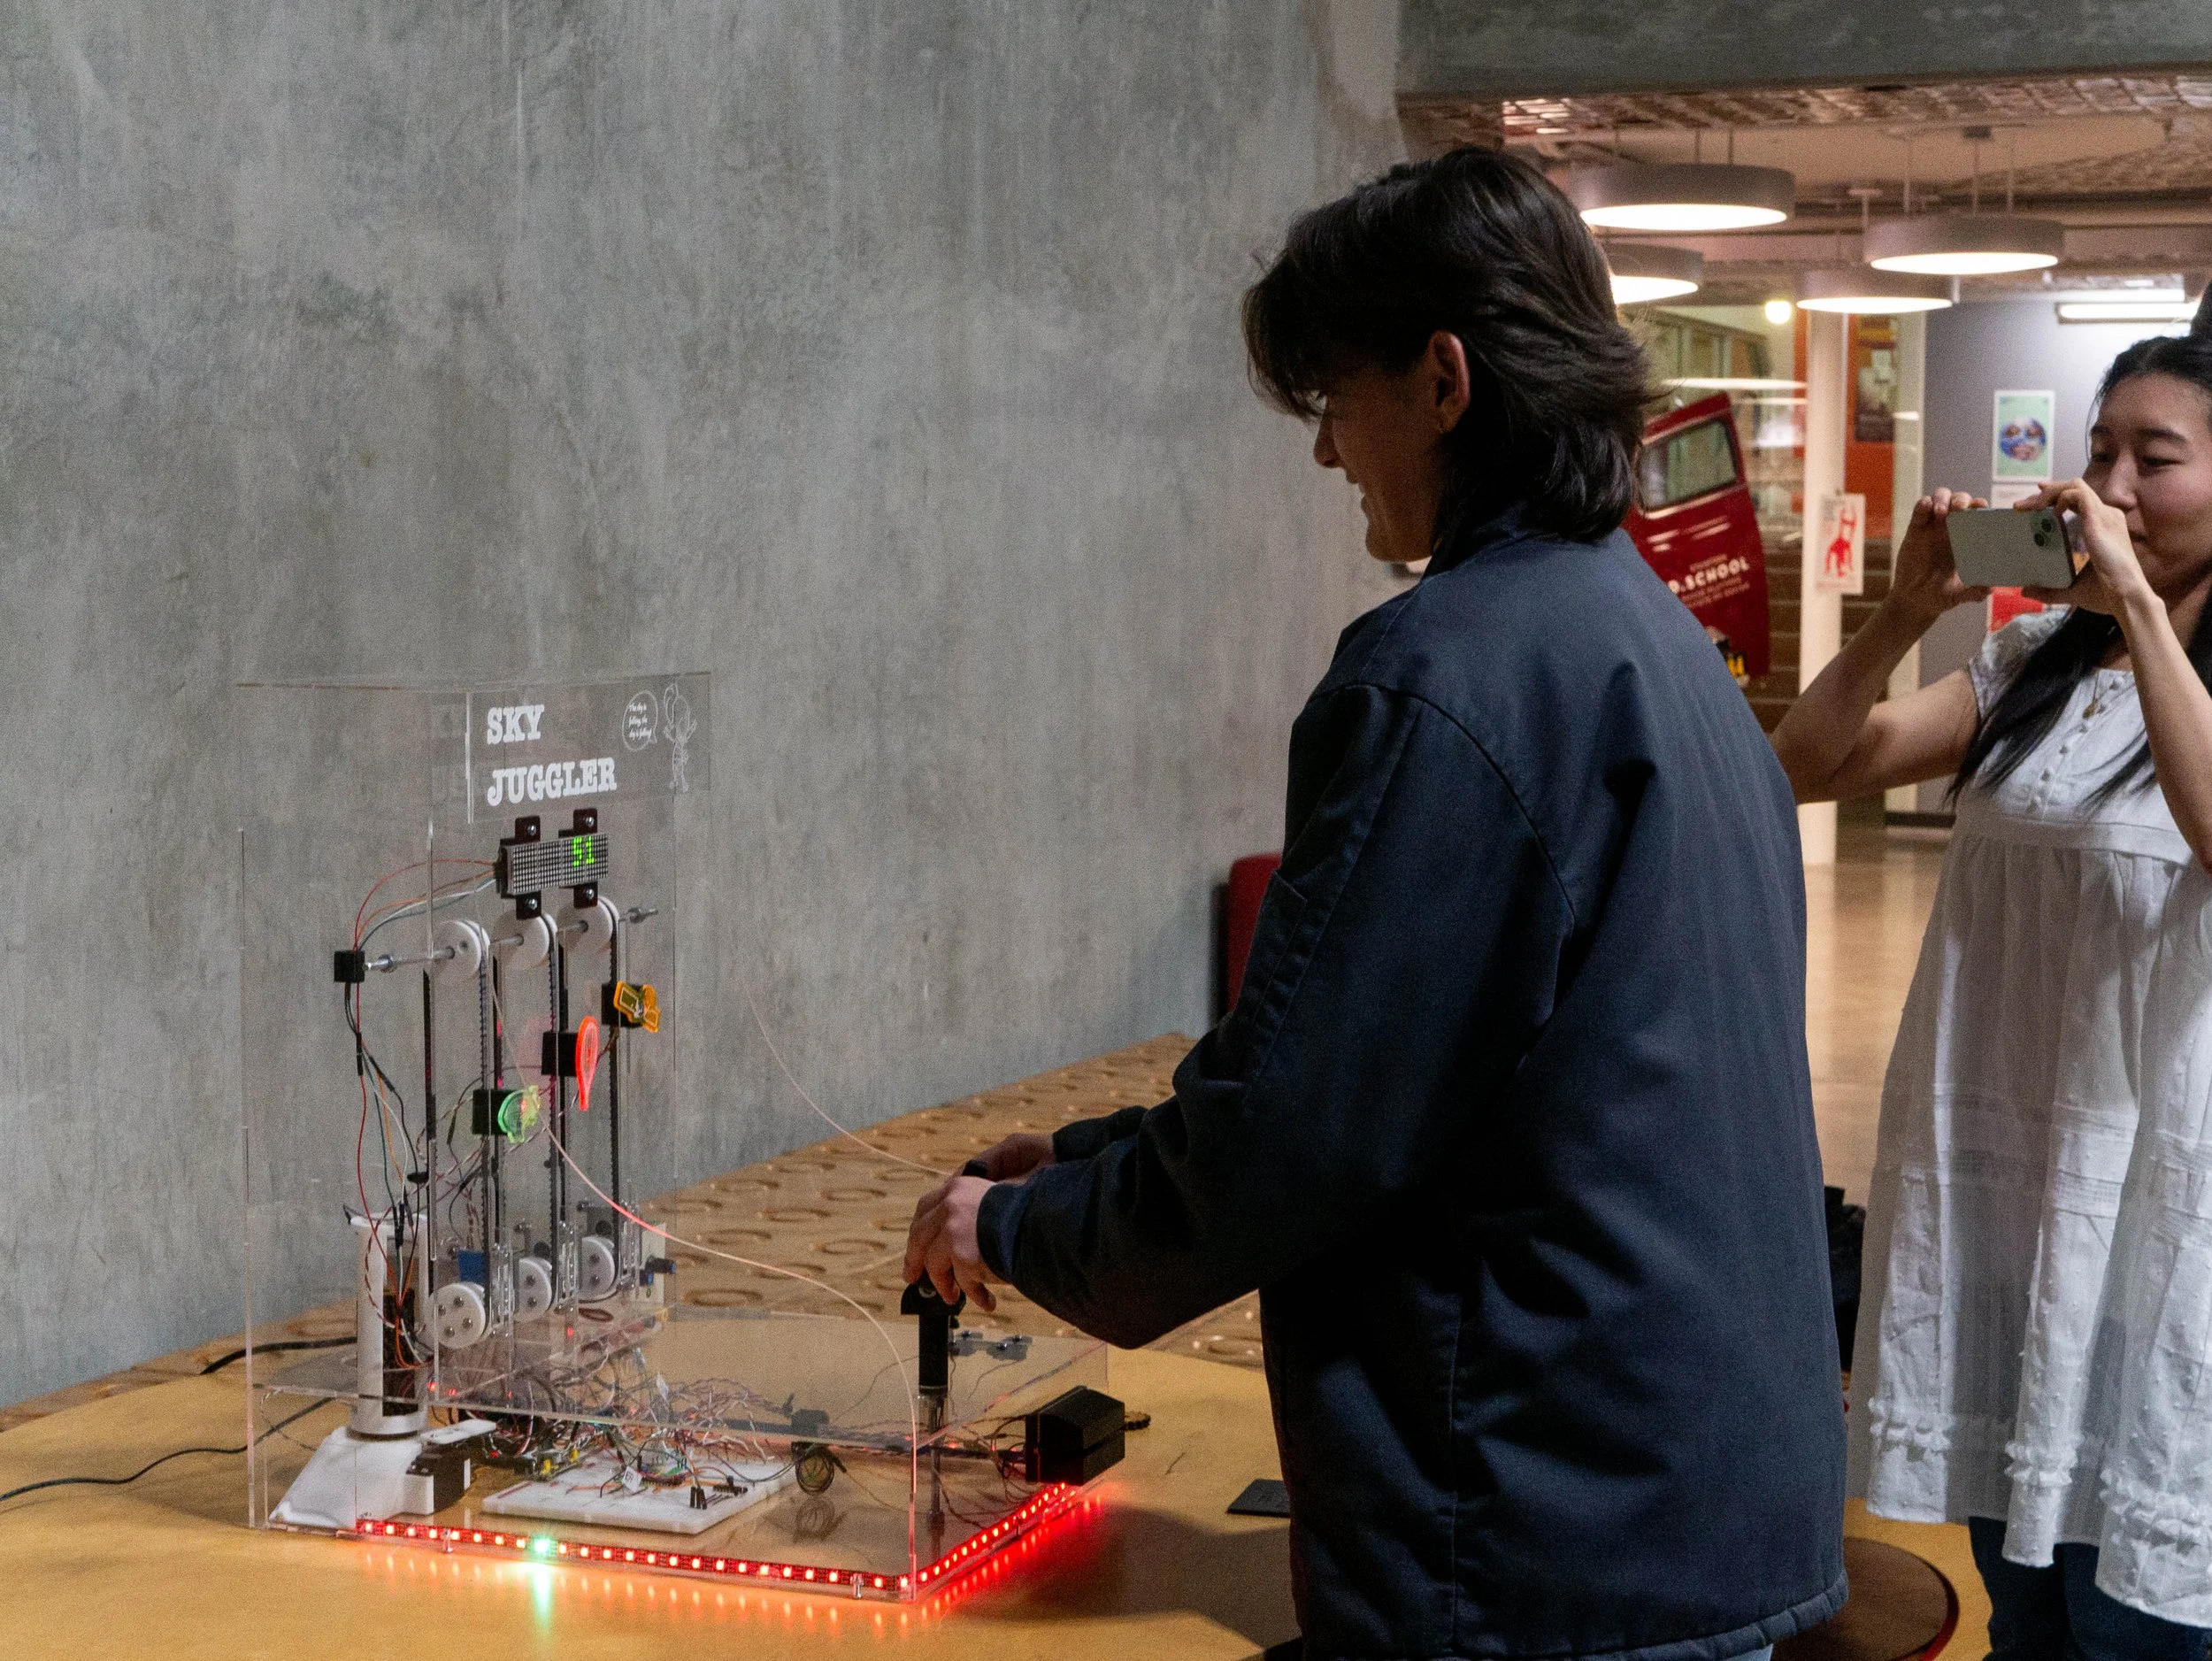
A mechatronics carnival game that challenges users to keep 3 falling aircraft airborne for 60 seconds by aiming at each one with a laser. Final project website found at this link.
Course
ME218A: Smart Product Design Fundamentals
Timeframe
2 weeks [Co-term Fall]
Skills
Event-driven embedded C software for PIC32 microcontroller, electrical circuit design, 3D printing, laser cutting
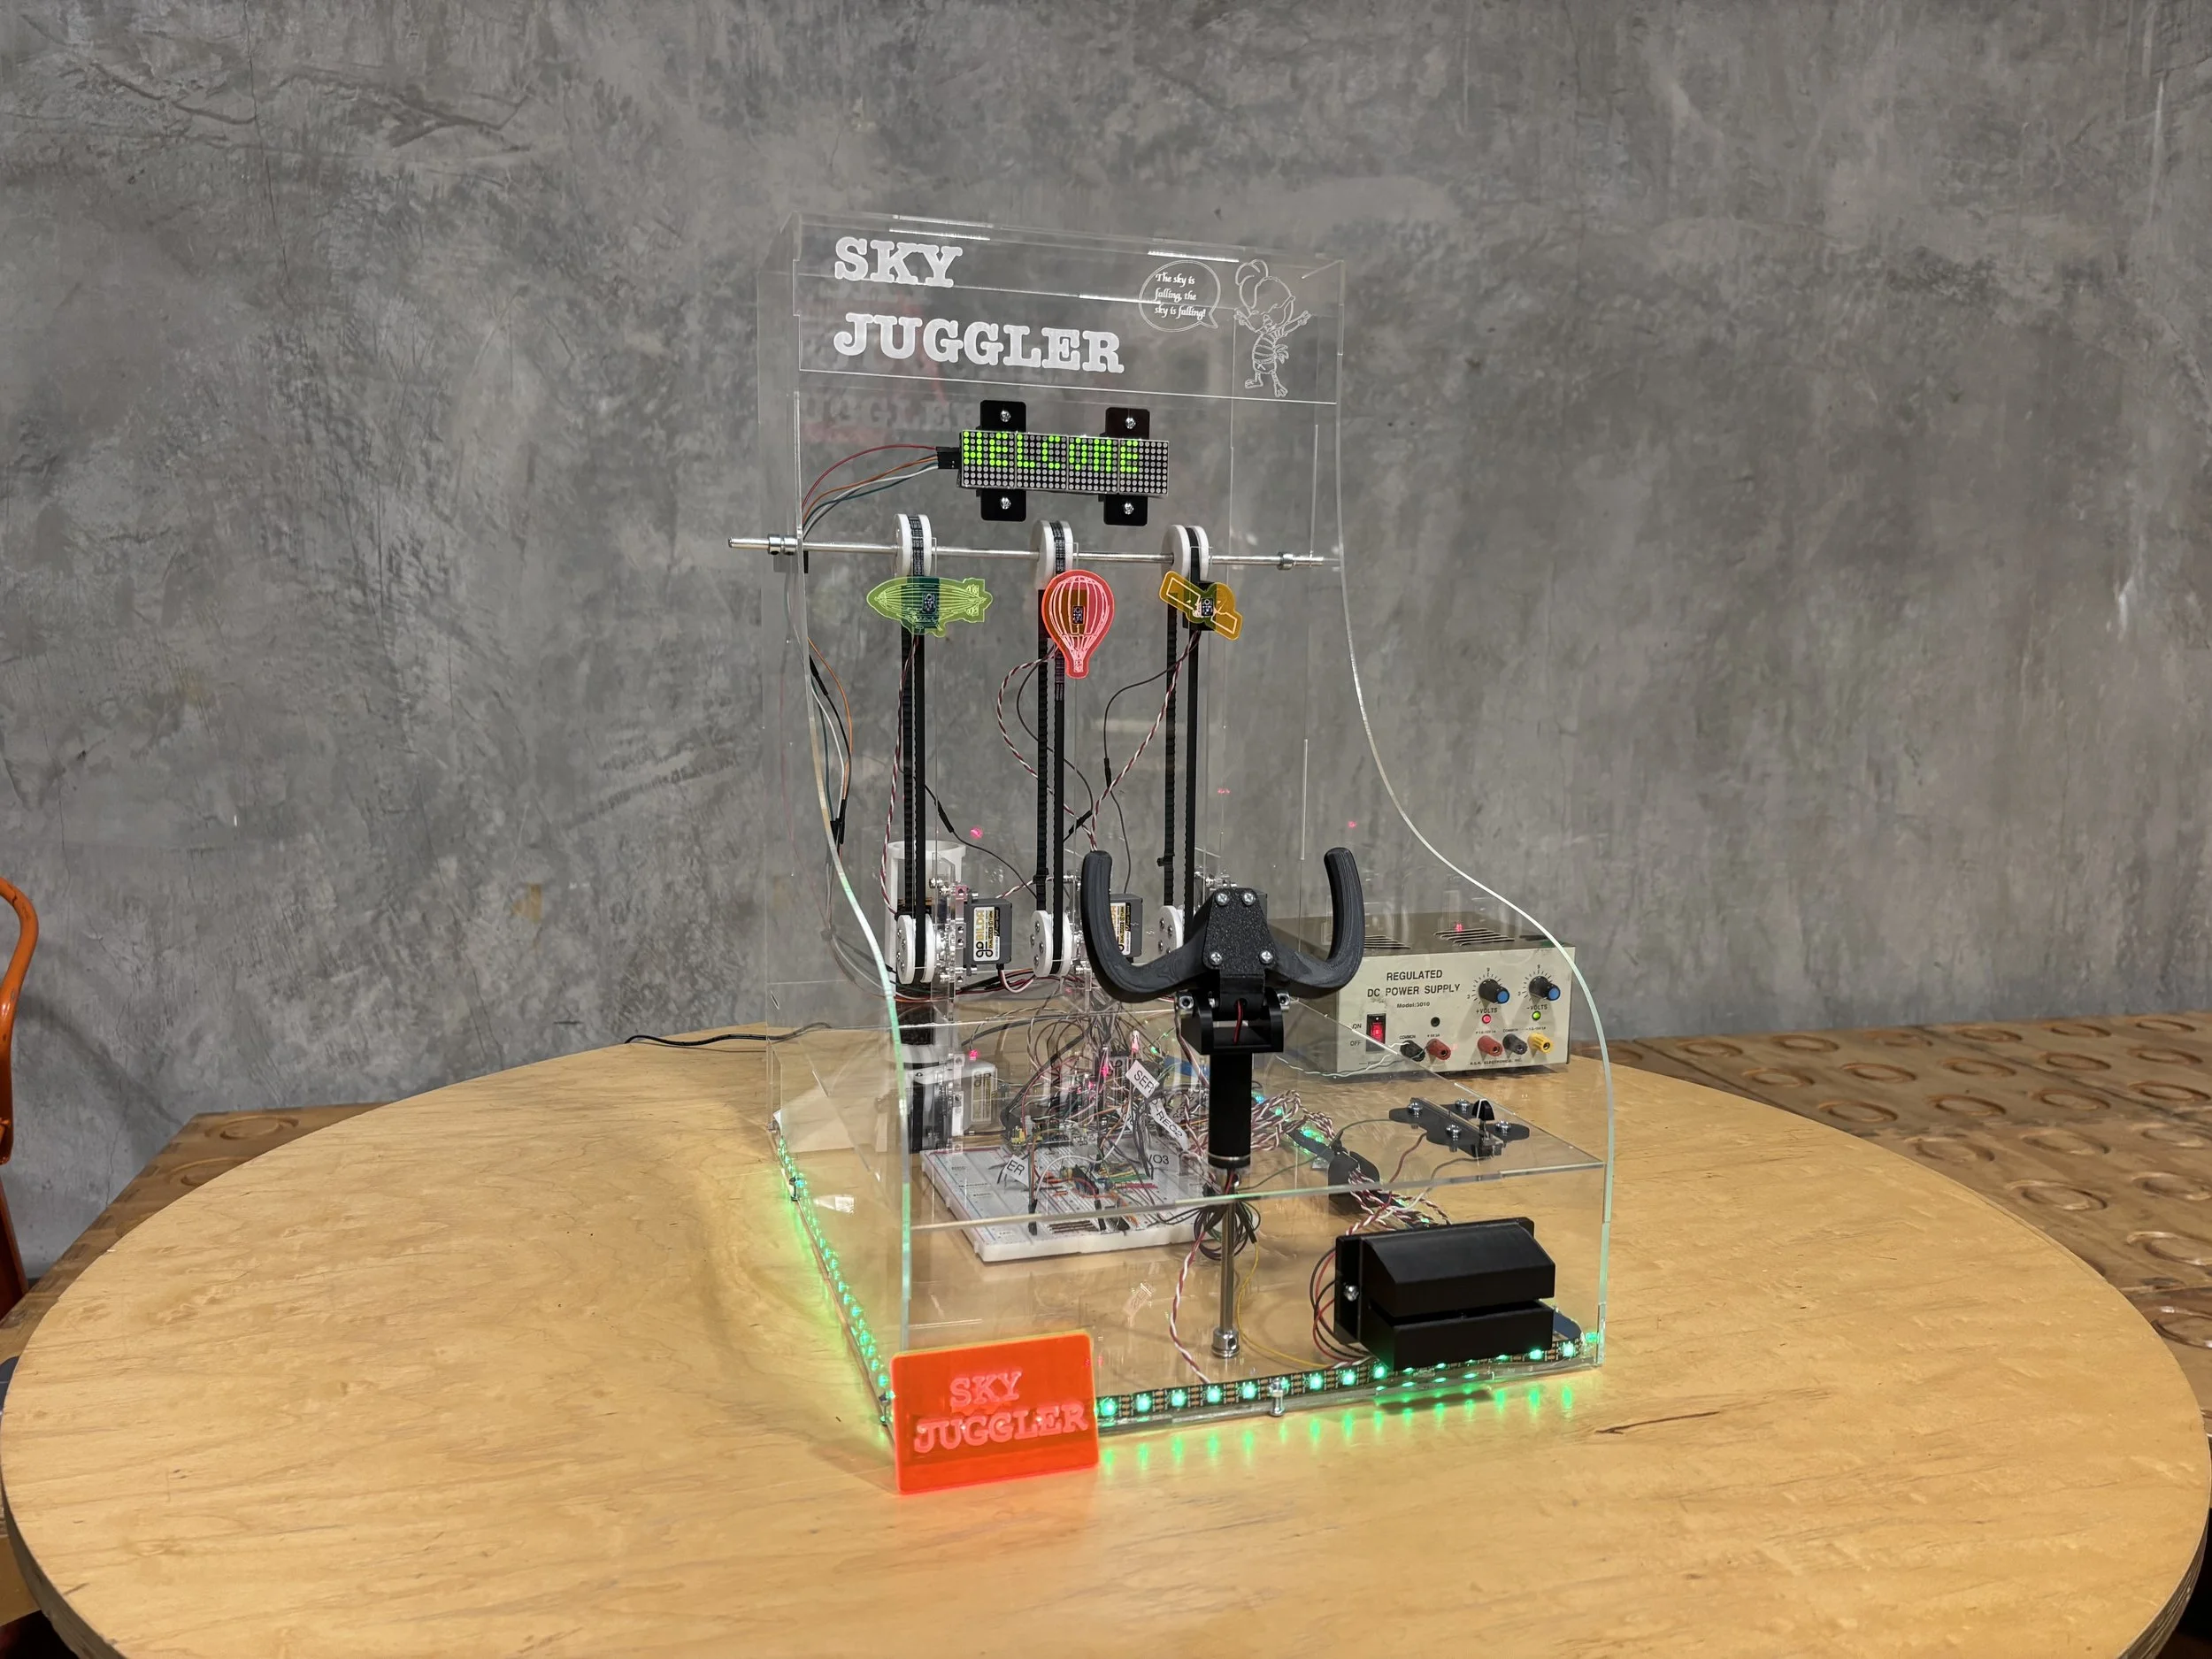
Game Requirements
Power up into a welcoming mode
Time out after 20 seconds of no user interaction
60 seconds of gameplay
Display the passage of time
Hold 50 gears, dispense 1-3 when gameplay is complete
3 distinct user interactions
At least one form of non-sensing contact (IR, audio, etc)
At least one analog input (IR, joystick, potentiometer, etc)
3 distinct modes of feedback
At least one electromechanical actuation (servo motor, fan, vibration, etc)
Inputs
Sliding Potentiometer - Adjusts difficulty (falling speed)
IR Beam Break Sensor - Card swipe triggers start of game
Photocell - Direct laser hit triggers aircraft ascent
Outputs
Aircraft Servo Motors - Direction and speed dependent on laser hit and difficulty
Gear Dispensing Servo Motor - Dispenses two gears
LED Display - Difficulty, countdown, and score
Neopixels - Colors change when difficulty adjusted
Instructions
Adjust difficulty using sliding potentiometer
Swipe card to start game
Point laser at photocell centered on each aircraft to raise it
There's a danger line—for every second that an aircraft stays above it, you get a point
If an aircraft crashes in under 60 seconds, you lose and restart
If all 3 aircraft stay airborne for 60s, you win and receive a score!
Either way, you get two prize gears for effort :)
Game Demo
Winning
Losing
Laser Diode (Player Laser)
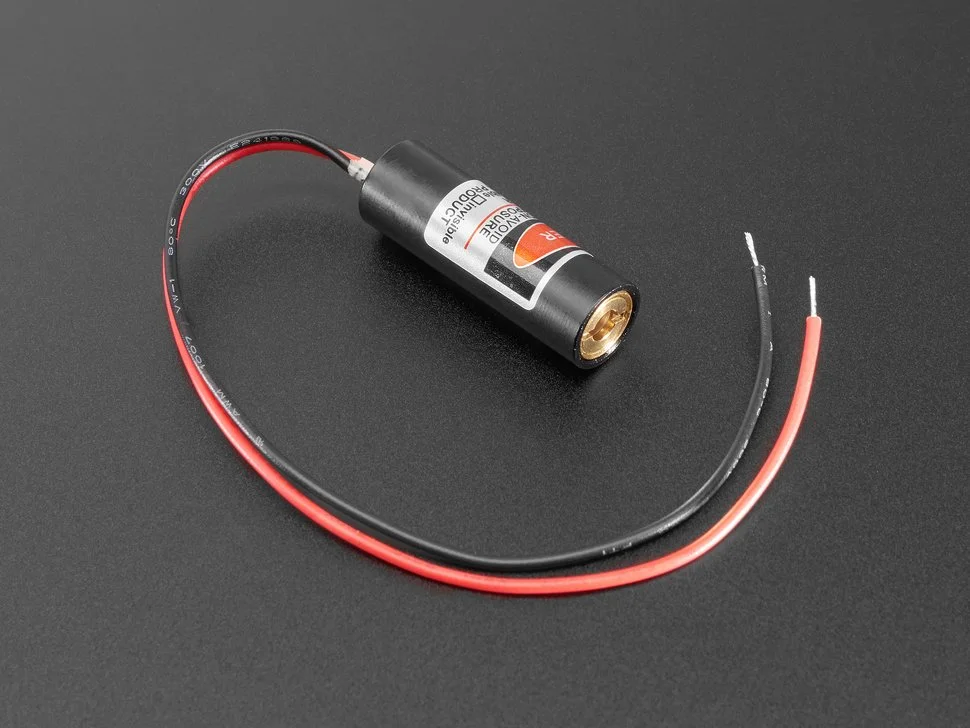
The laser diode module is a 5 mW, 650 nm red laser used to create a narrow, visible beam for precisely indicating the target location in the game. It operates from a 2.8 V–5.2 V DC supply and draws approximately 25 mA, making it compatible with standard low-voltage rails in the system. The module’s compact cylindrical housing allows it to be rigidly mounted so the beam remains aligned with the target. The laser diode provided a stable visual aiming reference for players. When the beam is directed onto an Adafruit light sensor breakout (phototransistor-based), it causes a measurable change in the sensor’s output voltage, which is read by the PIC32 to detect when a target object is successfully aimed at or “hit.”
Analog Light Sensor (Laser Detector)
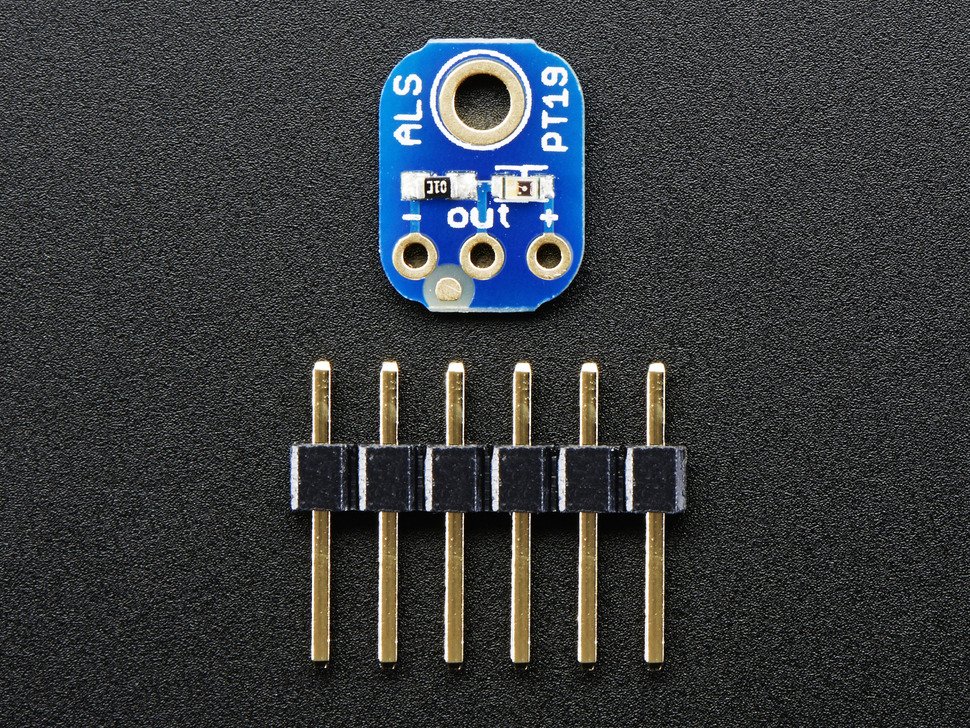
The analog light sensor breakout consists of a phototransistor that outputs a voltage proportional to the intensity of incident light. Each of the three sensors was mounted at the center of the target objects in the game, allowing it to detect illumination from the laser diode. The sensor operates from a 3.3 V–5 V supply, with a common ground shared with the microcontroller, and produces an analog voltage that varies with light intensity. The PIC32 reads the detected voltage changes when the laser diode beam strikes the target.
Mechanical
Full Assembly
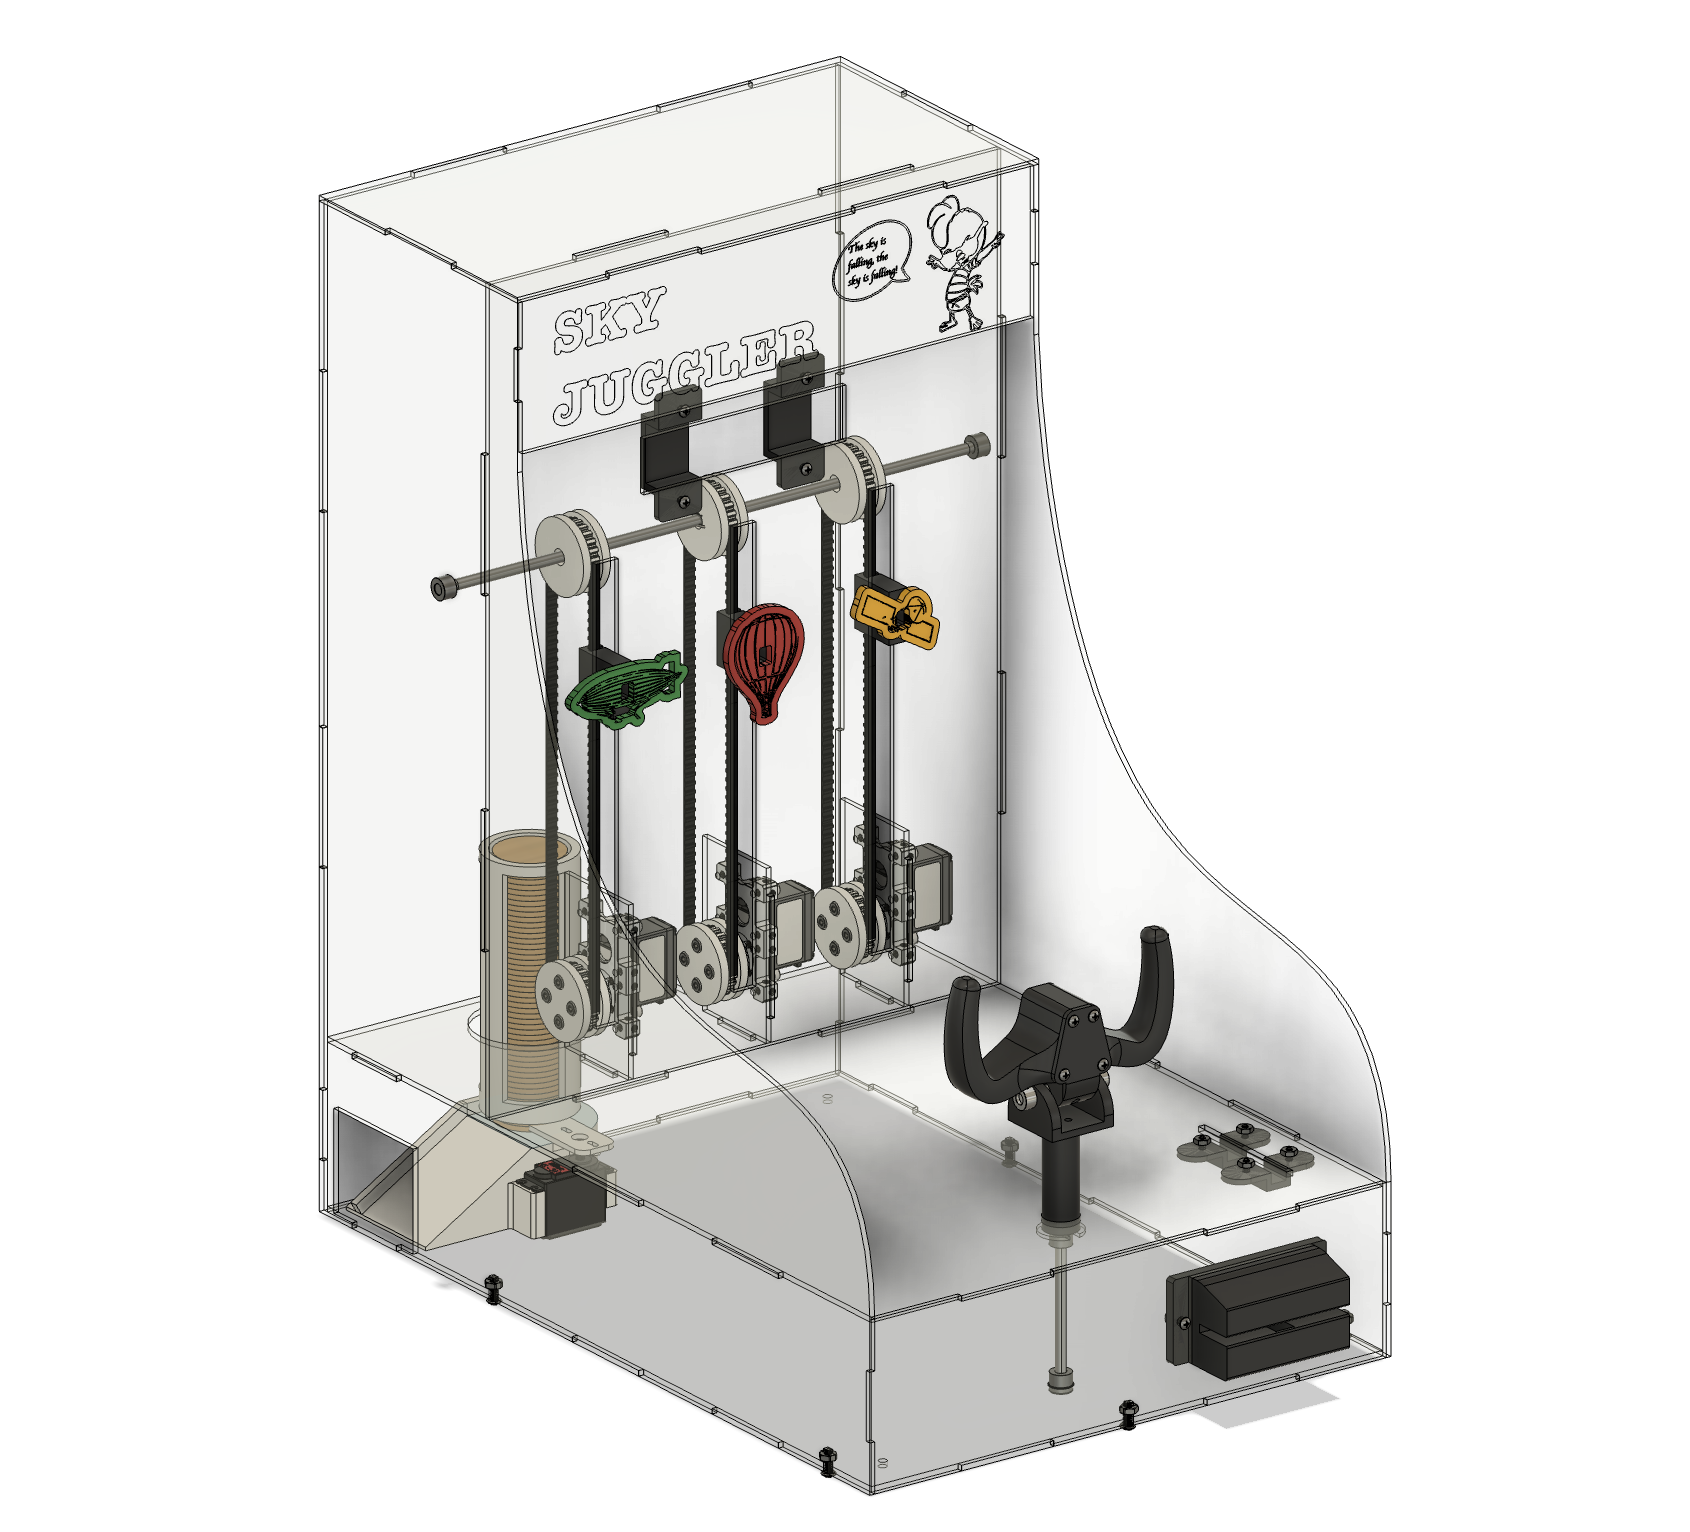
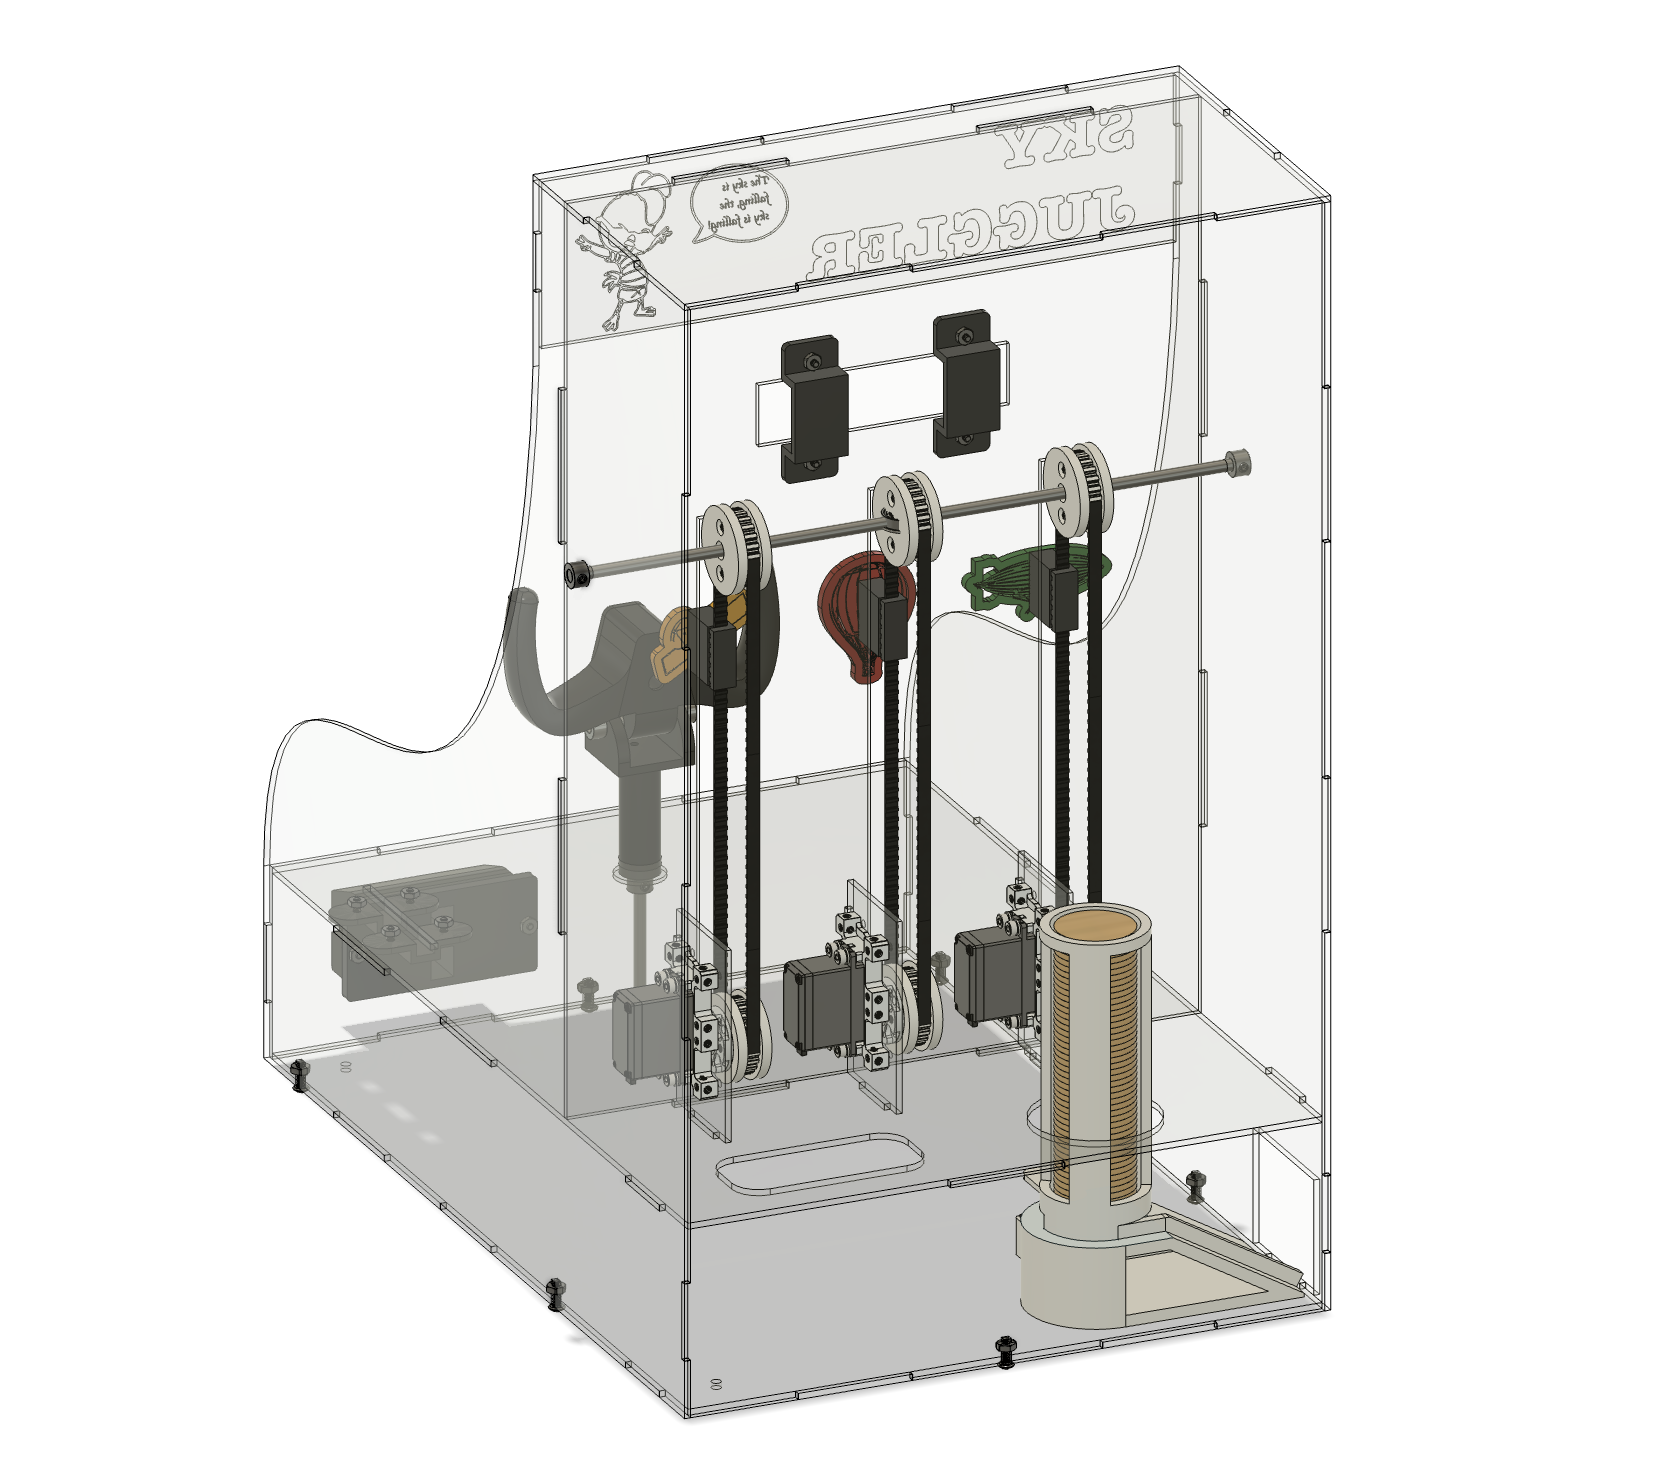
The full assembly was designed in Fusion 360. The frame was made out of 0.125" clear laser-cut acrylic, held together by 8-32 x ½" screws and a 0.015" interference between the teeth for a slight press fit.
Pulley Sub-System
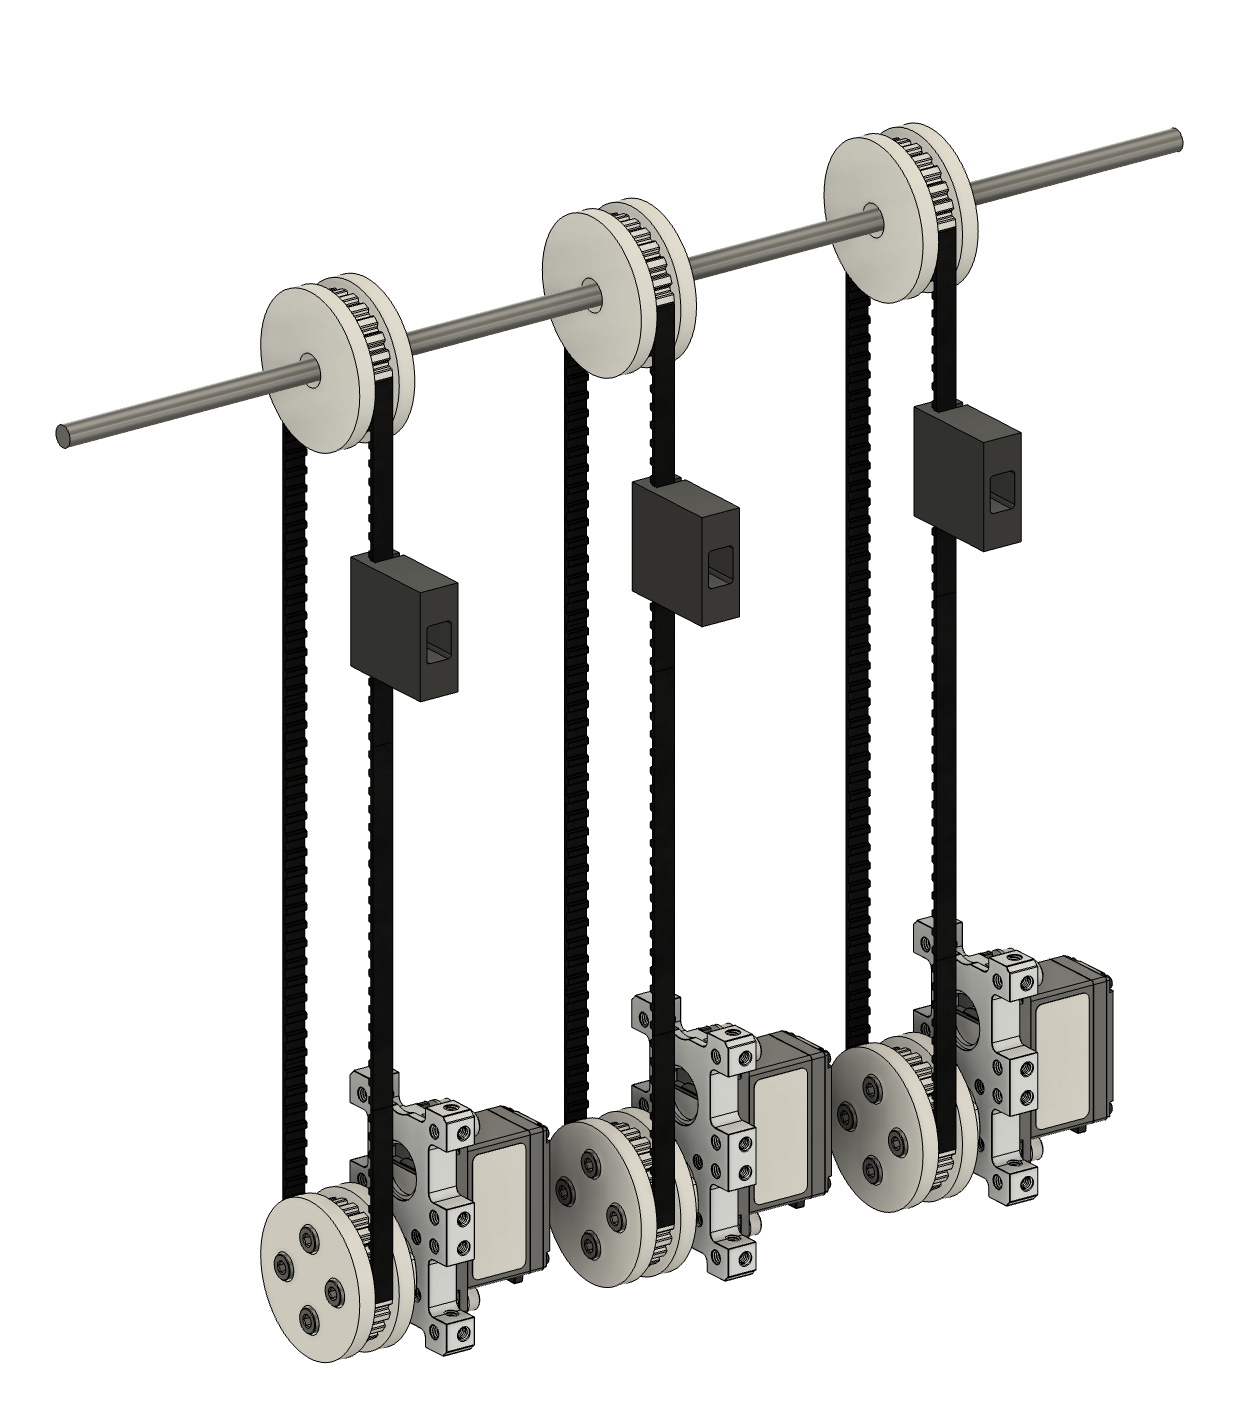
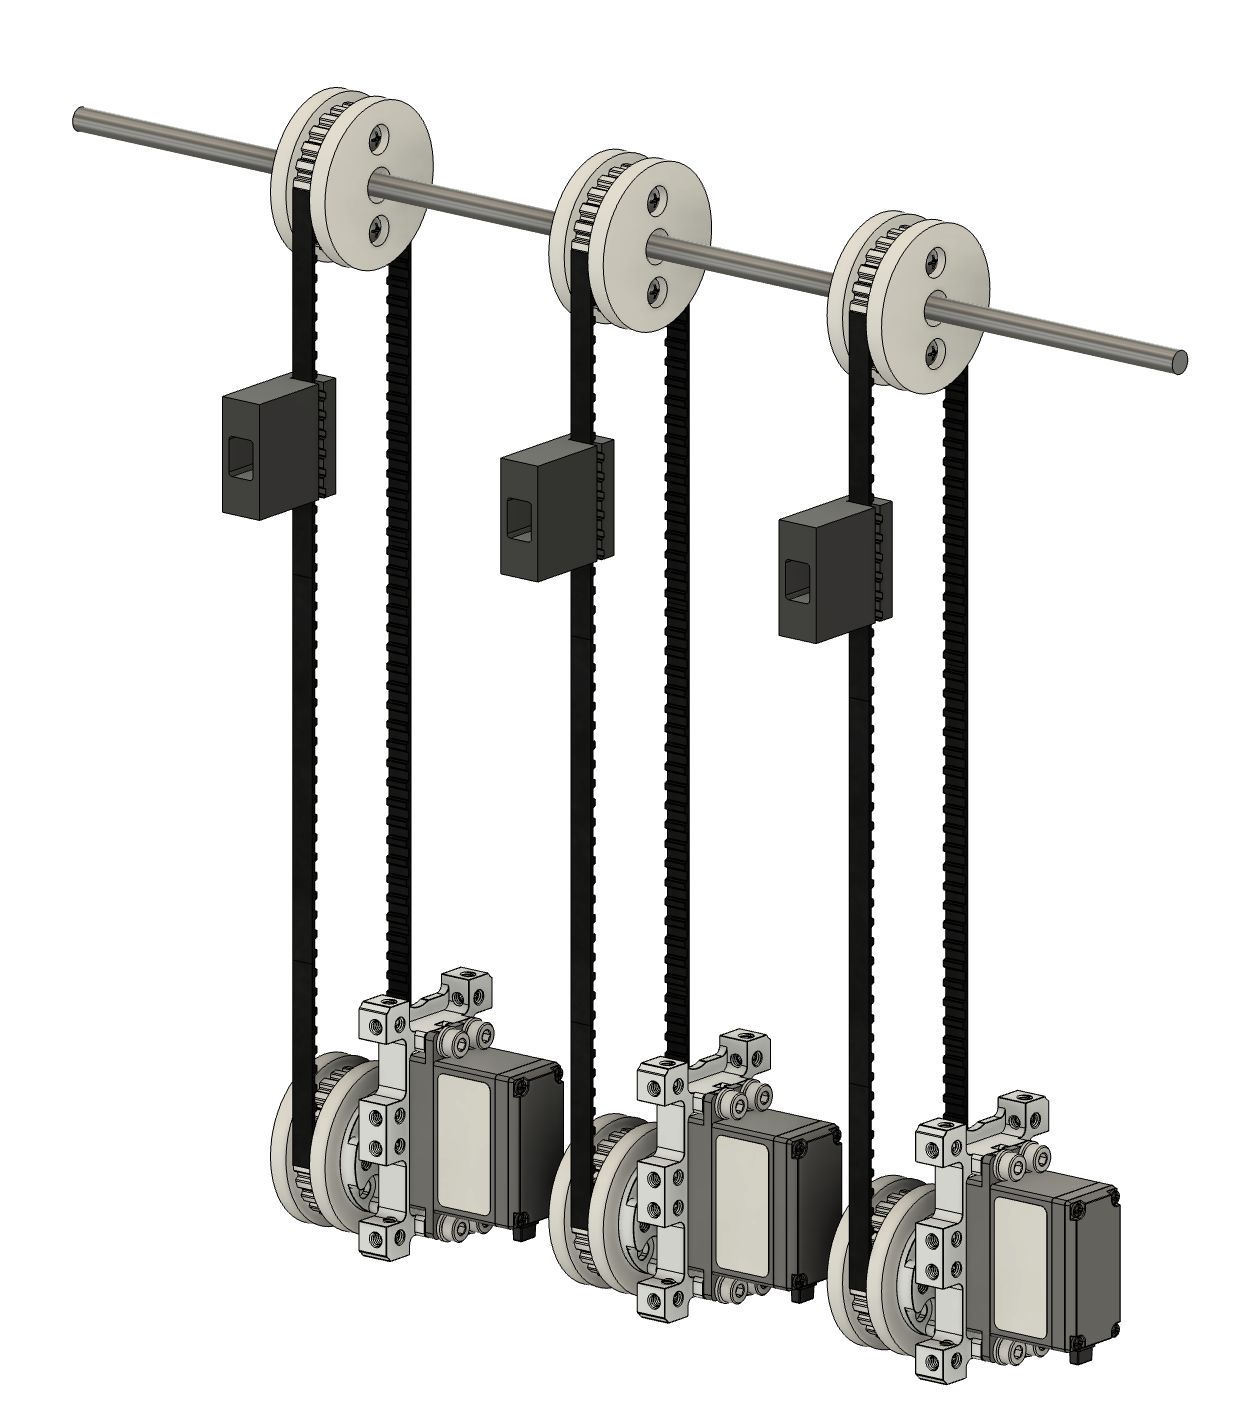
The idle and driver pulley wheels engage with the ridges on the timing belt to vertically translate the aircraft. ¼" ID bearings are press-fit into the idle pulley wheels for low-friction rotation about the ¼" diameter aluminum rod. Each idle pulley wheel is split into two halves to reduce print time, with the halves fastened together with 8-32 x ⅜" screws. The driver pulley wheels are rigidly attached to the servo hub via M4 screws. The pulley wheels were 3D-printed in white PLA. The aluminum rod, timing belts, and servos were purchased off-the-shelf components.
Flight Yoke
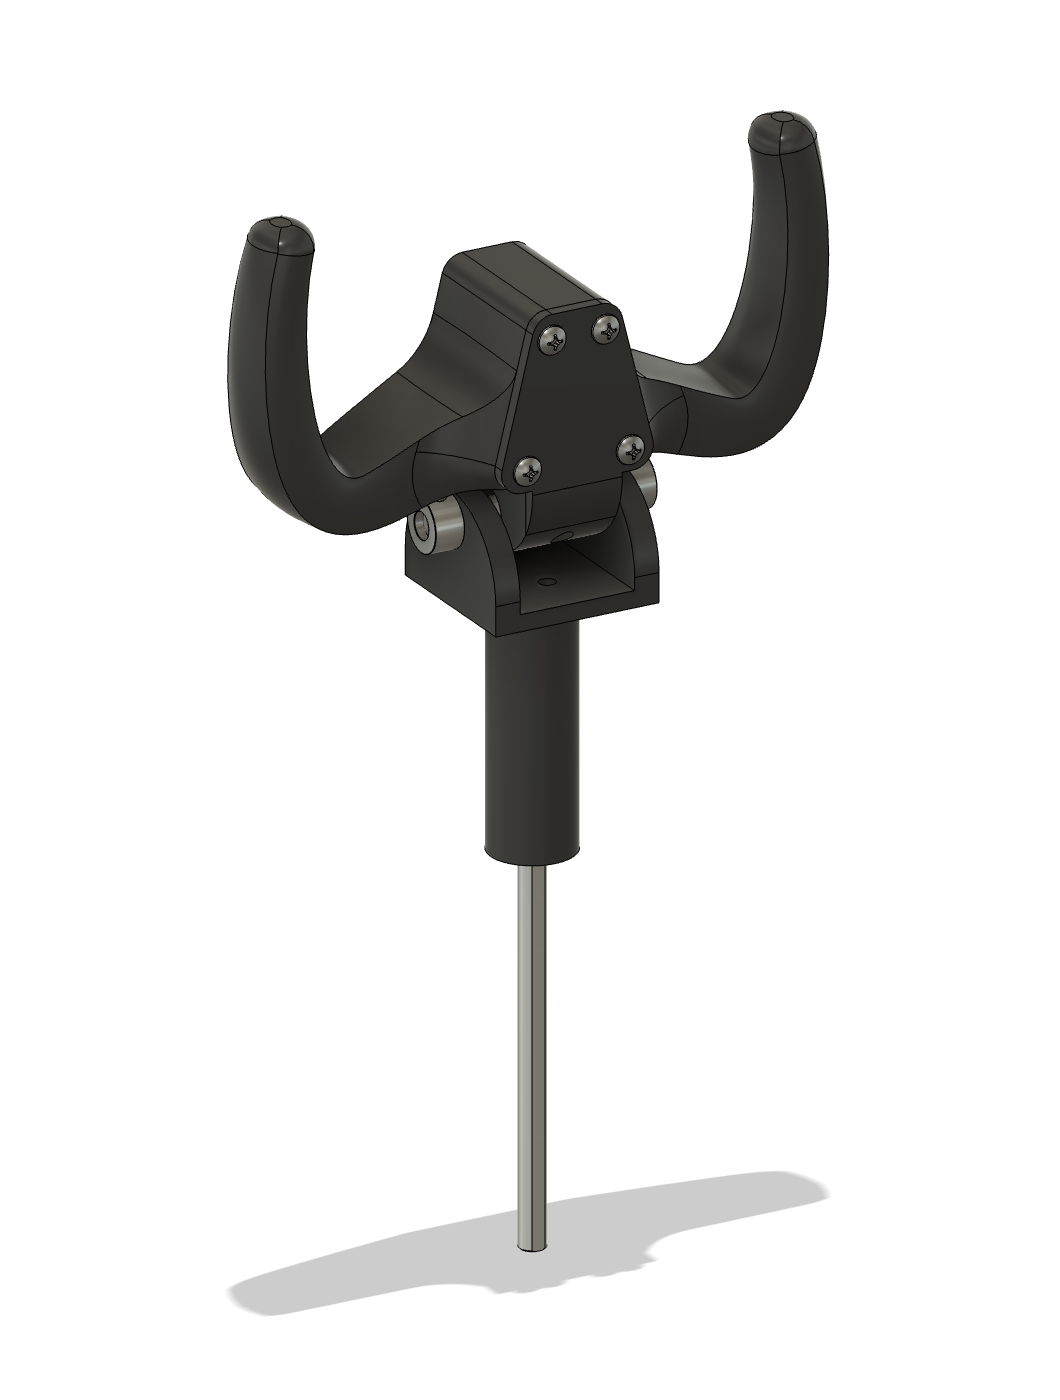
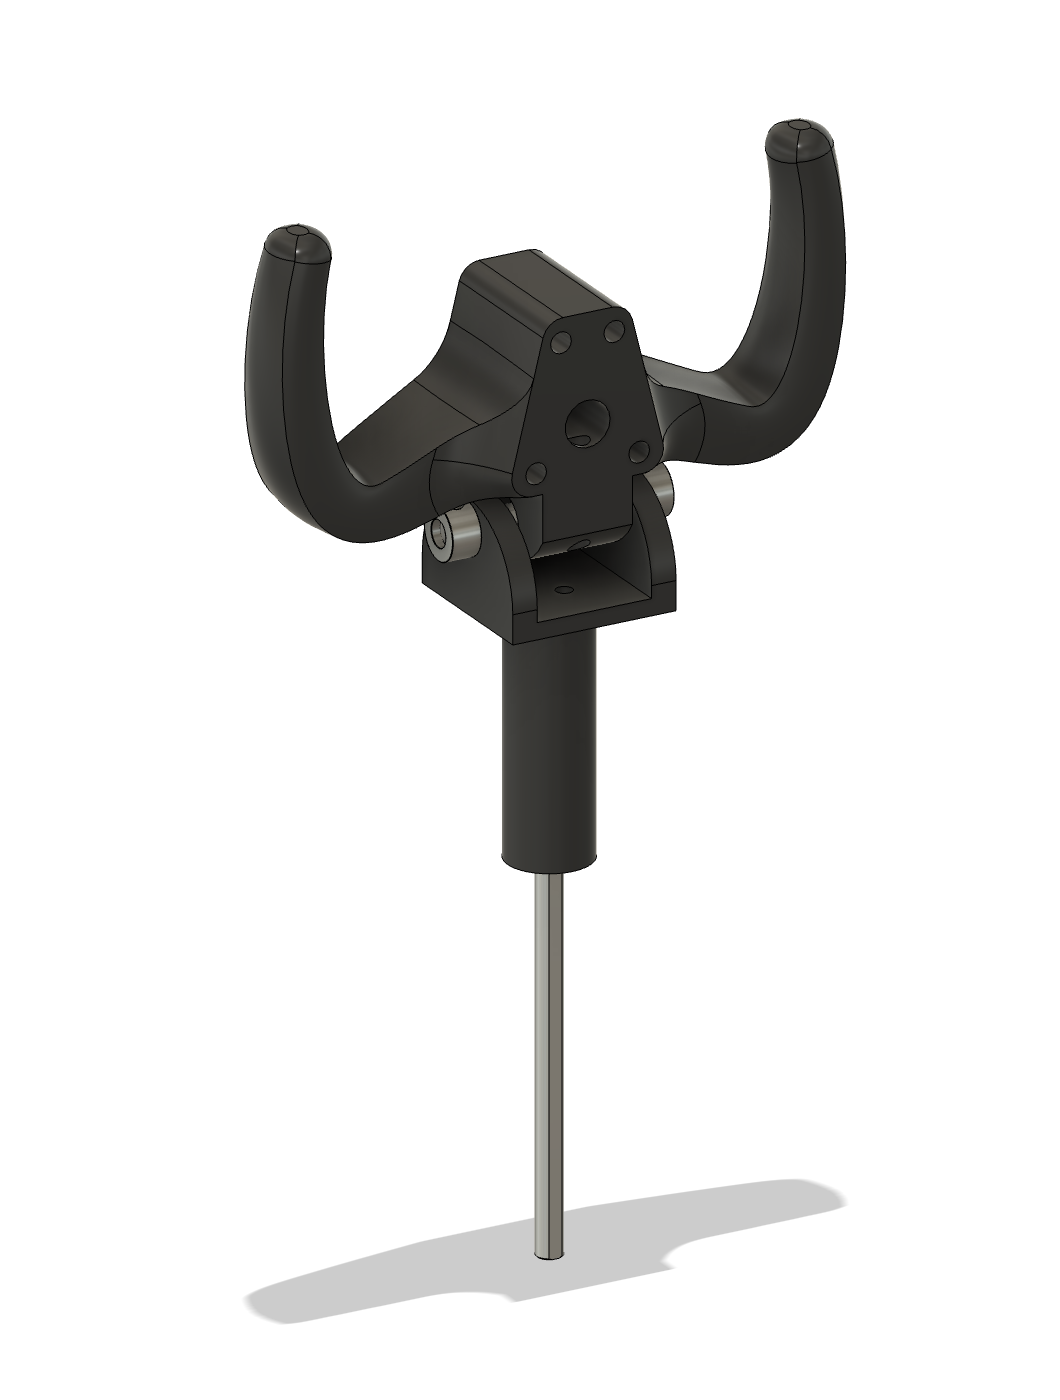
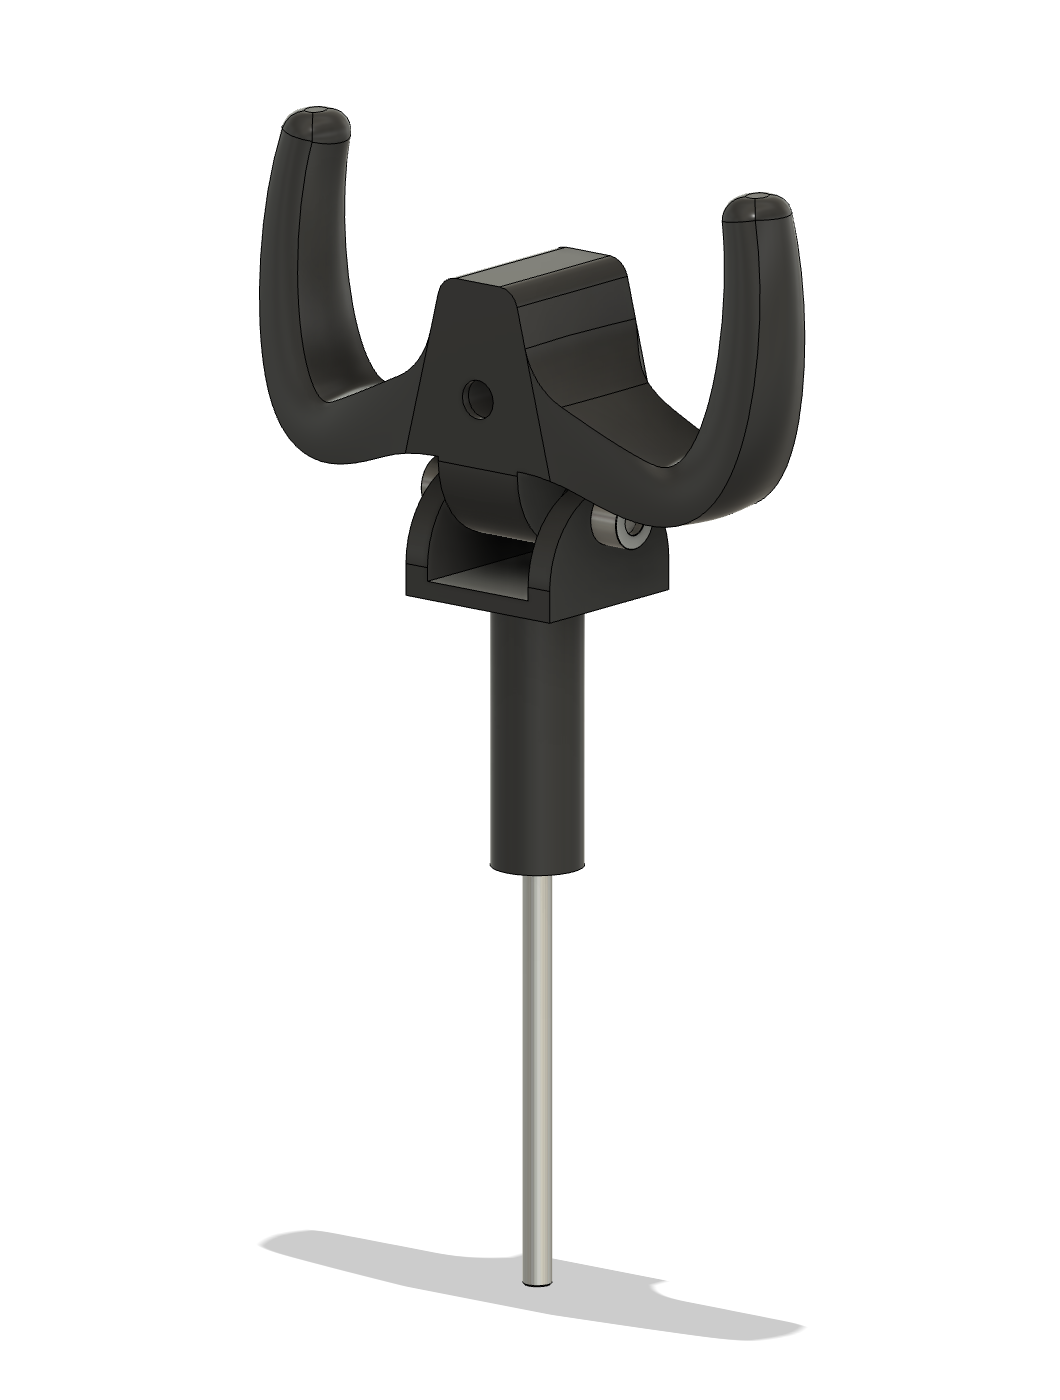
The flight yoke provides pitch and yaw control via a pan-tilt mount. Pitch is enabled via a horizontal ¼" x 2" D-shaft, while yaw is enabled by a vertical ¼" x 6" D-shaft that is press fit into the pan-tilt mount. The body is split into two halves, allowing the laser to be inserted when the front panel is removed. A pass-through hole routes the laser's power and ground wires through the mount toward the breadboard in the final assembly. The flight yoke was 3D-printed with black PLA.
Gear Dispenser
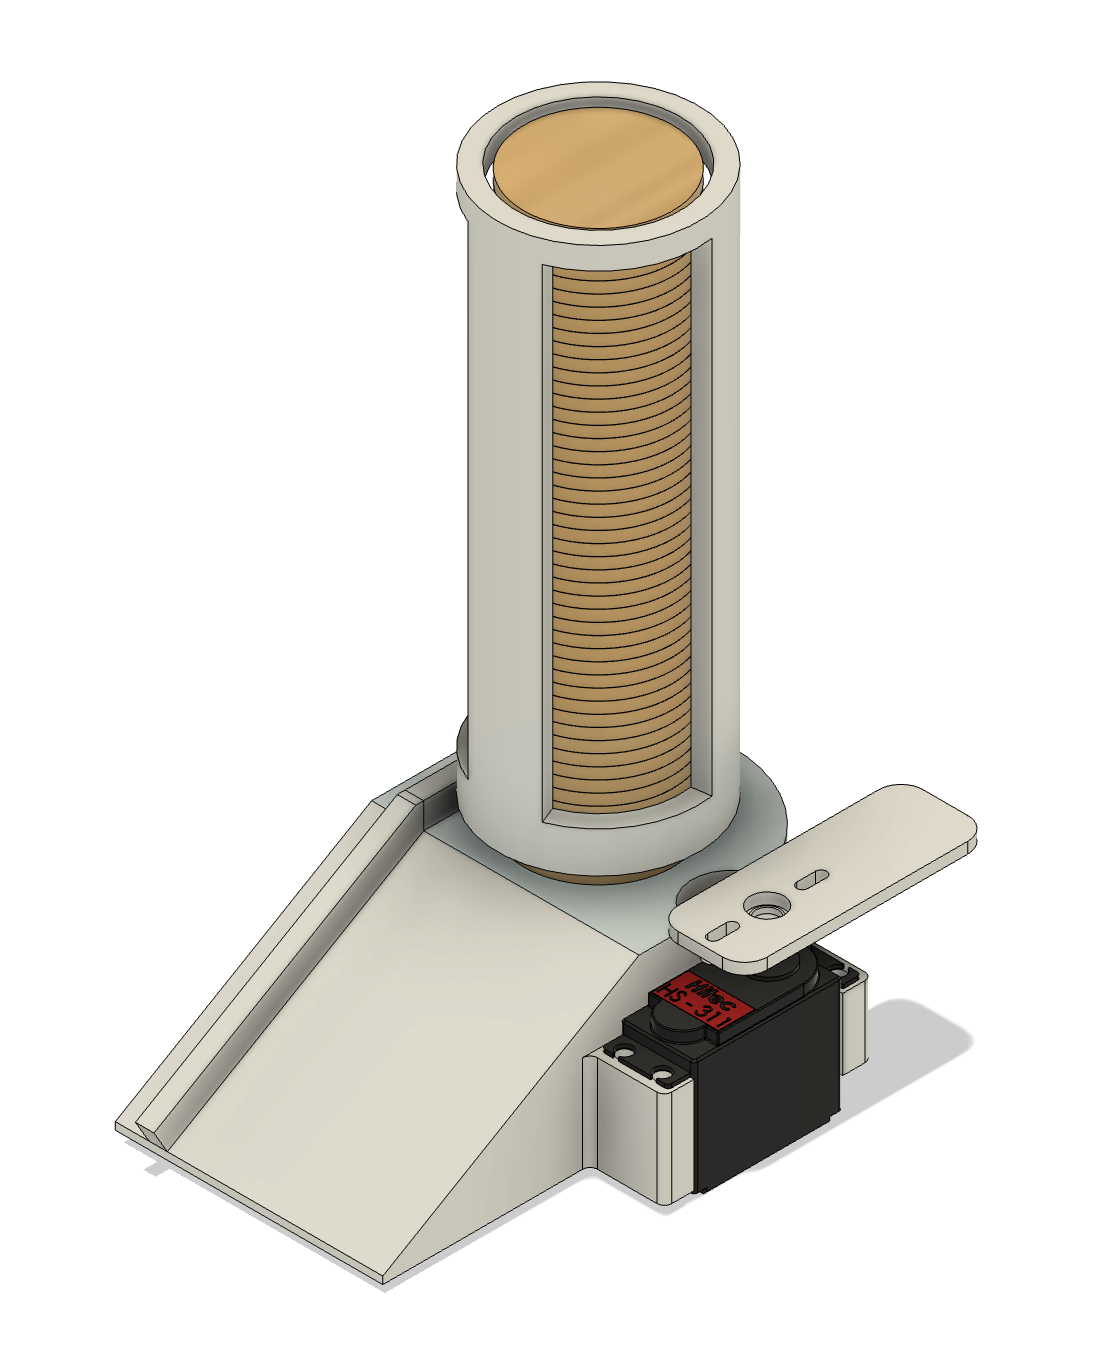
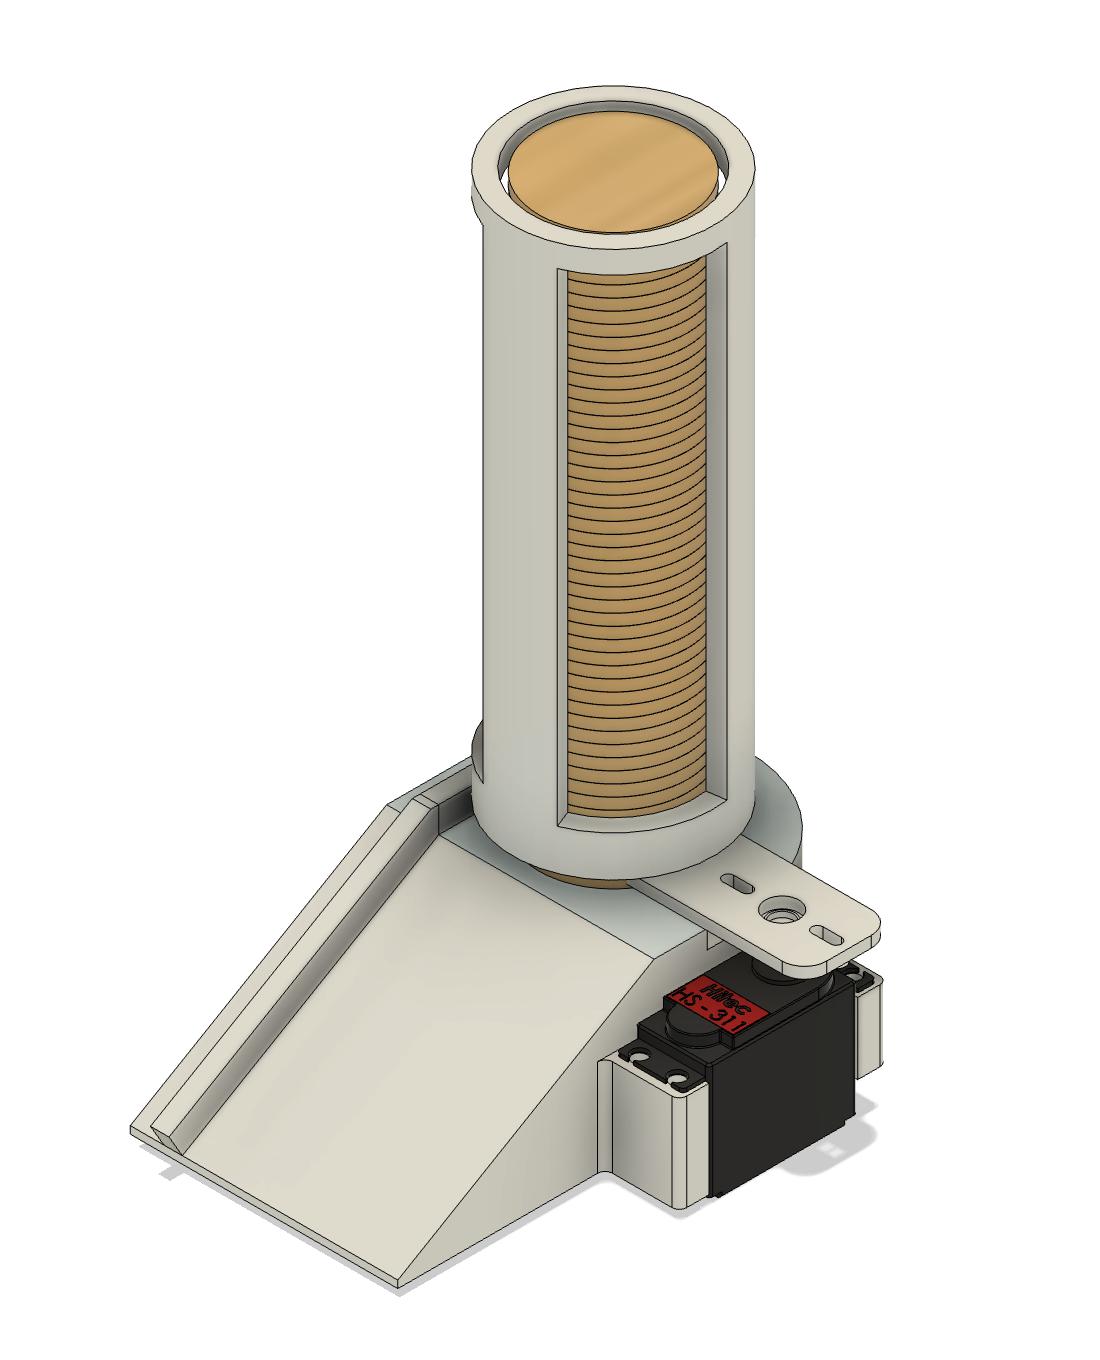
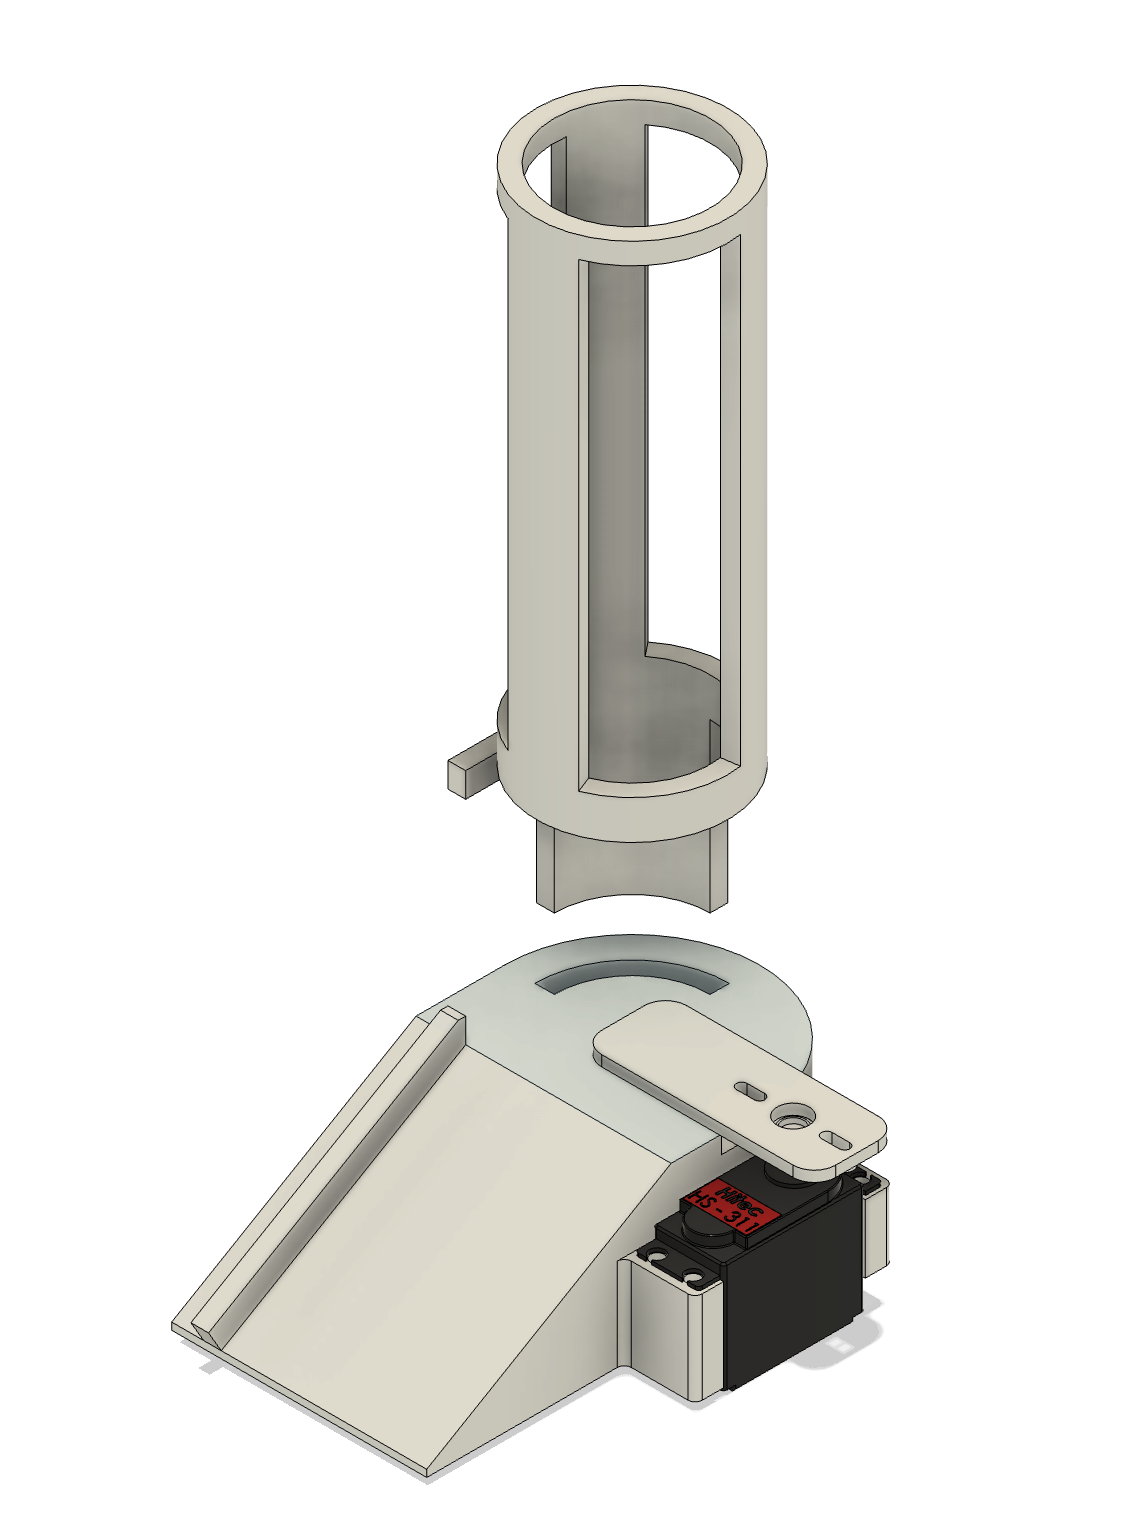
The arm mounted on the servo horn swings out 90 degrees and displaces two laser-cut gears simultaneously. The column that holds the gears in place is a separate component that slots into an opening in the ramp body. All components were 3D-printed in white PLA.
Aircraft Mounts
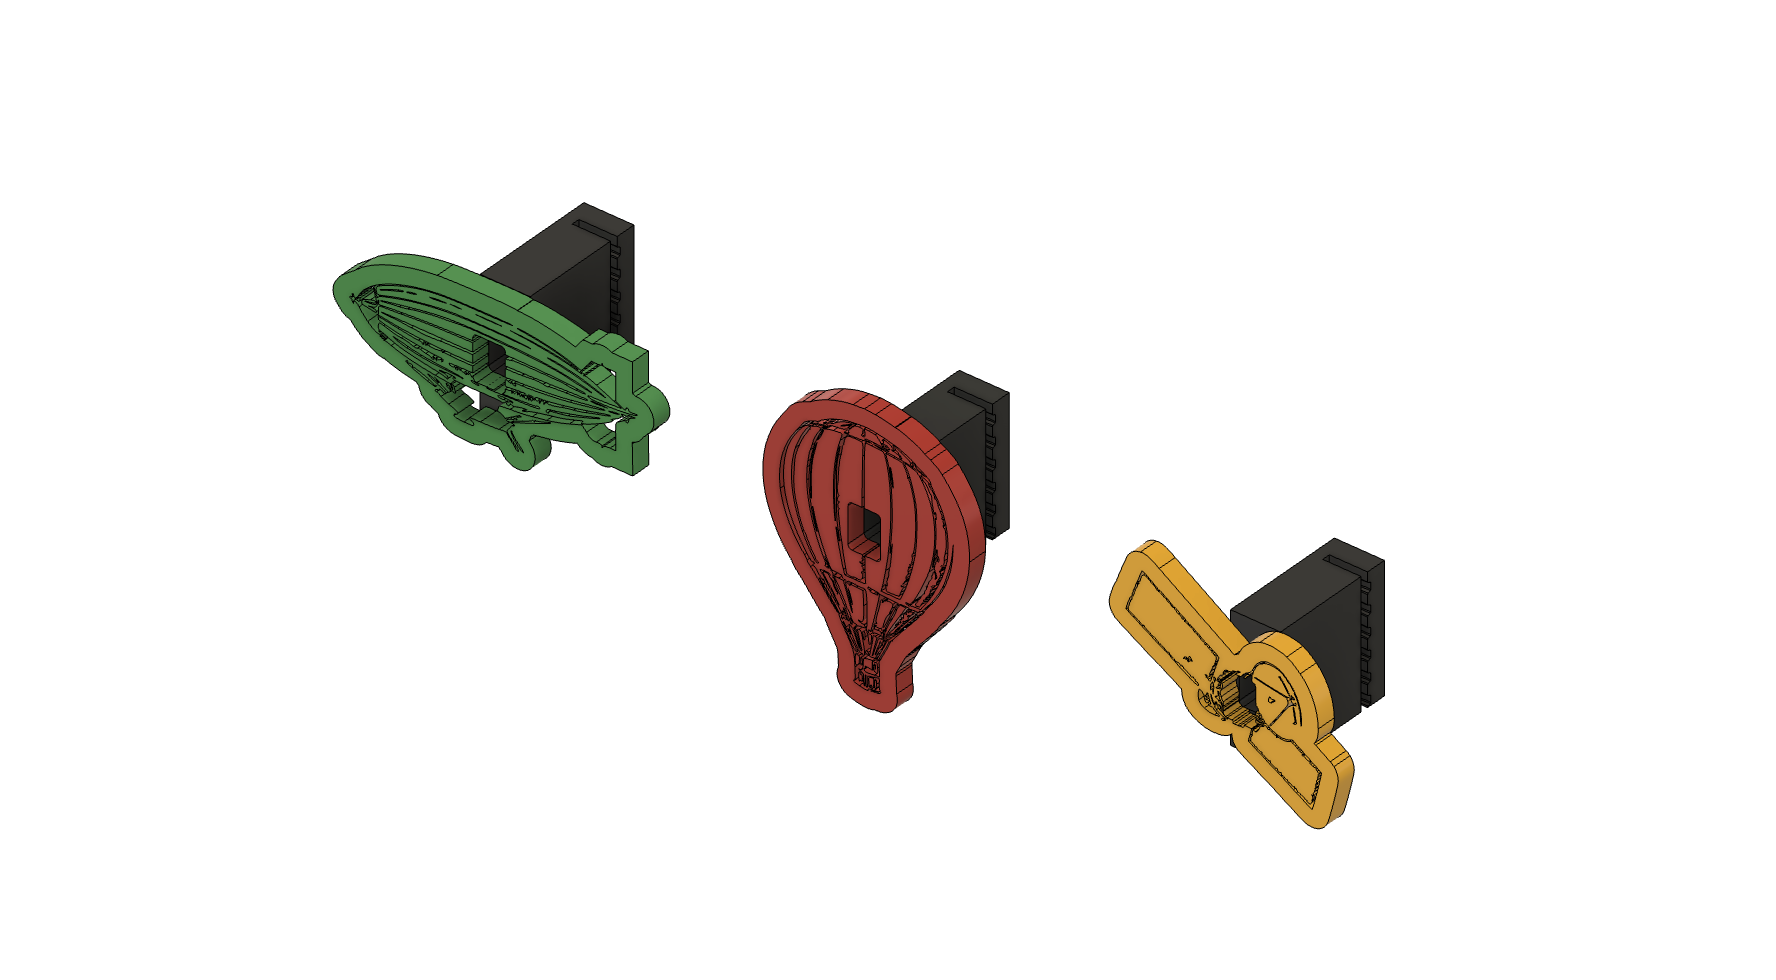
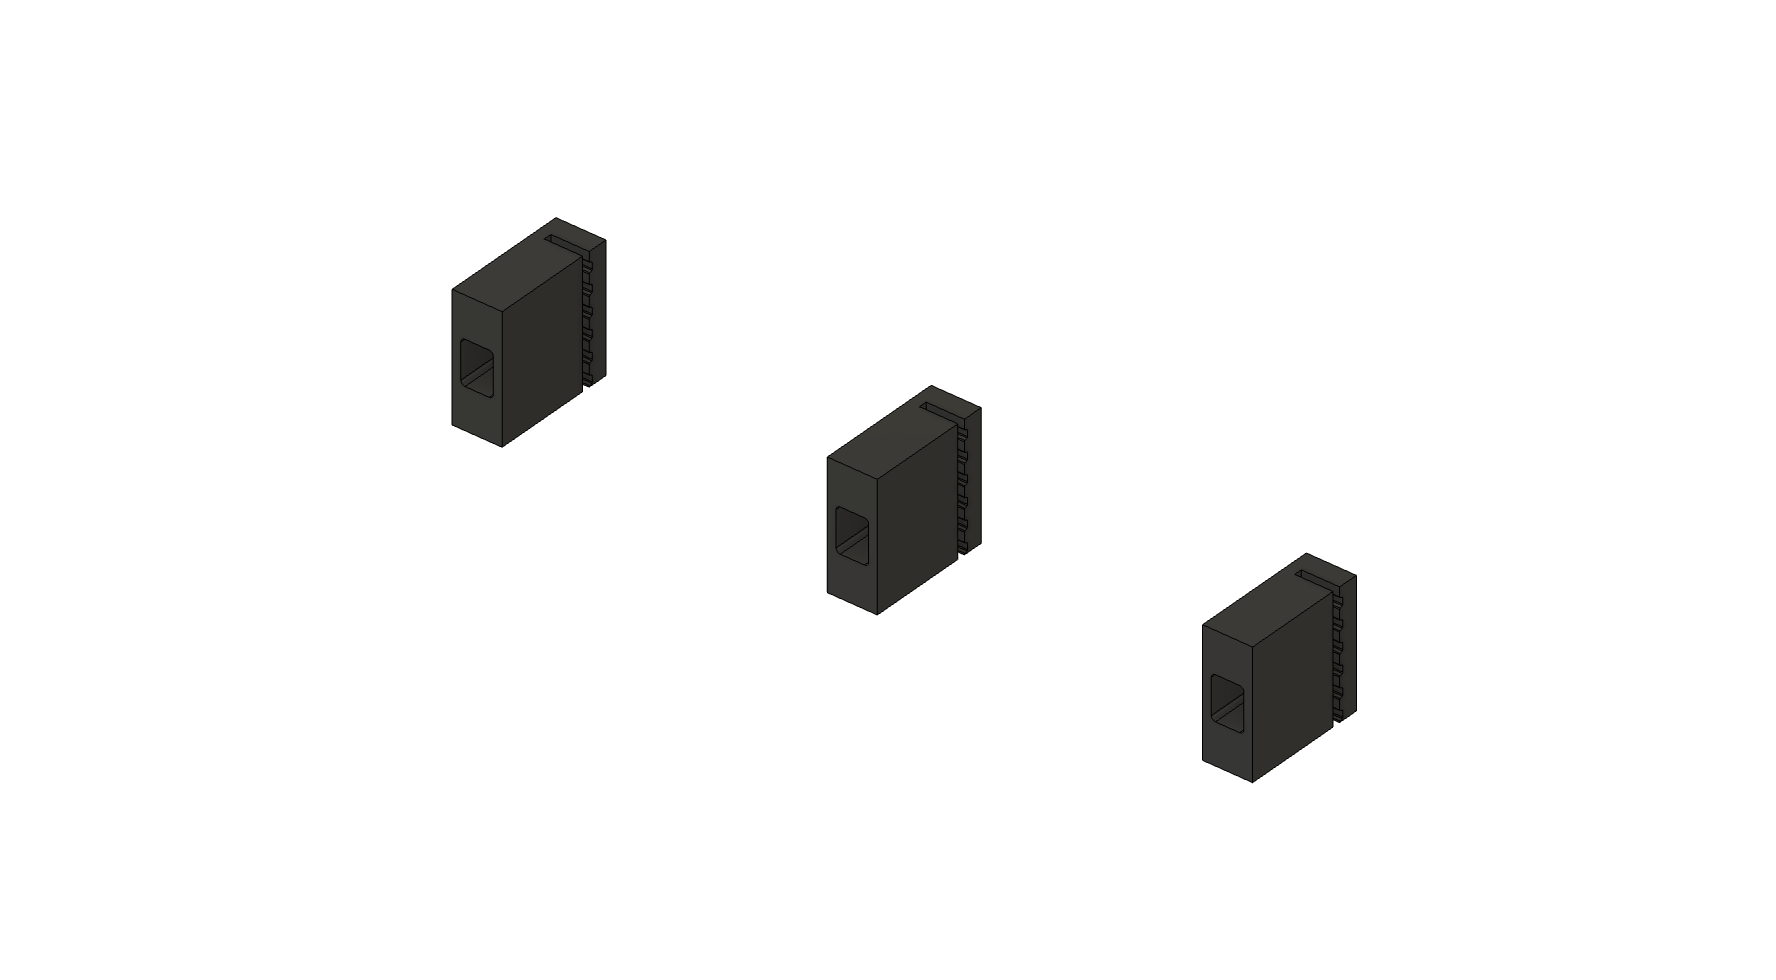
The 3D-printed mounts align with the grooves in the timing belt, allowing them to simply slide in without the need for adhesives. The laser-cut aircraft were secured to each mount with acrylic cement, and a hole was cut to press-fit the photocell into place. The mounts were 3D-printed with black PLA. The blimp, hot air balloon, and satellite were laser-cut on neon yellow, neon pink, and neon orange acrylic respectively.
Card Reader
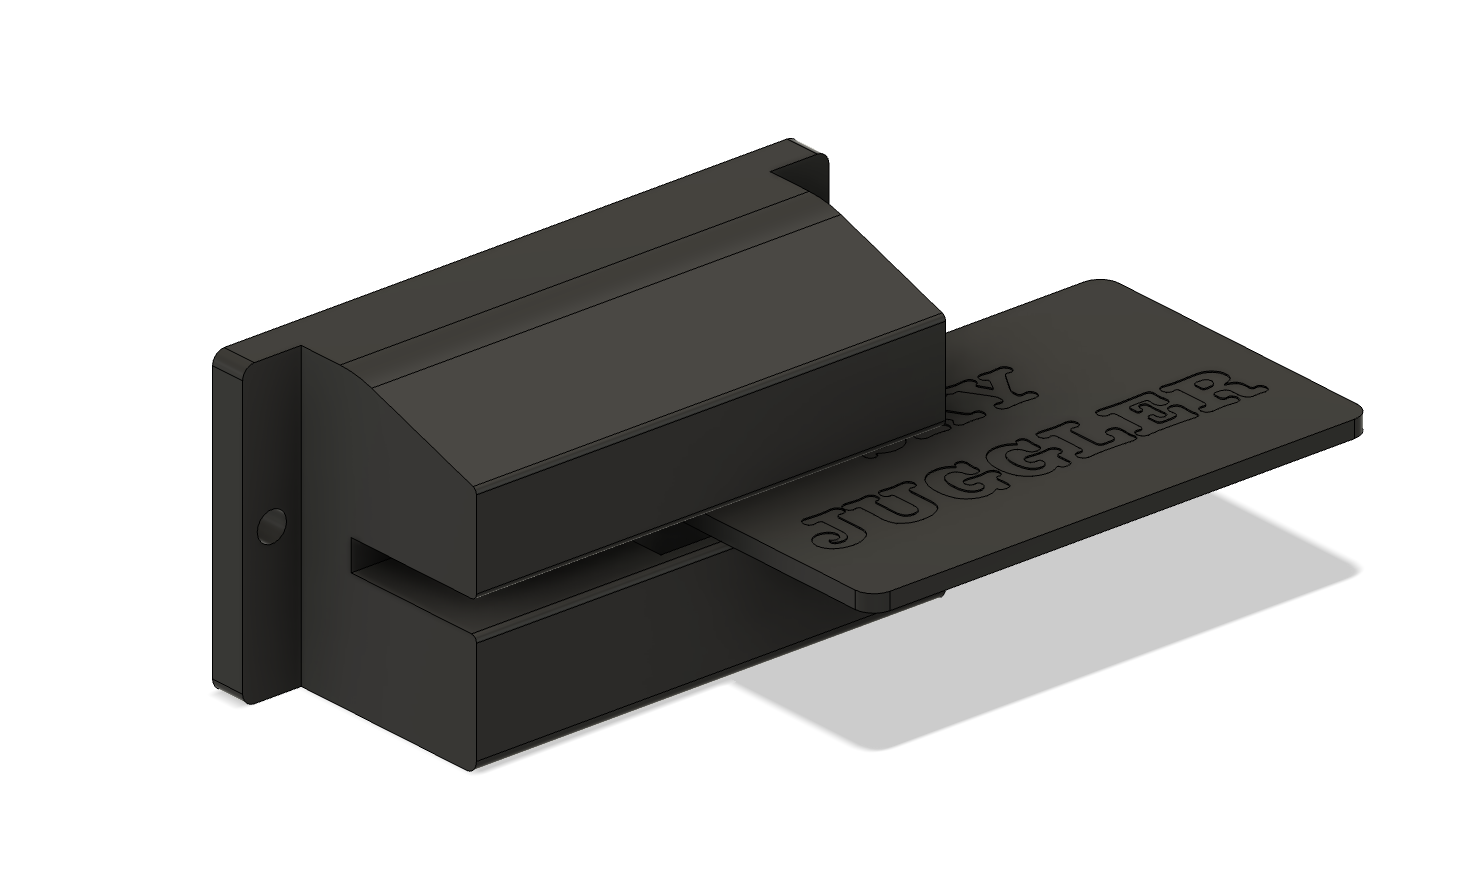
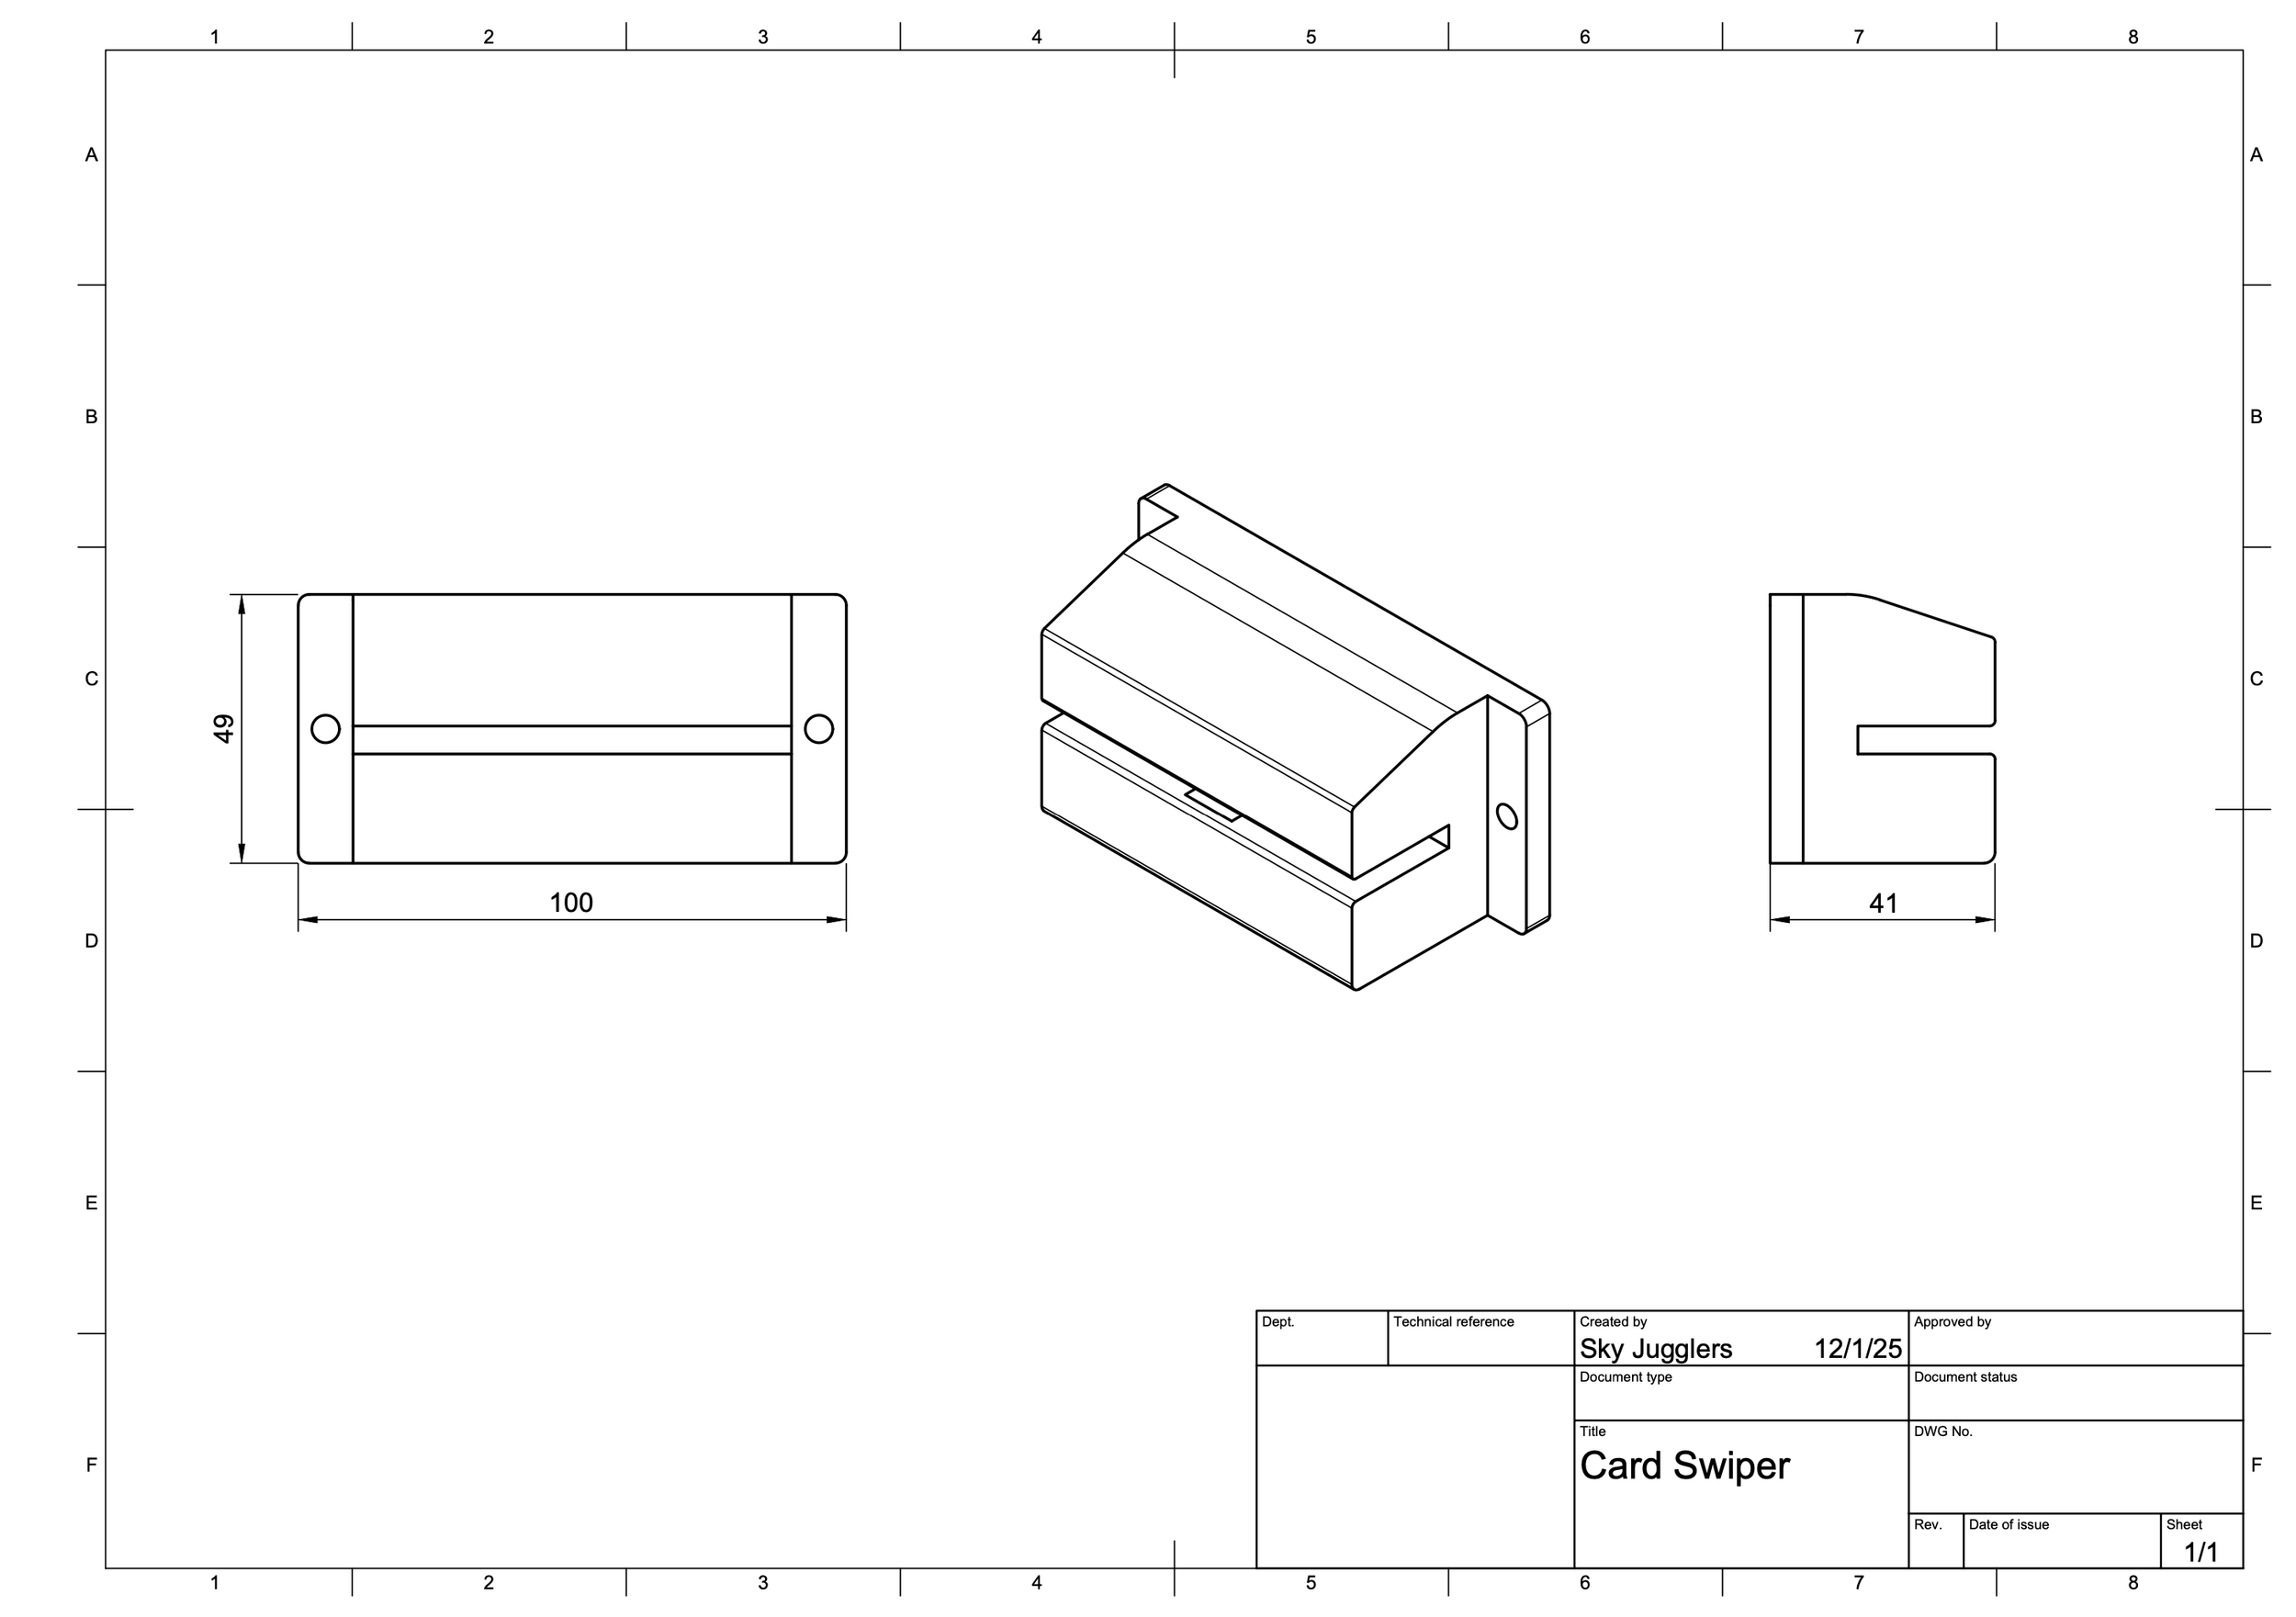
The card reader houses an IR beam-break sensor, which is triggered by a black acrylic card. Note: Transparent or non-black solid-colored cards did not reliably activate the sensor. The card reader was 3D-printed with black PLA.
Engineering Drawings
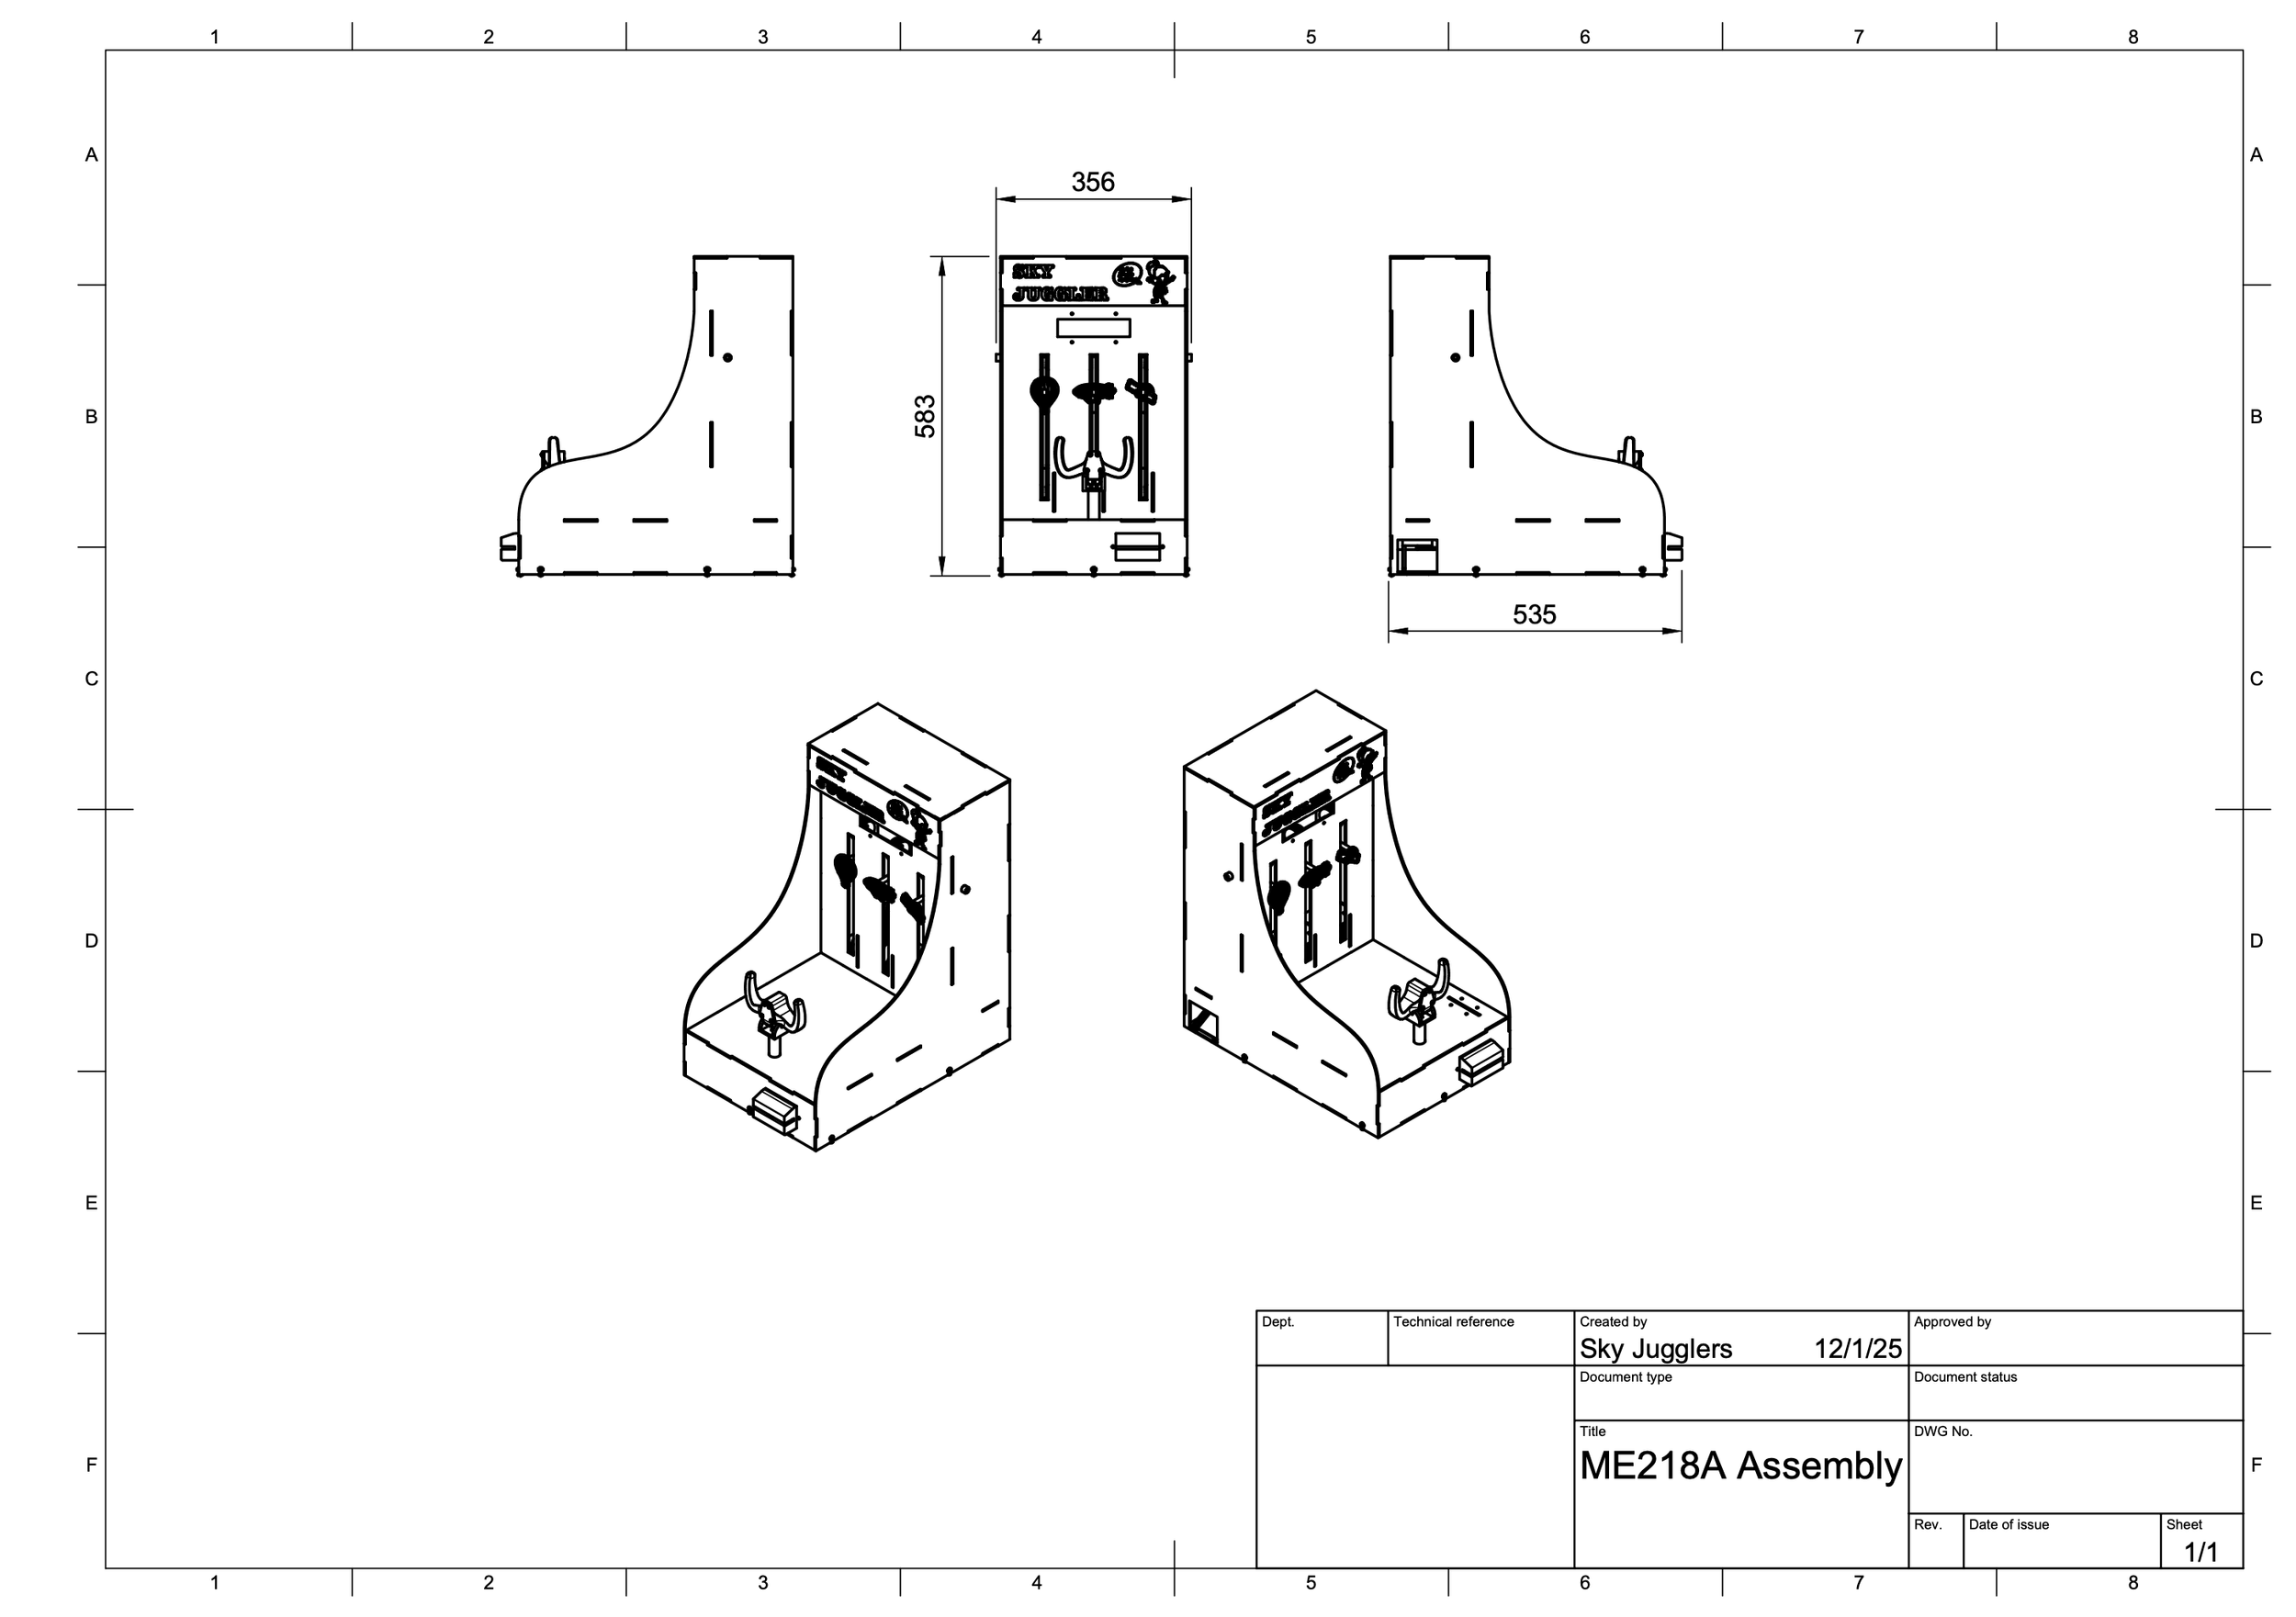
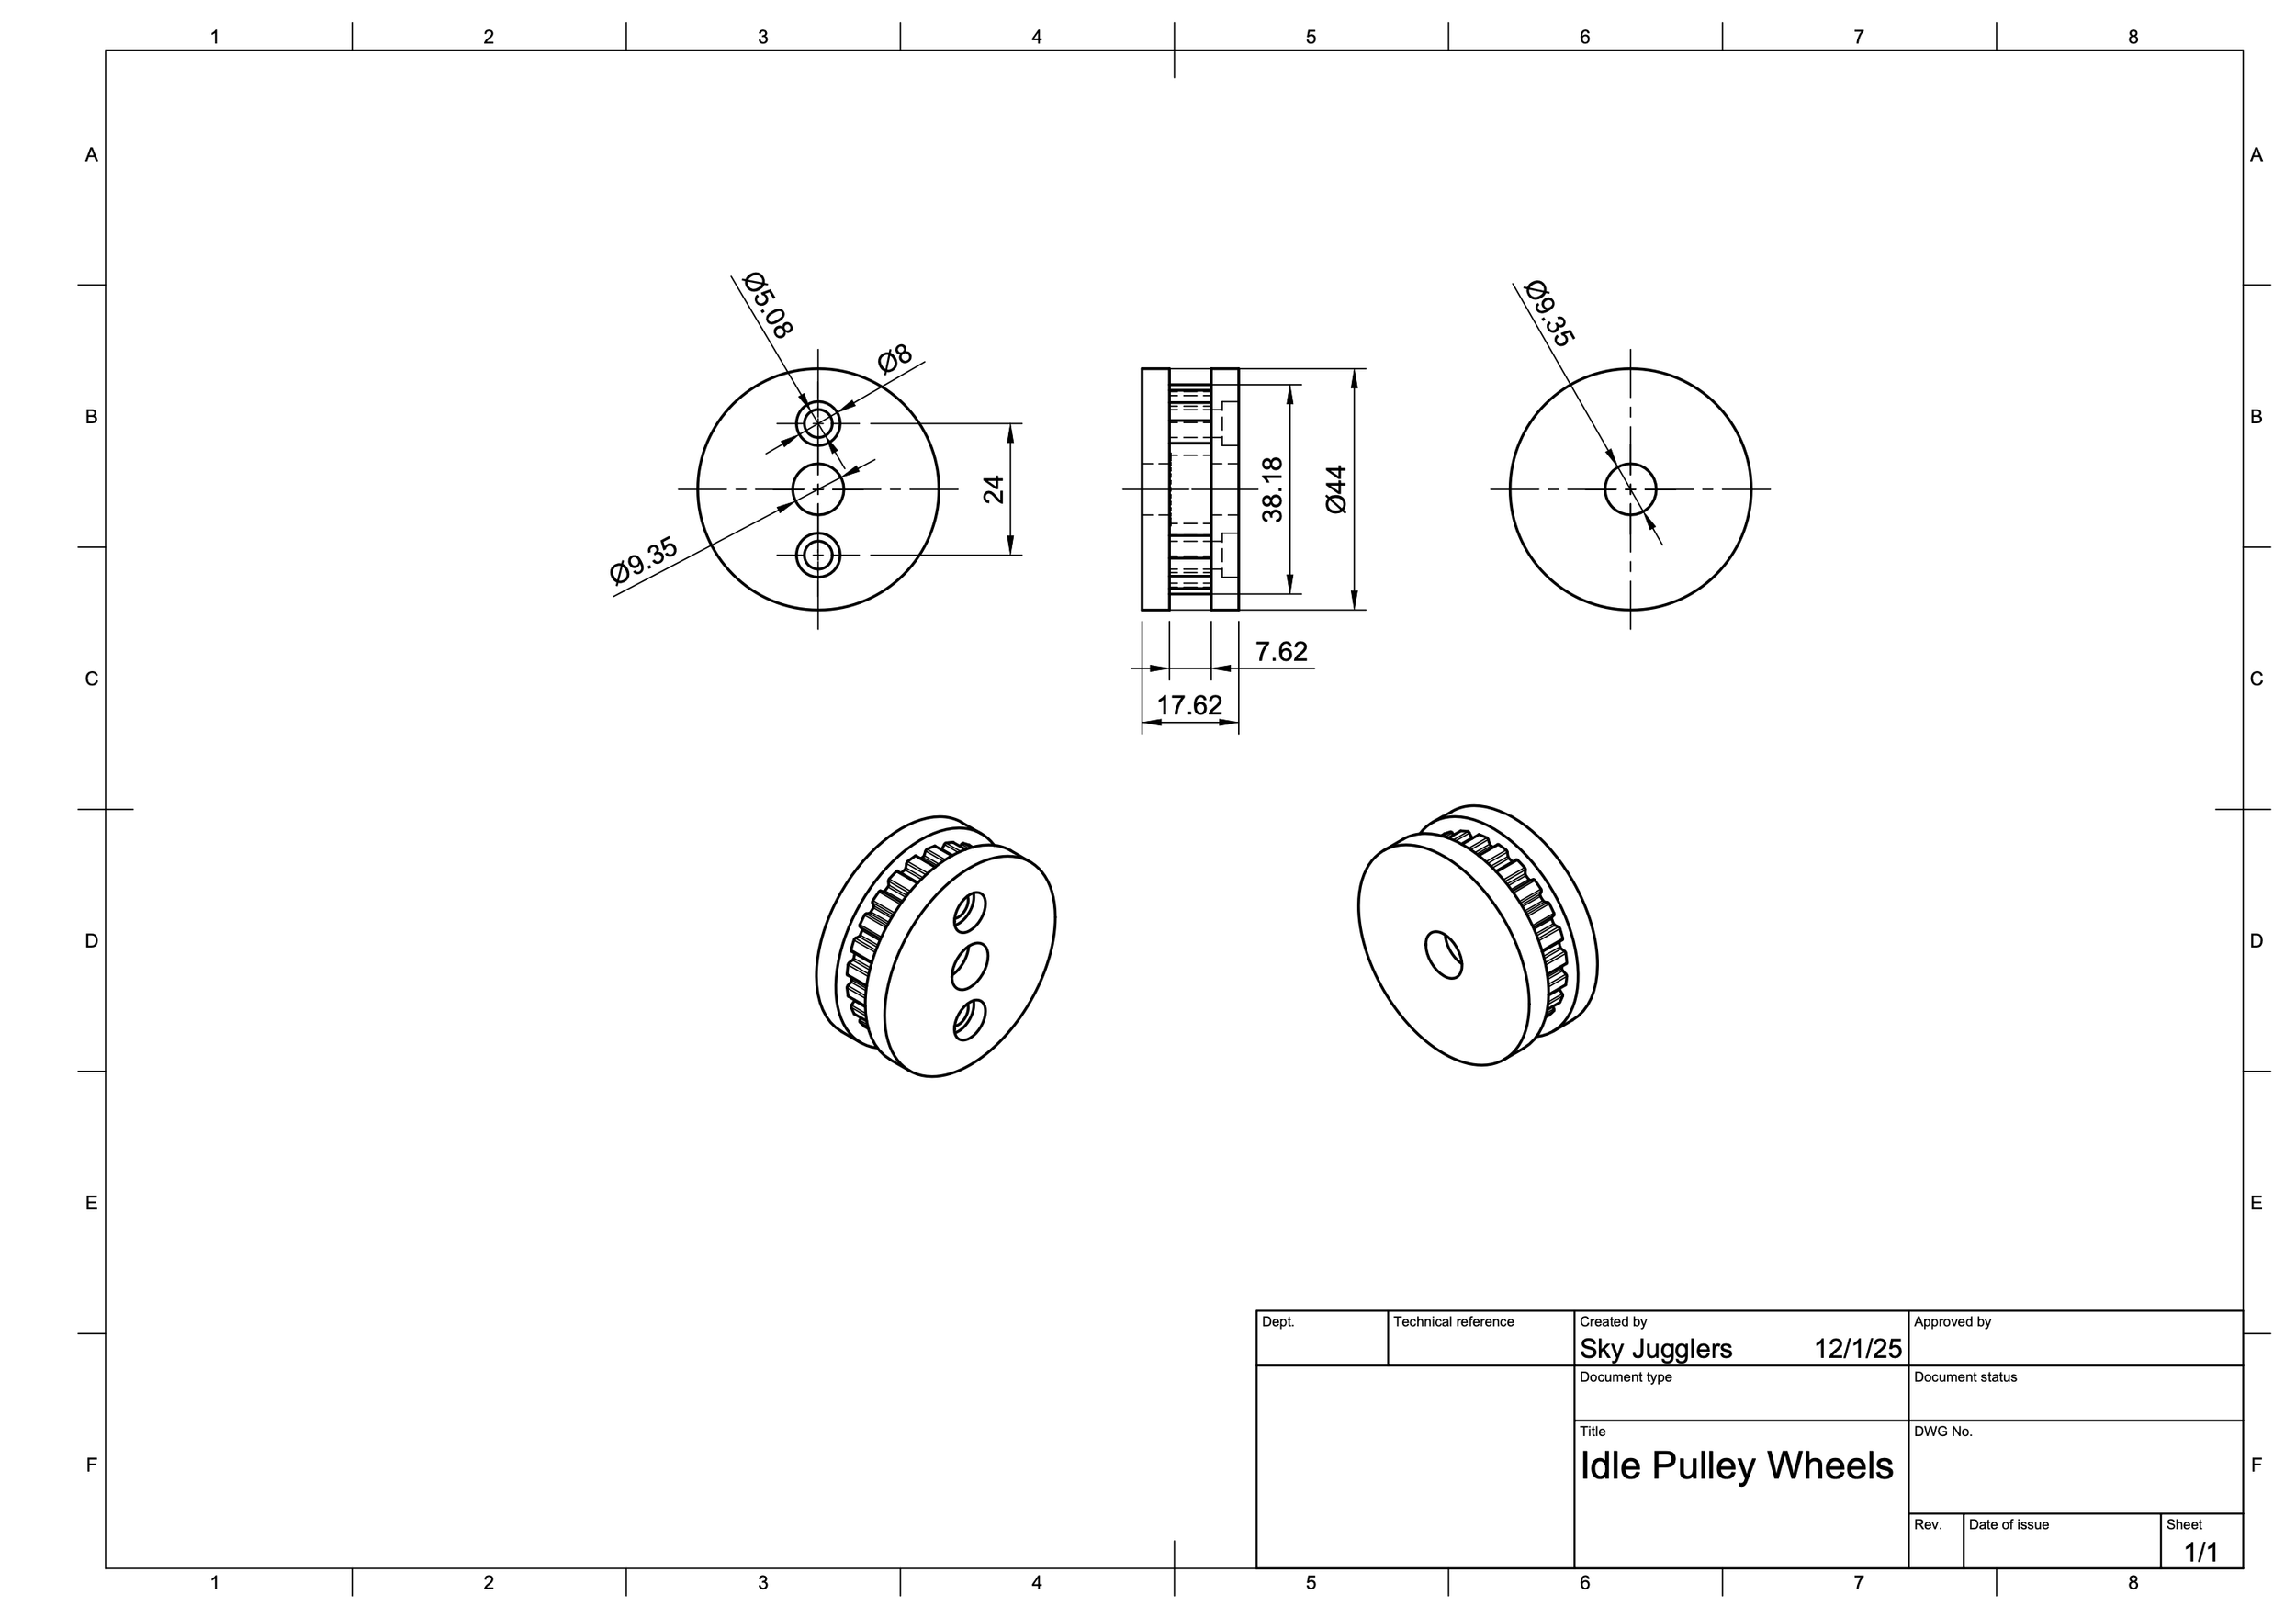
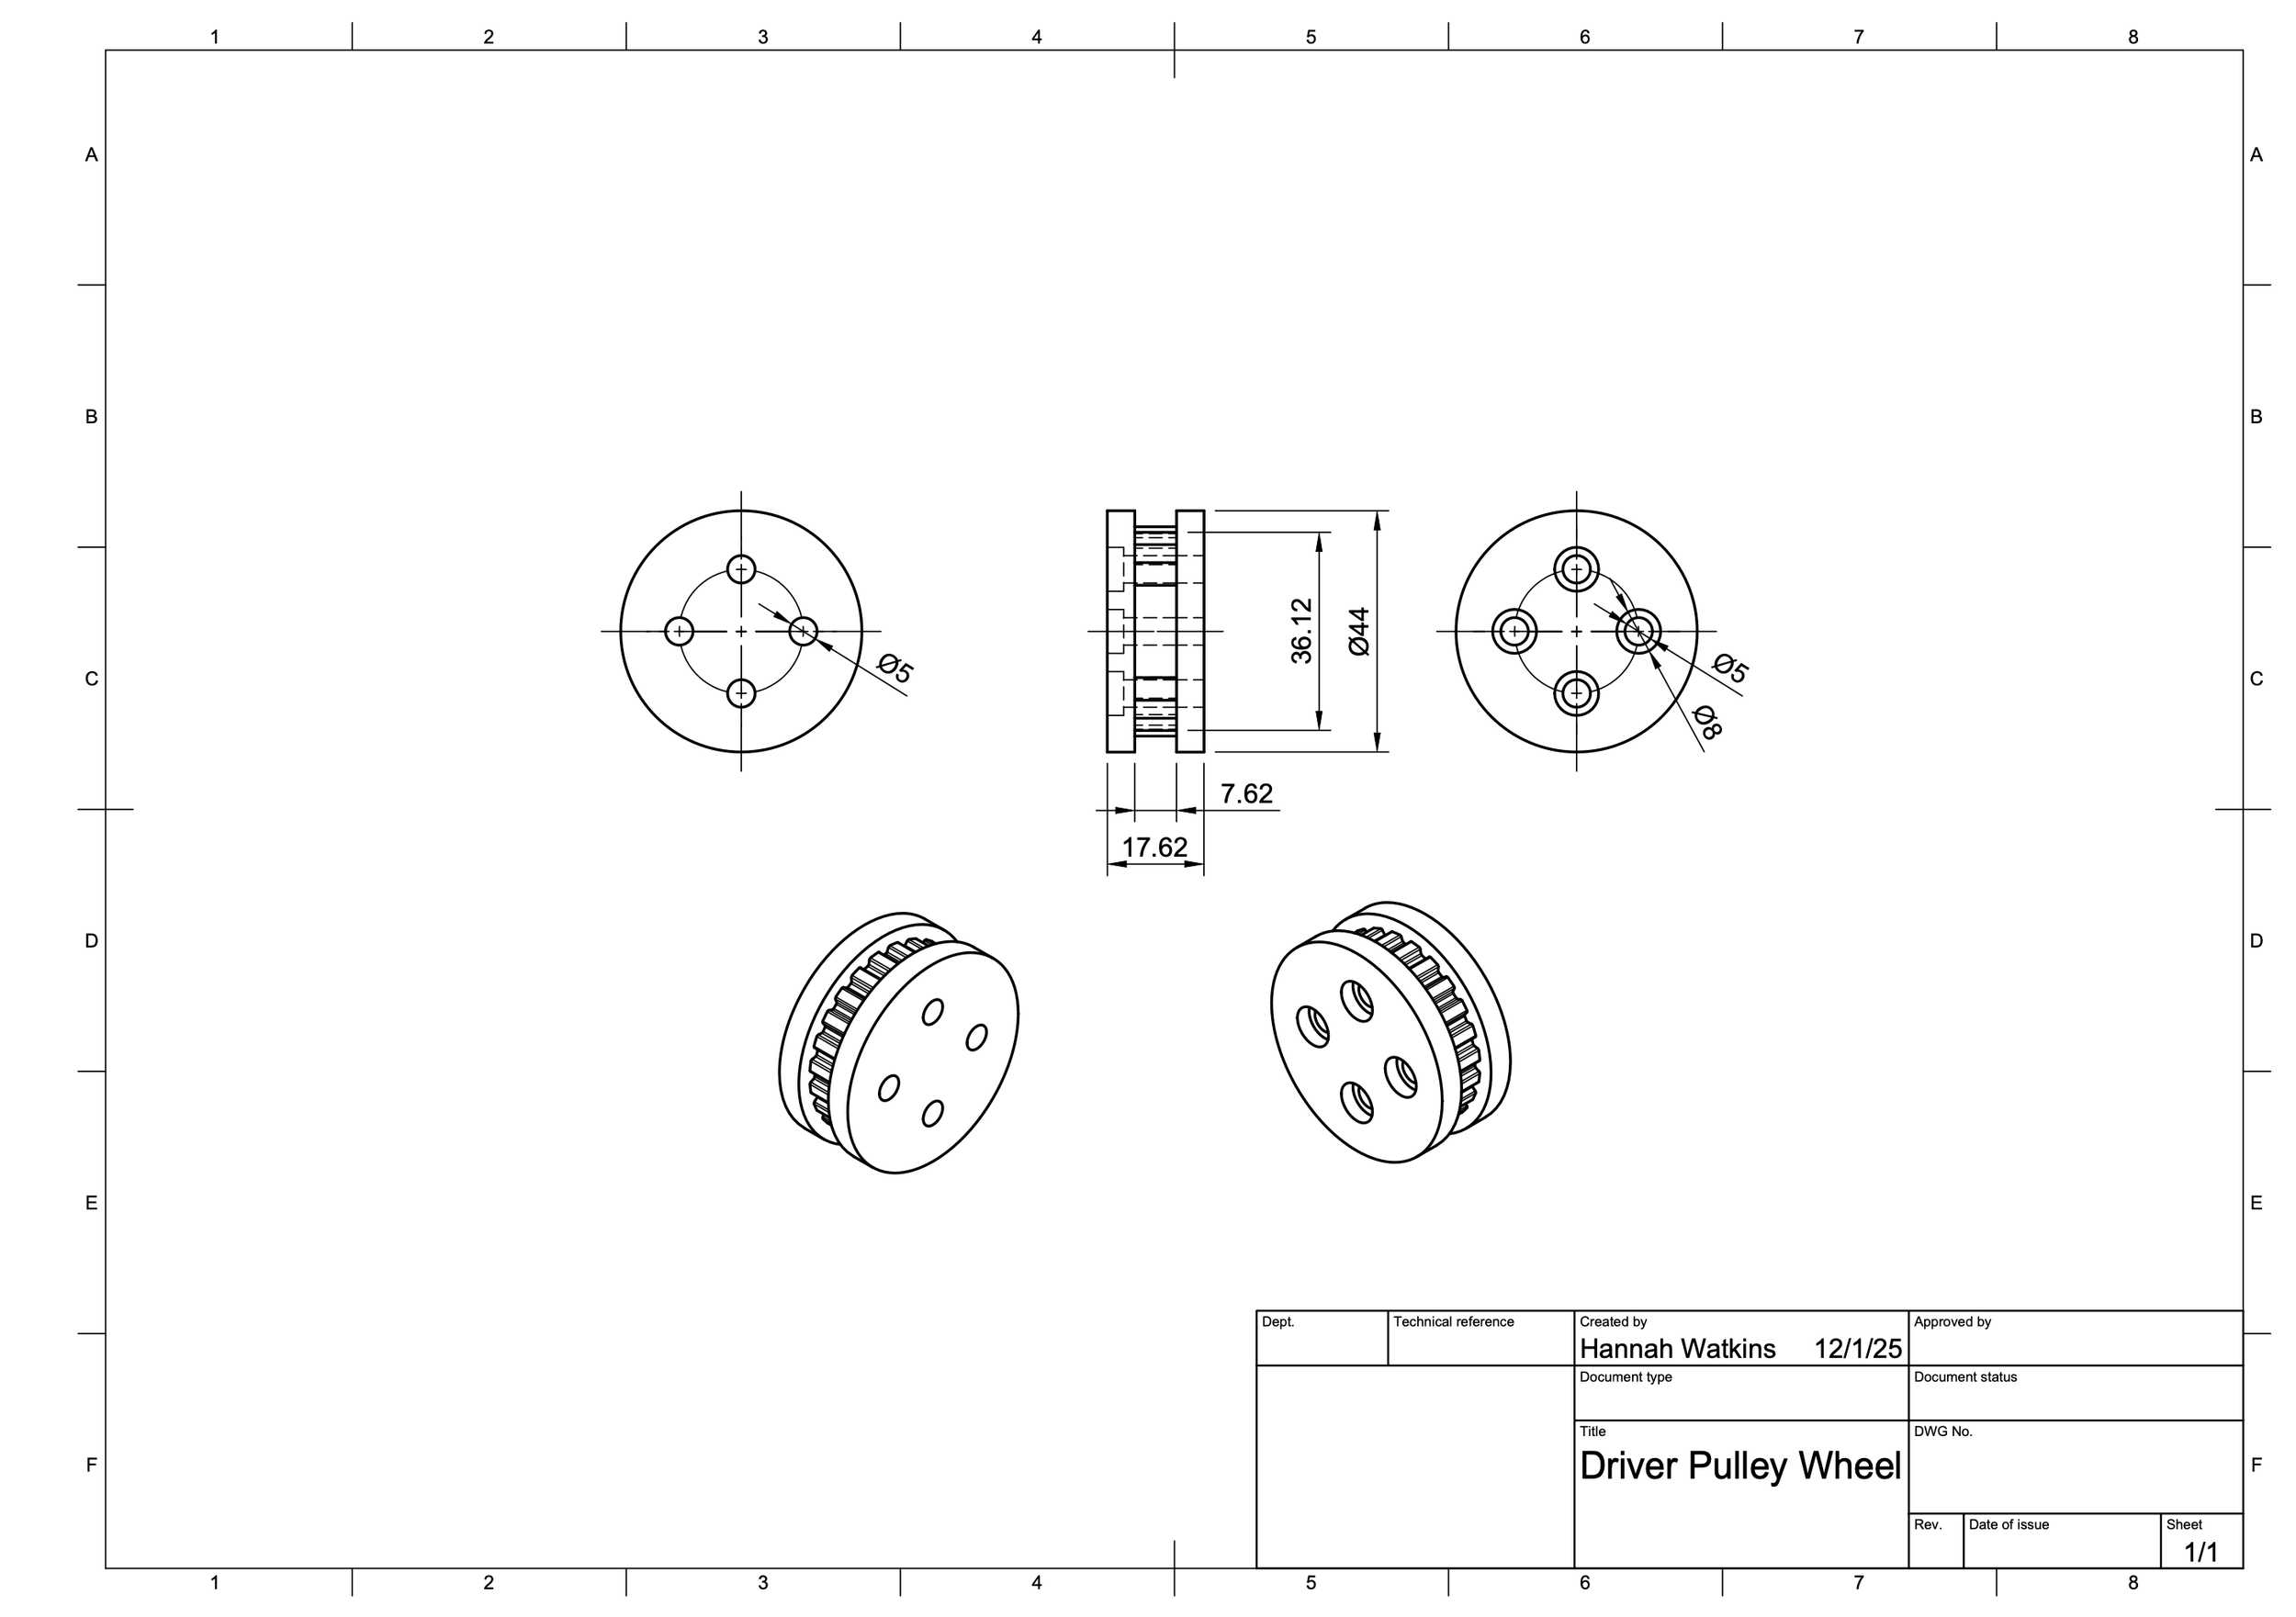
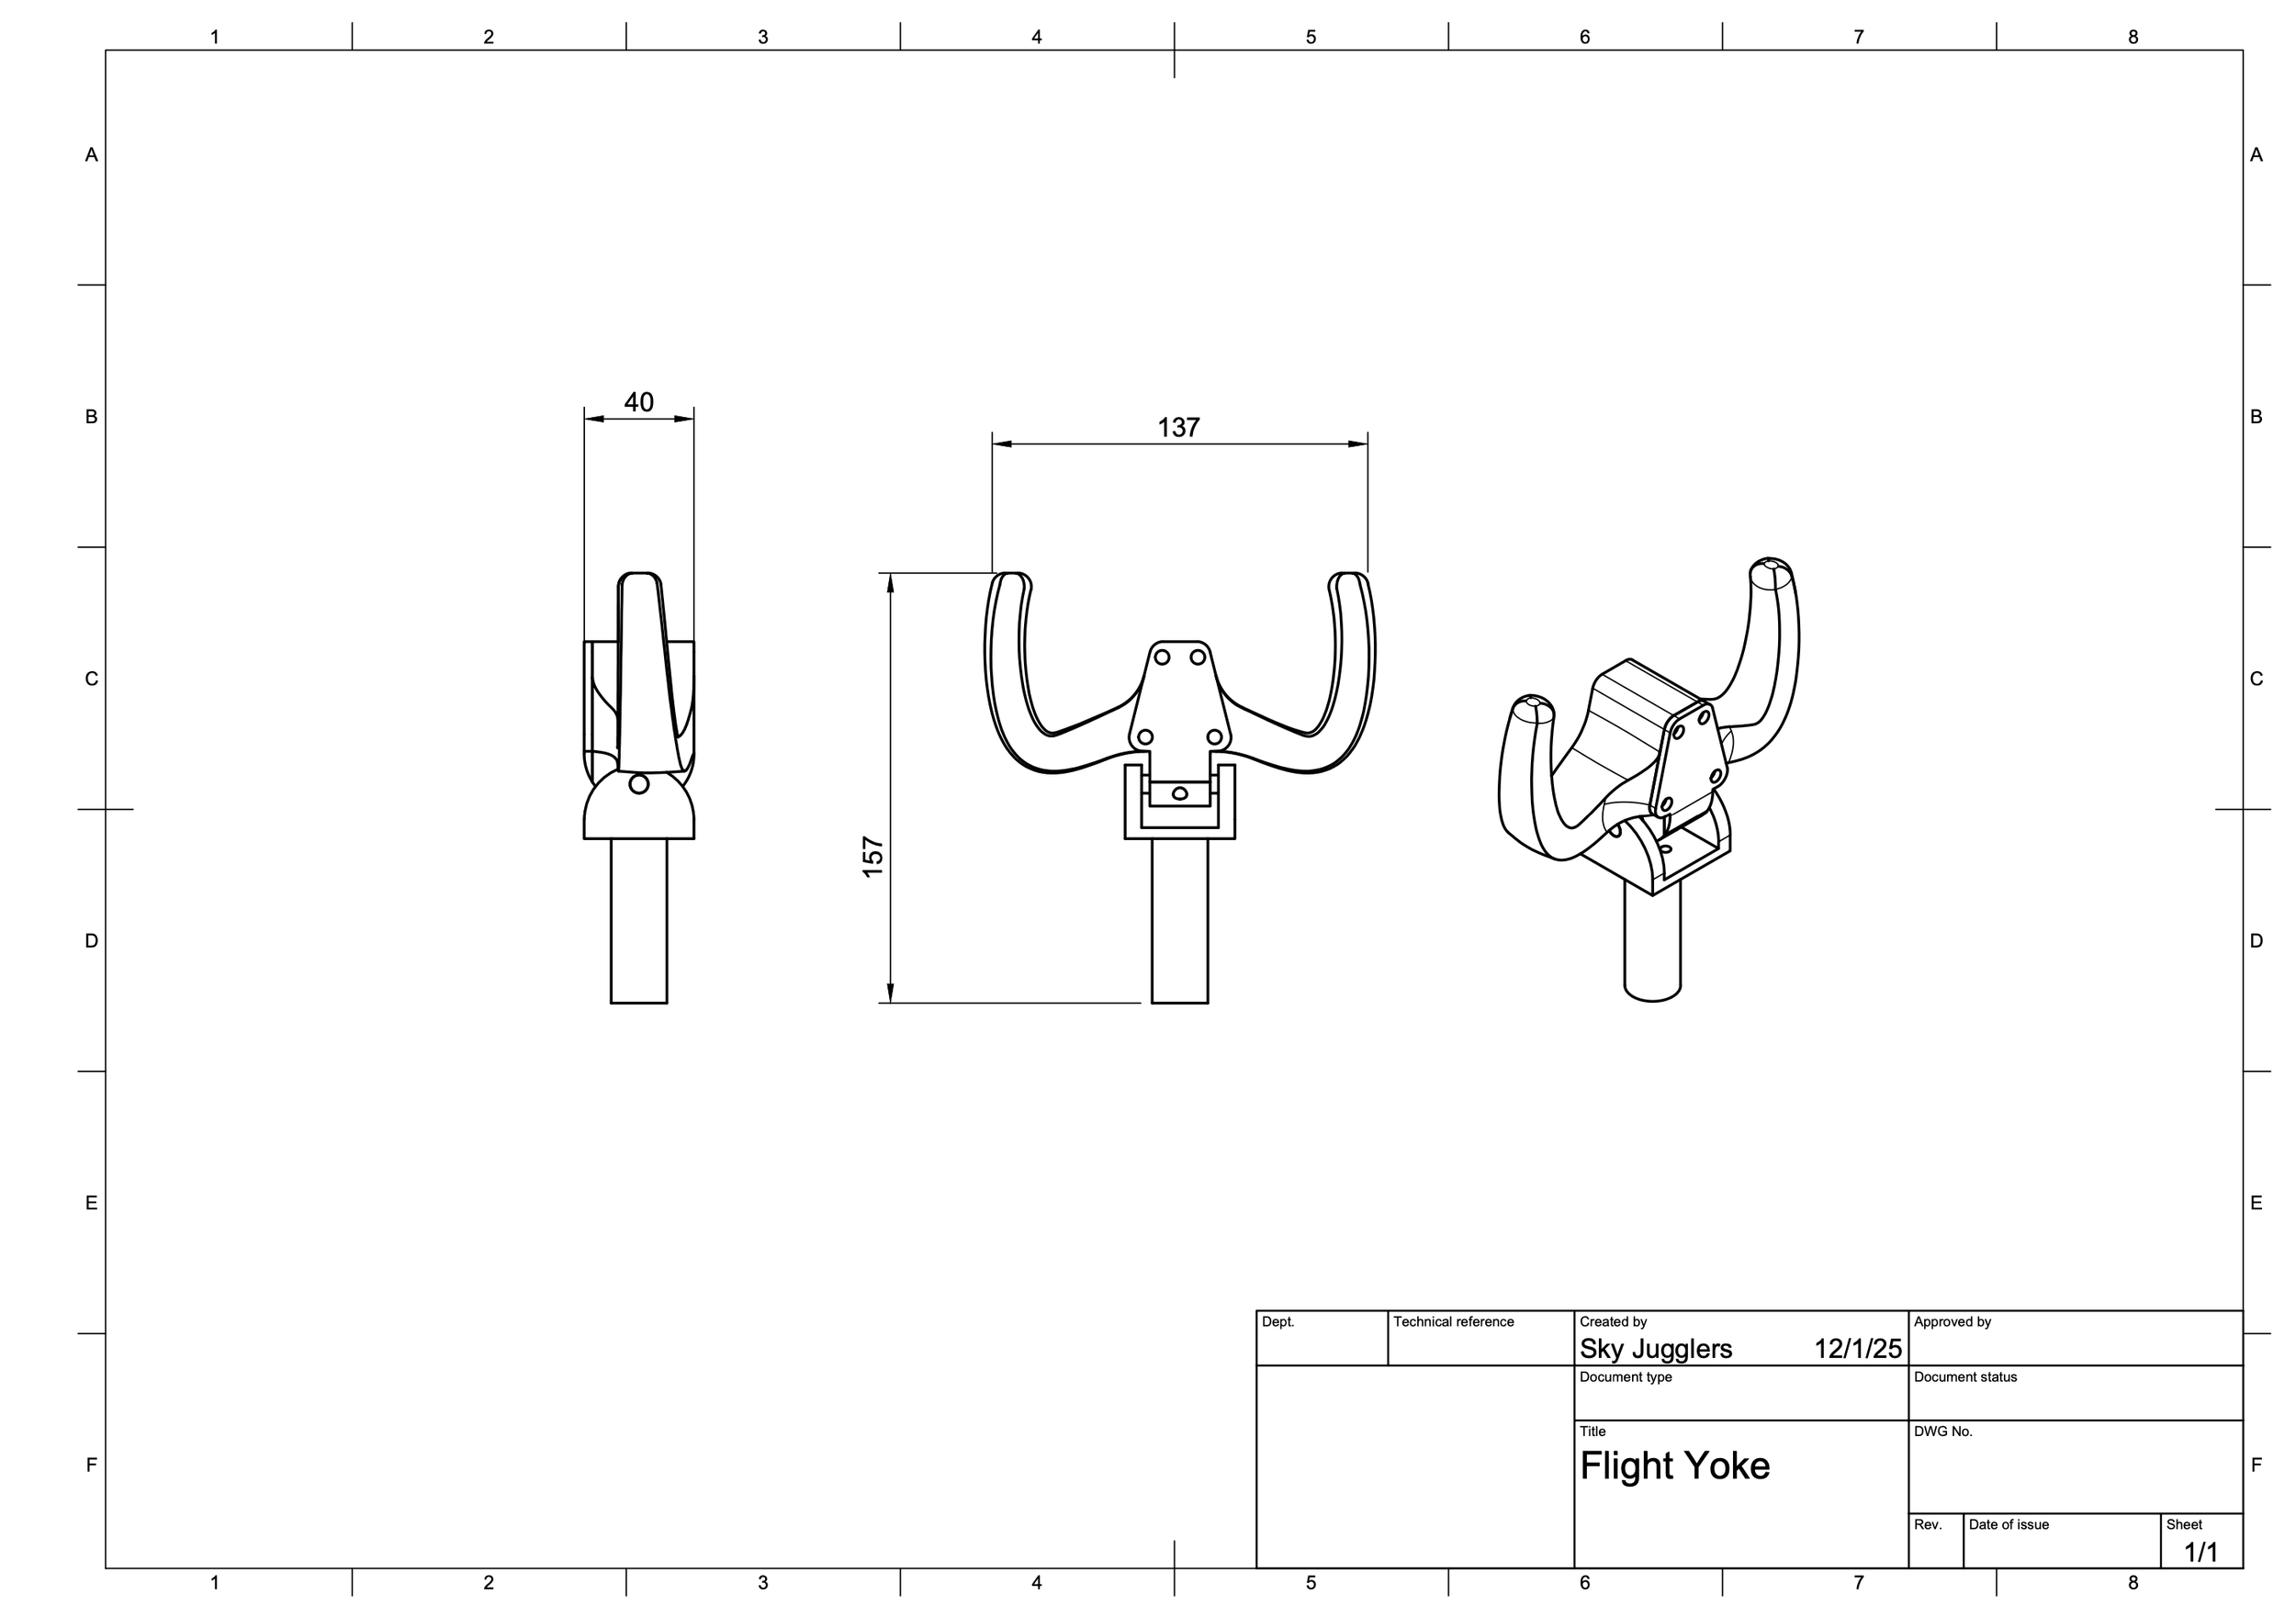
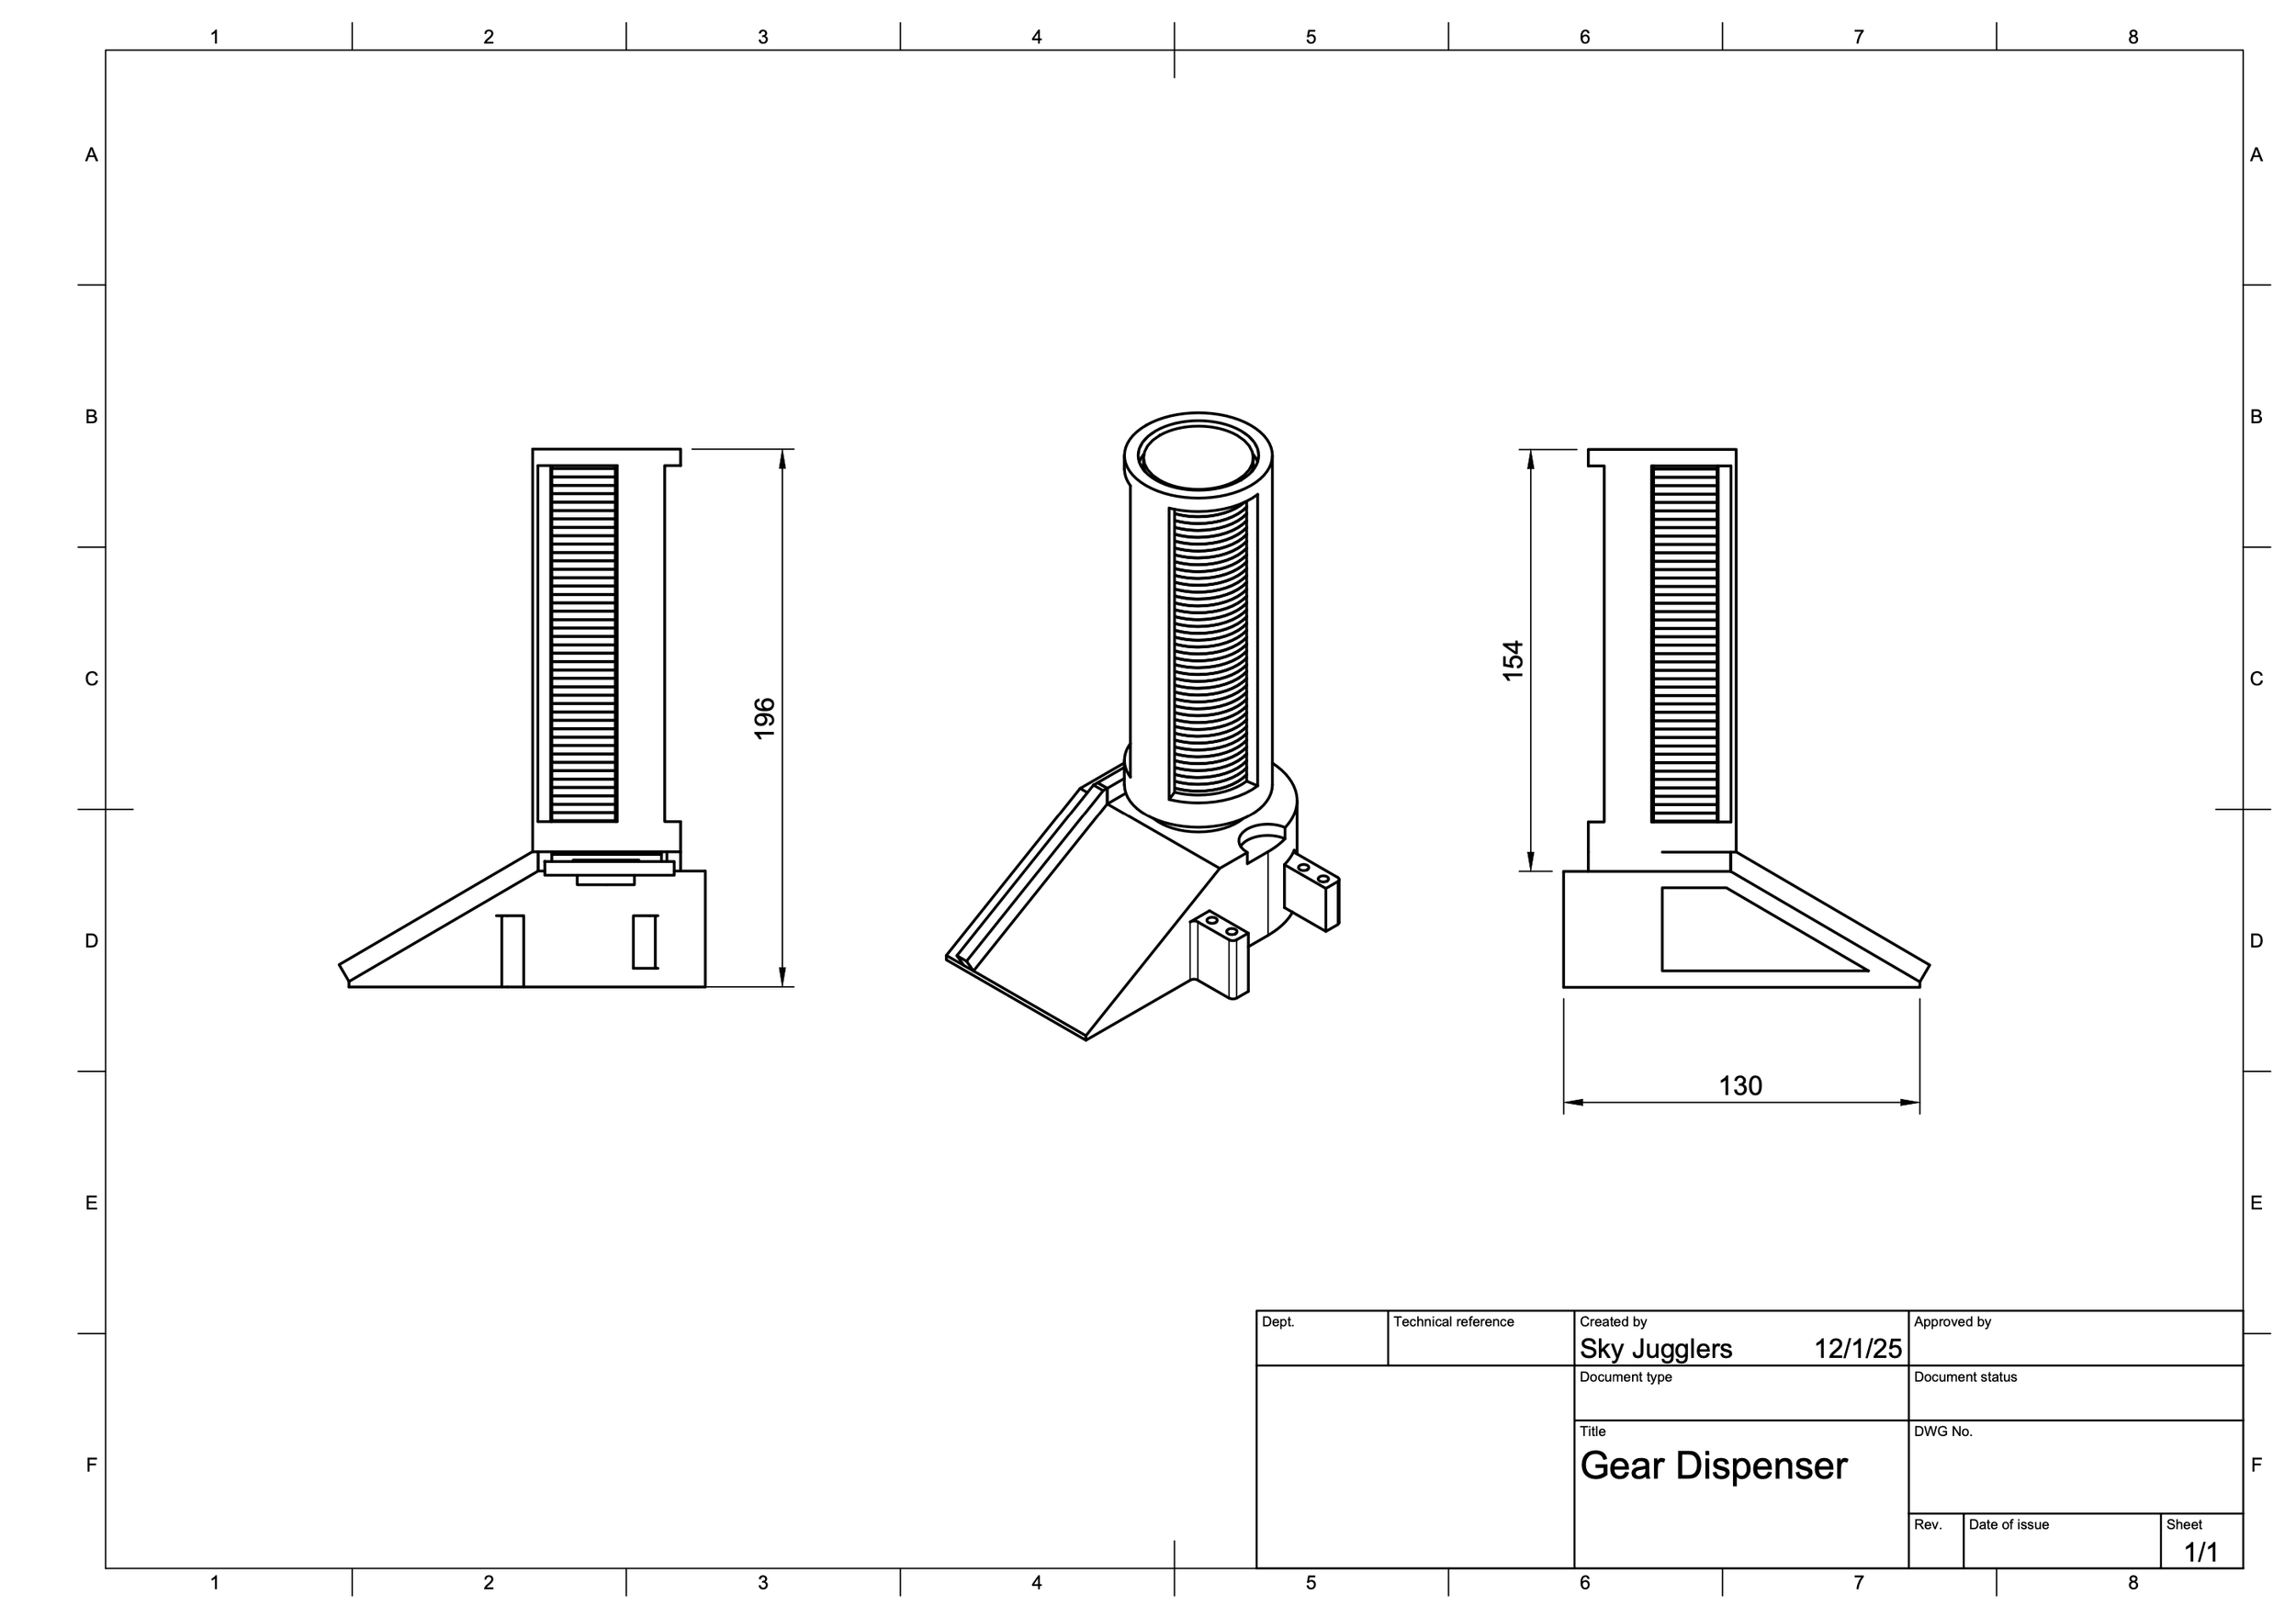
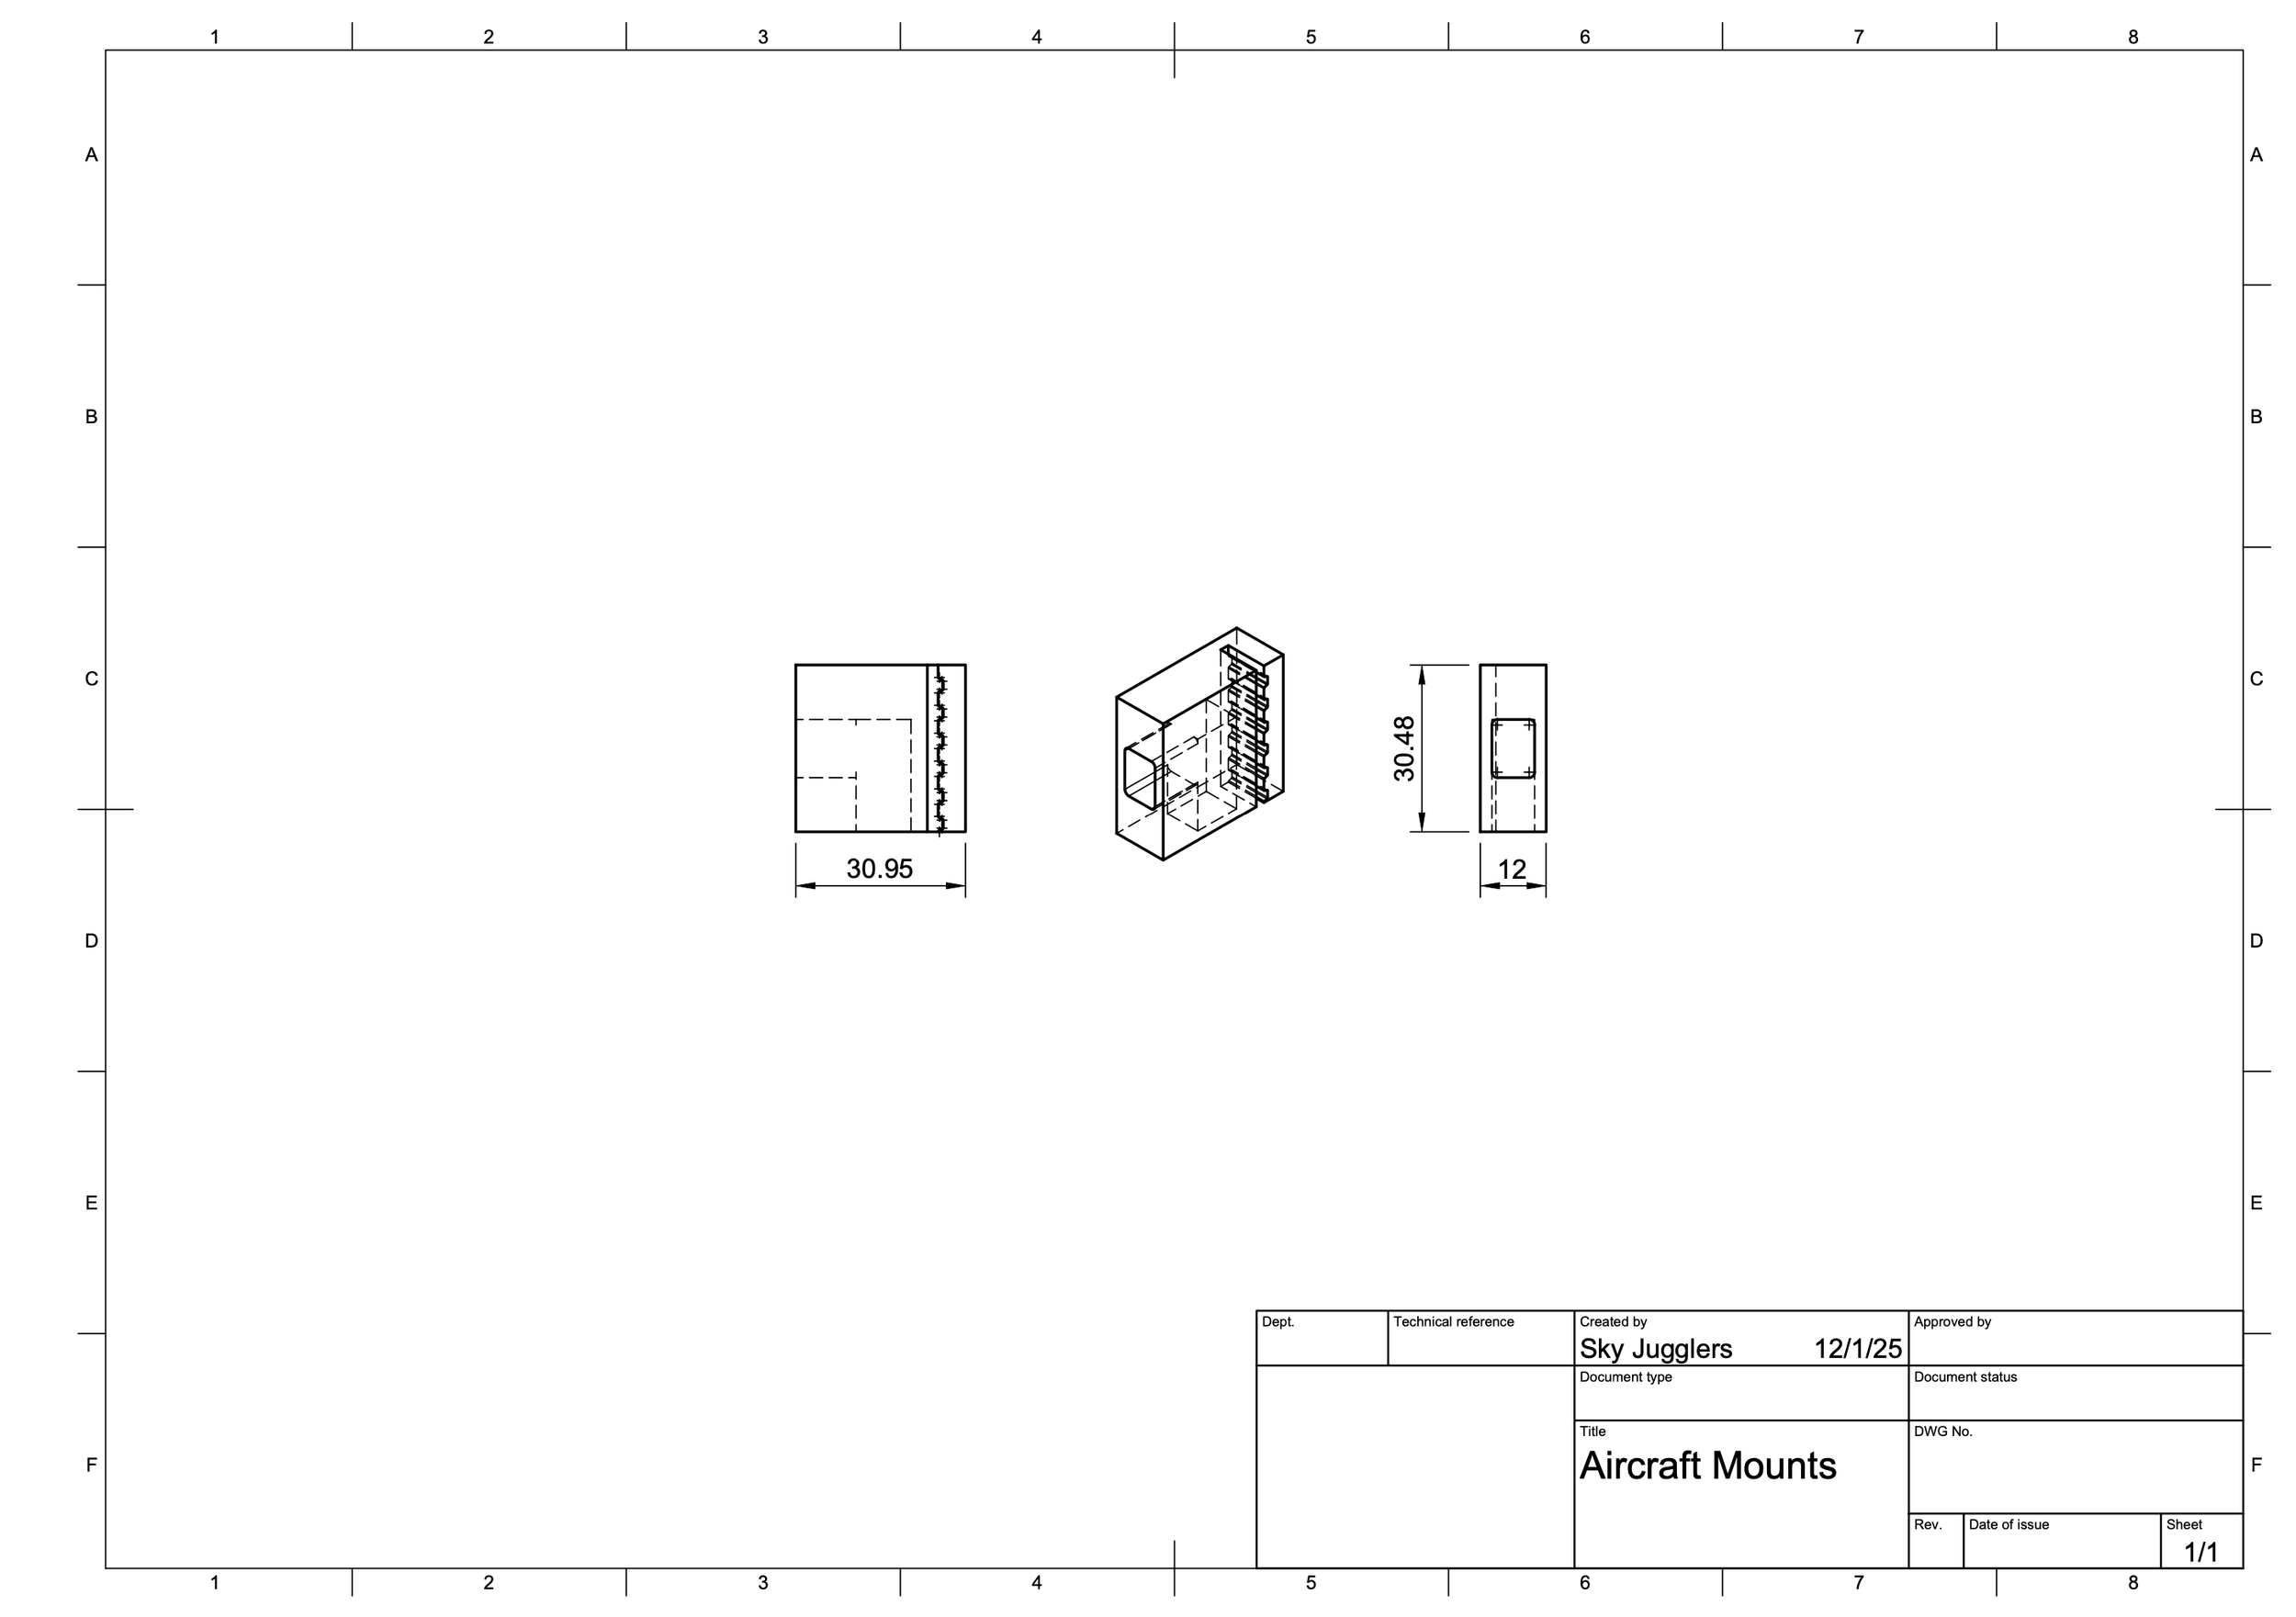
Electrical
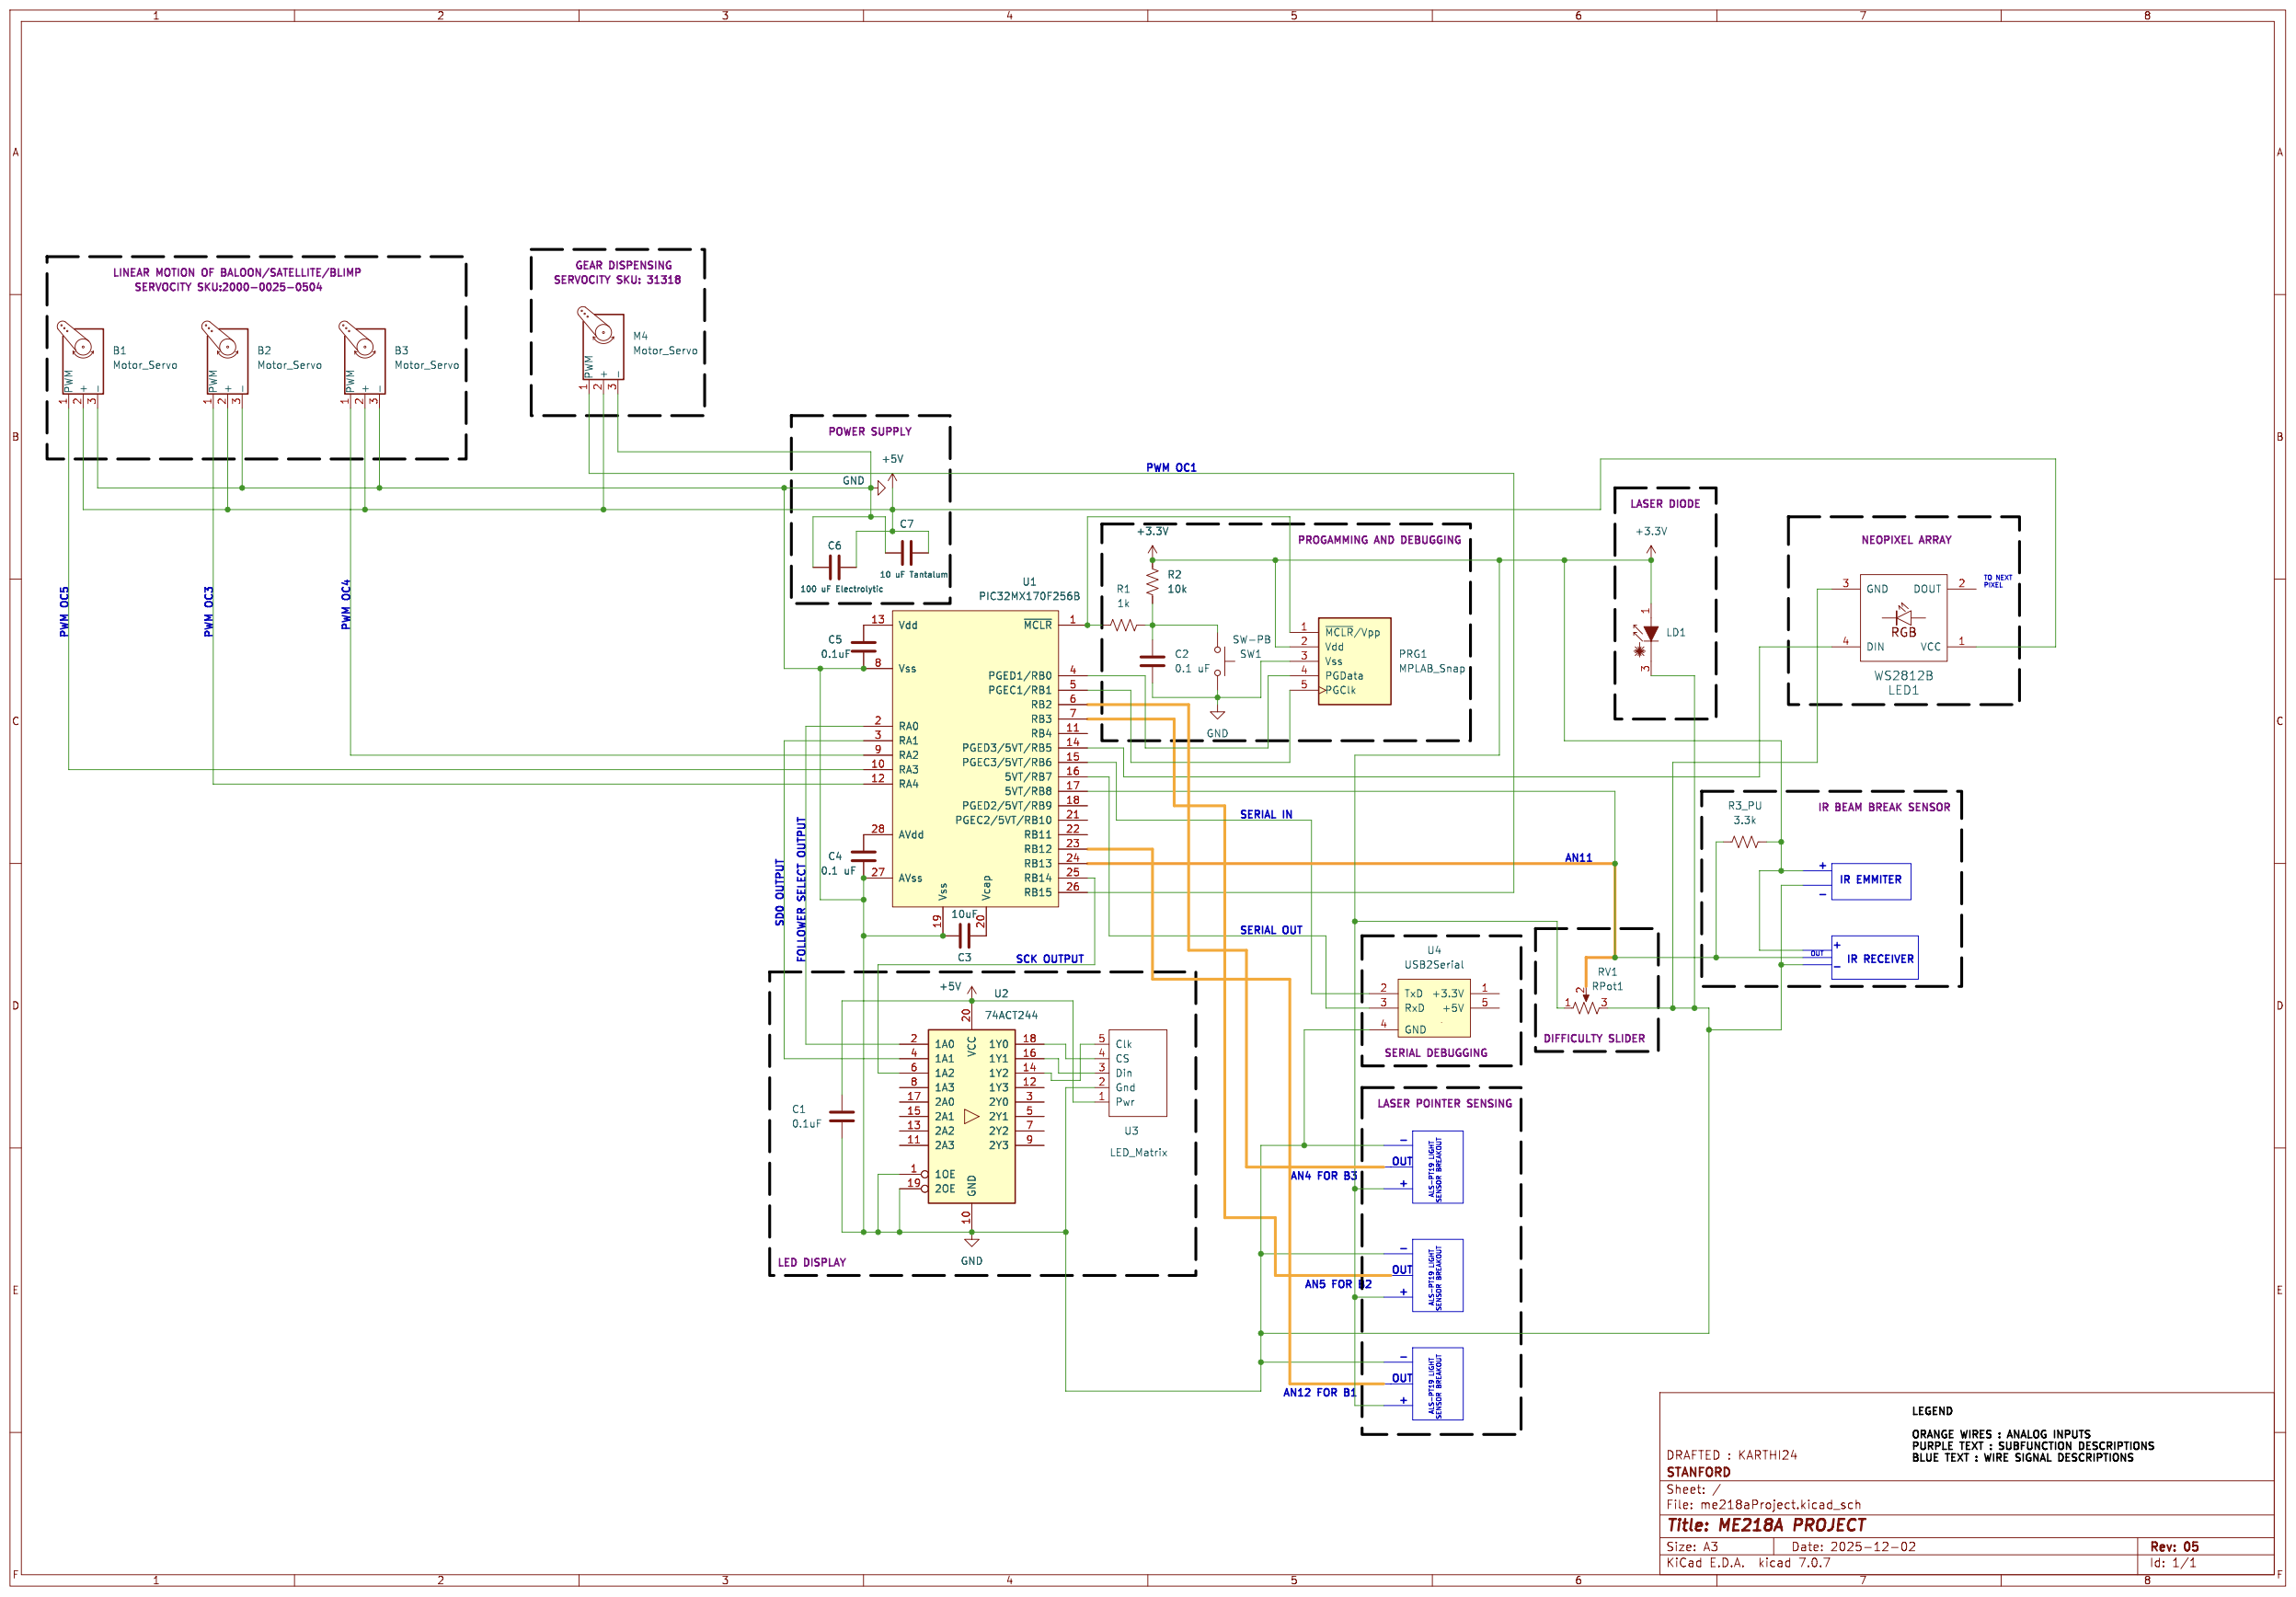
Circuit Diagram
Electrical System Overview
The system is made up of one PIC32MX170F256B (PIC32) microcontroller. All the subcomponents are controlled by the singular PIC32. At power on, a singular LED matrix displays "Welcome" and waits for the user to start the game.
After powering on the game, the player sets the difficulty level (through a potentiometer) and starts the game by swiping a card (through an infrared break beam sensor). NeoPixel lights that are wrapped around the base of the game box change color as the difficulty level is changed.
Three objects (balloon, blimp, and satellite) attached to three separate servos with pulleys begin descending when the game starts. The players can raise the objects by shining the laser diode inside the 3D printed airplane yoke at the center of each object, which each house an analog light sensor.
When the timer runs out, regardless if the player wins or loses, two gears are dispensed using another motor servo.
Due to time constraints, we did not transfer the breadboard circuit onto a protoboard, but many measures were taken to ensure the wiring was as robust and decluttered as possible. Wires or breakout pins of each subcomponent were permanently elongated with solder and heatshrink or electric tape, and the power and ground of each component were connected with twisted pair cable. Red and white twisted pair cables were used for 3.3V connections, and green and white twisted pair cables were used for 5V connections to reduce confusion and loose wiring.
Finally, two wires connected external power to the box internal electronics. The 3.3V source plugged into the power source located on the breadboard, where all of the rails were made 3.3V. The 5V source came from an external 5V regulated power supply which connected to a terminal block that was housed inside the game box. All 3.3V power electronics were connected to the breadboard, and all 5V power electronics were connected to the terminal block.
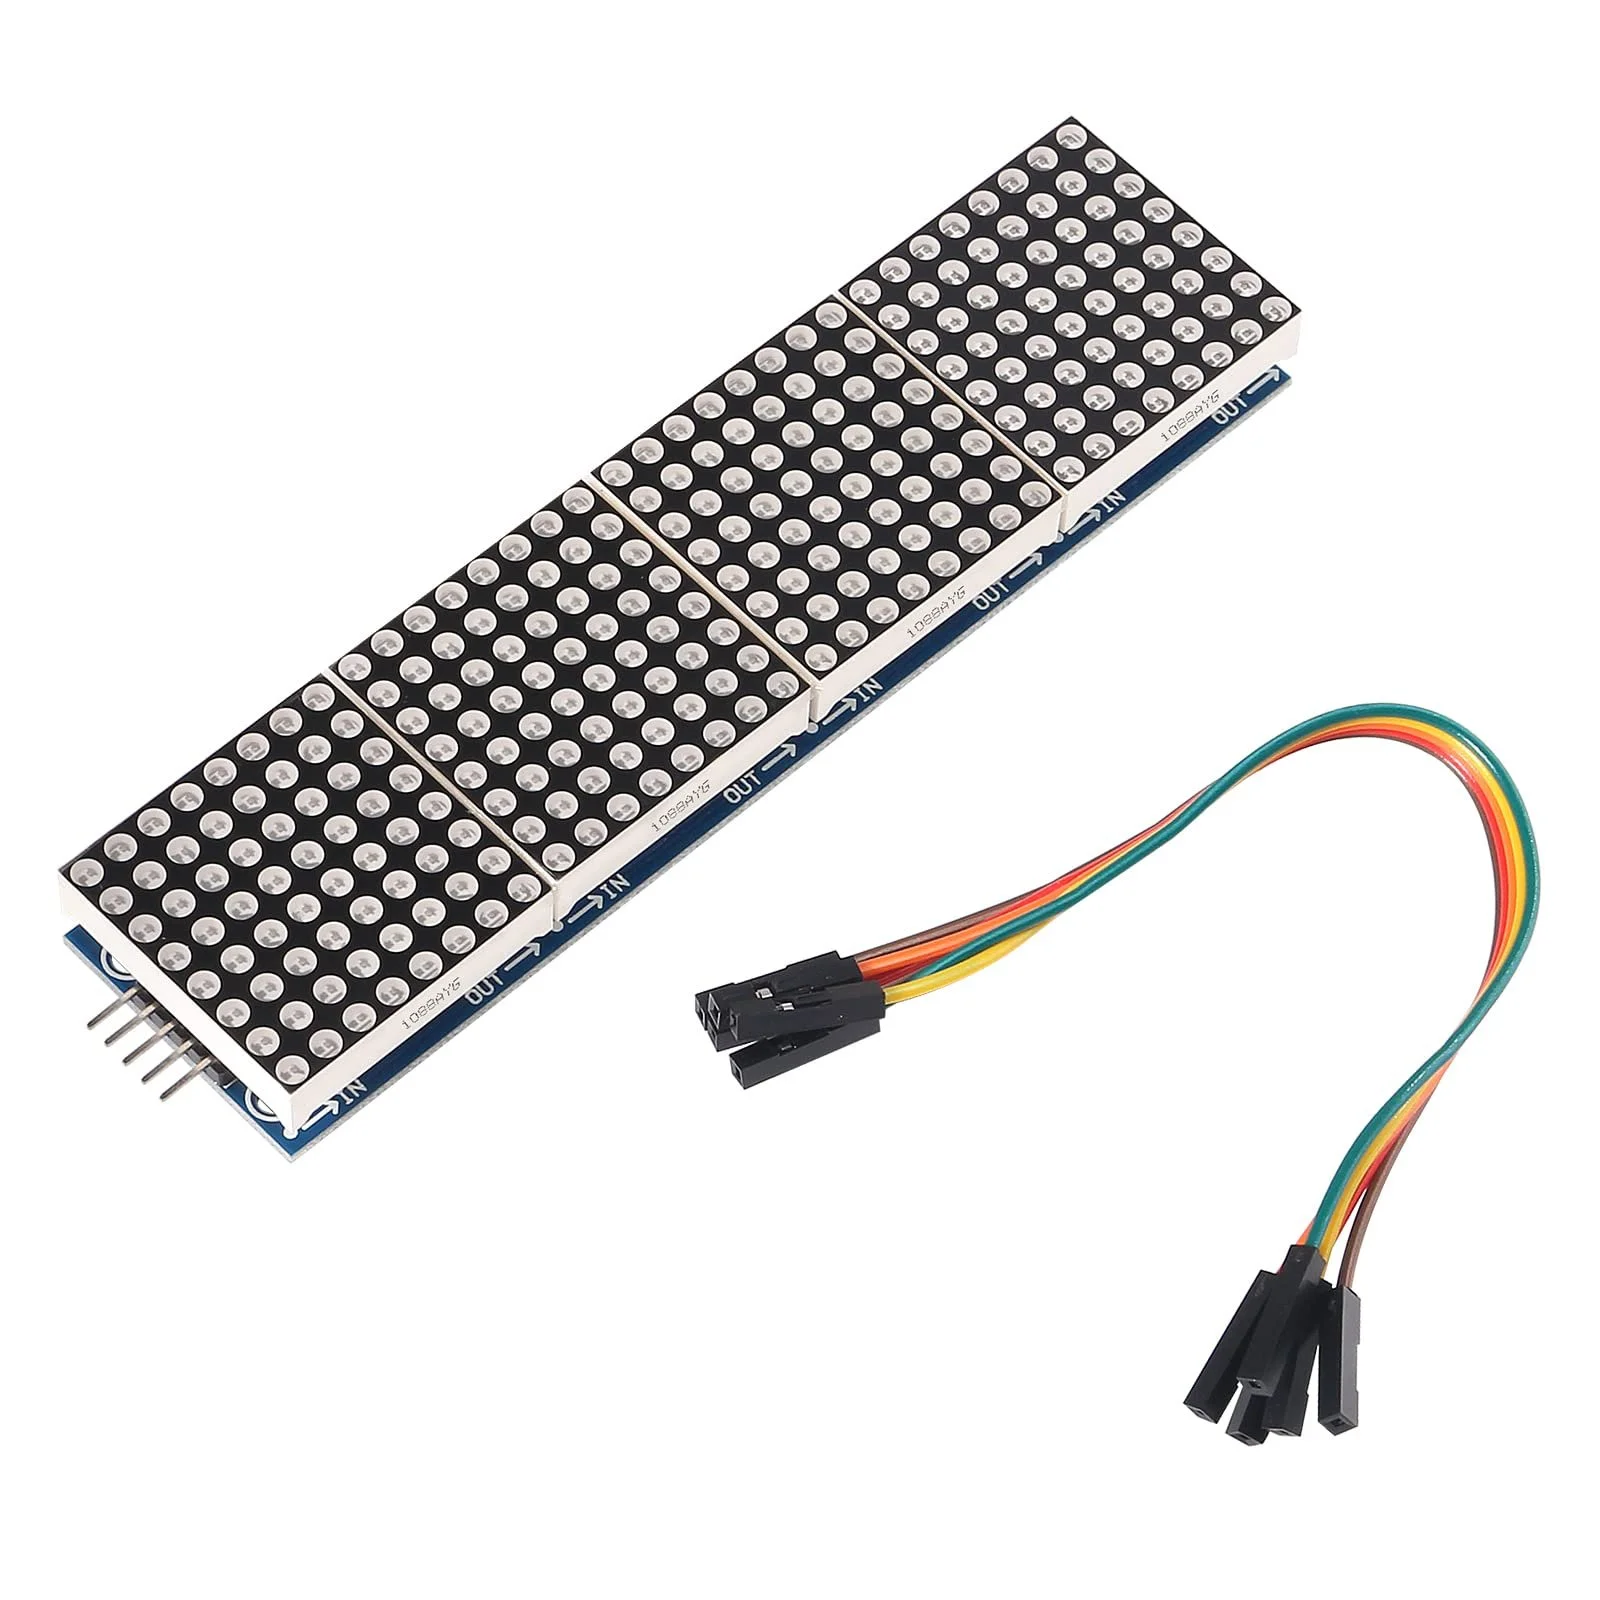
Dot LED Matrix (Display)
The MAX7219 Dot Matrix Module connects to both the PIC32 microcontroller and the 74ACT244 buffer, which increases the signal voltage from 3.3V out of the PIC32 to 5V as required by the LED dot display.
Interactive View
Potentiometer (Difficulty Slider)
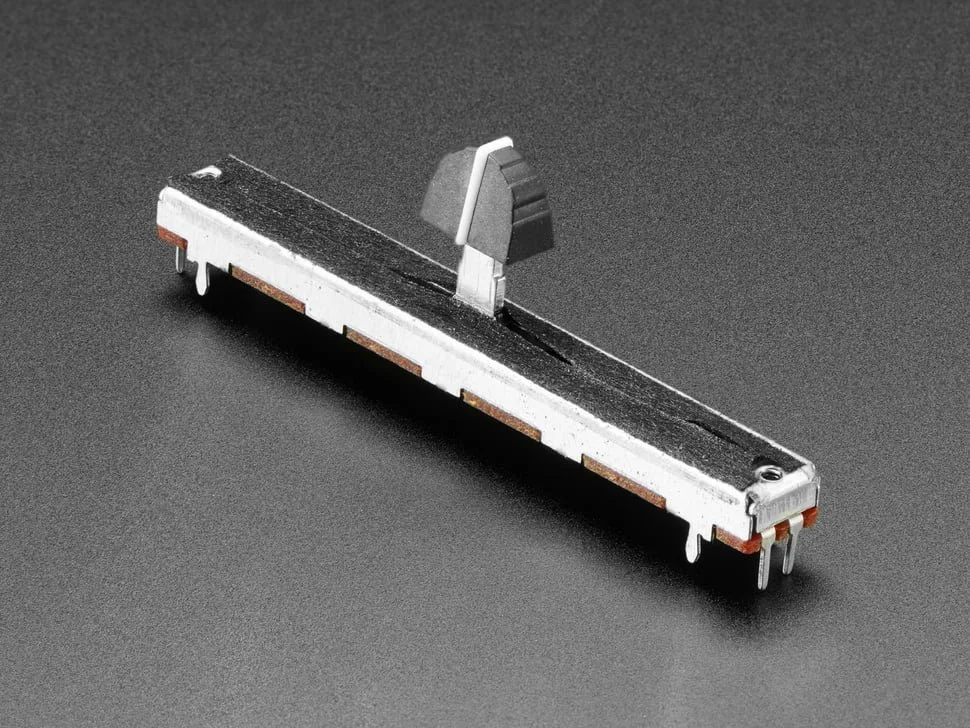
The slide potentiometer serves as an analog input device for user-controlled position or value adjustment. It forms a variable voltage divider, outputting a continuous analog voltage proportional to the slider’s position. This voltage is read by the PIC32’s ADC (Analog-to-Digital Converter), allowing the microcontroller to interpret the slider’s position for real-time control or parameter tuning within the system. The 10 kΩ resistance provides stable, low-noise analog signals while minimizing current draw.
NeoPixels
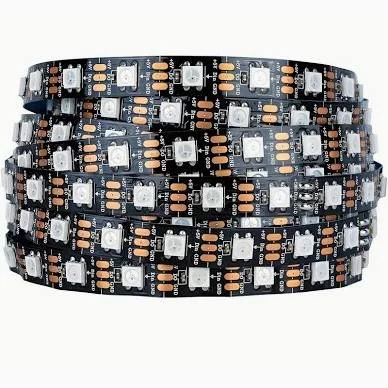
The NeoPixel strip consists of 60 RGB LEDs with integrated driver ICs, allowing each LED to be individually addressed along a single data line. The strip operates from a regulated 5 V supply, with a common ground shared with the PIC32 microcontroller. The PIC32 sends a timing-specific PWM data signal that encodes color and brightness information for each LED. This configuration enables complex lighting patterns using only one control pin while minimizing external circuitry and preserving consistent LED performance across the strip.
IR Beam Break Sensor (Card Reader)
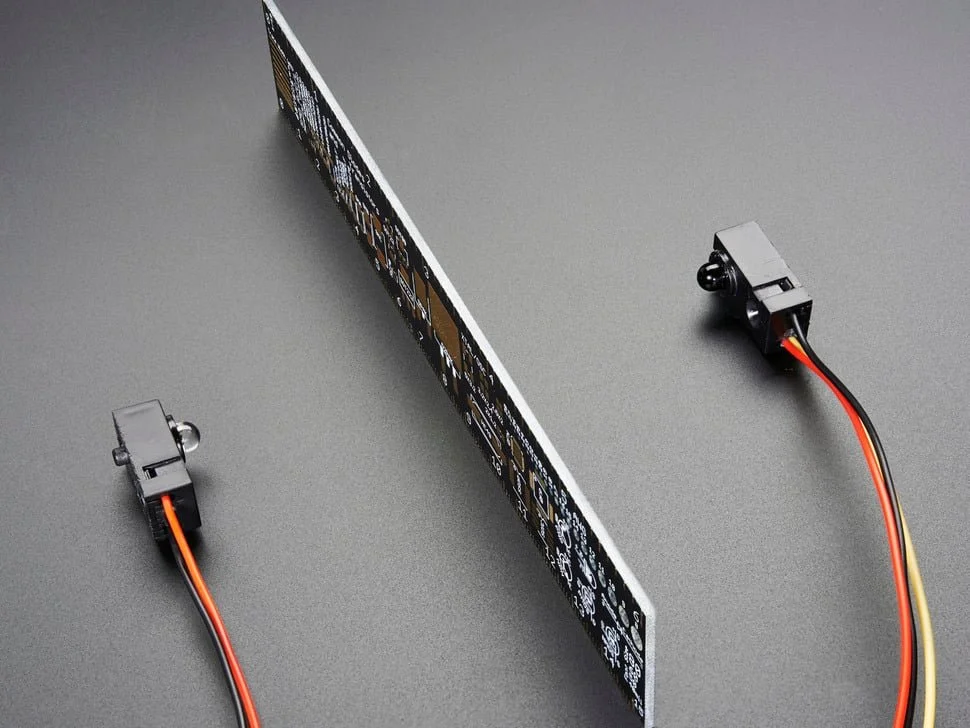
The IR break-beam sensor uses an infrared emitter and a corresponding receiver placed opposite each other. The emitter continuously sends an invisible IR beam; when an object interrupts that beam, the receiver detects the interruption and changes its output. The receiver’s output is a digital signal (open-collector) that goes LOW when the beam is broken and HIGH when the beam is intact. The sensor can be powered from 3.3 V to 5 V (5 V giving the best range, up to ~50 cm), with common ground shared with the microcontroller. A pull-up resistor (internal or external ~10 kΩ) is required on the signal line so the microcontroller reads a clean digital HIGH/LOW.
Servo Motor (Gear Dispenser)
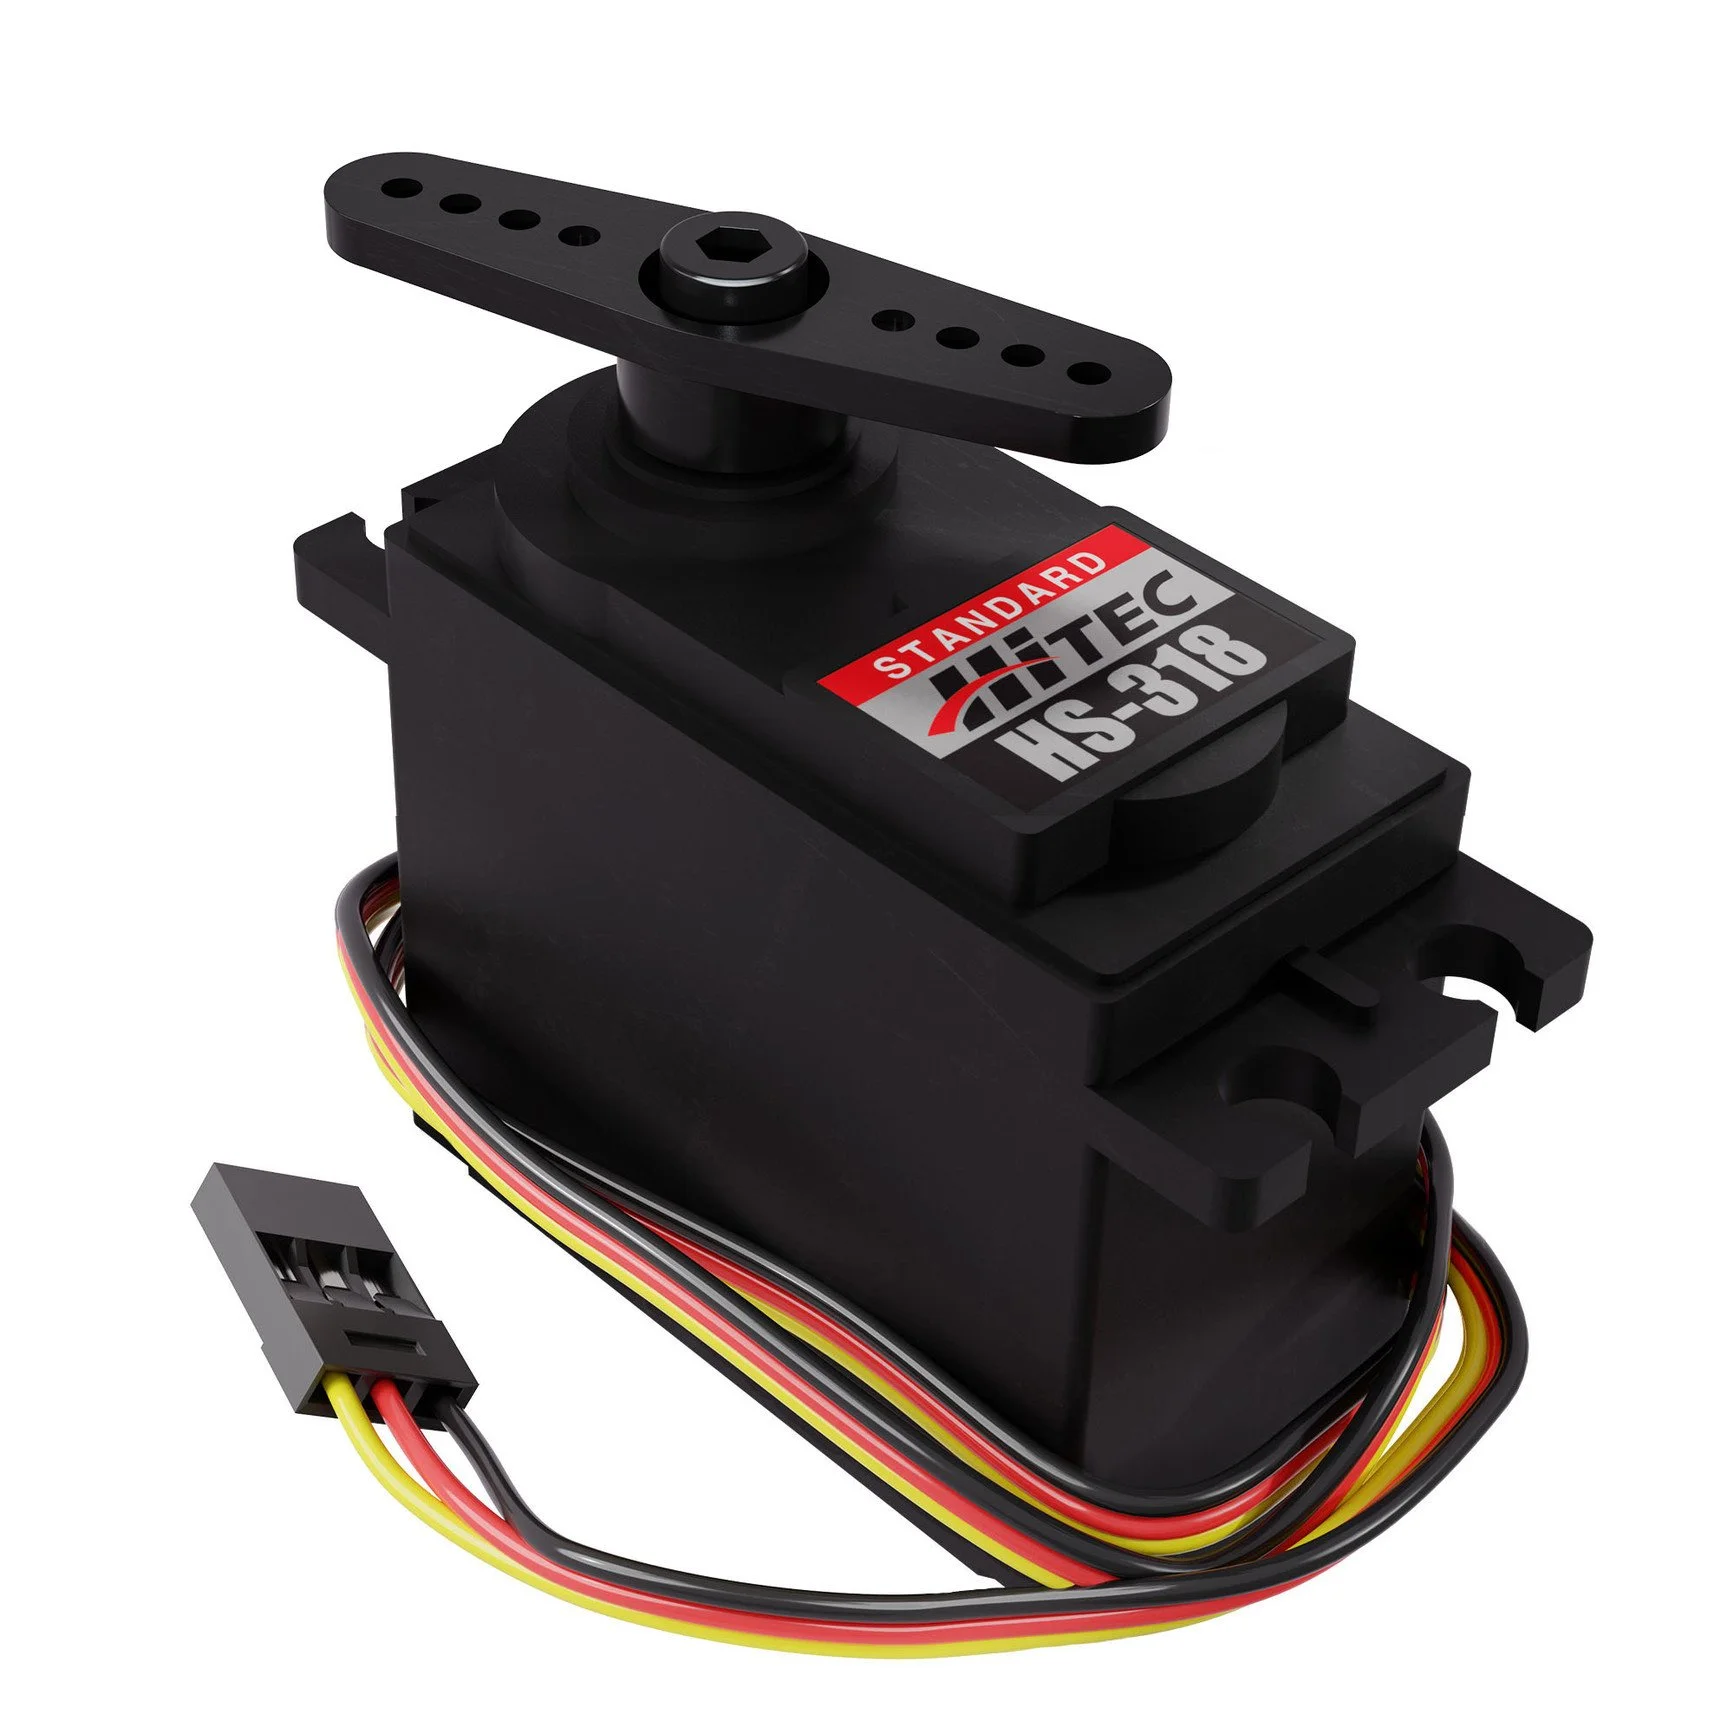
The HS-318 is a standard-size servo motor providing a controlled rotational shaft output, used to actuate the gear dispenser at the end of the game. It operates over a 4.8 V–6.0 V supply range, driven by a PWM control signal from the microcontroller.
Internally, the servo contains a DC motor, a small potentiometer for feedback, and nylon (resin) gears — together forming a closed-loop mechanism that positions the output shaft precisely according to the pulse-width of the control signal. When commanded, the PIC32 sends a periodic pulse with the pulse width specifying the target angle. The servo’s internal controller drives the motor until the internal potentiometer matches the desired shaft position — enabling reliable, repeatable movement of the gear dispenser.
The HS-318 has moderate torque (≈ 3.0–3.7 kg·cm) and speed (~0.15–0.19 sec/60°) and is suitable for actuating small mechanical loads like a gear dispense.
Servo Motor (Pulley System)
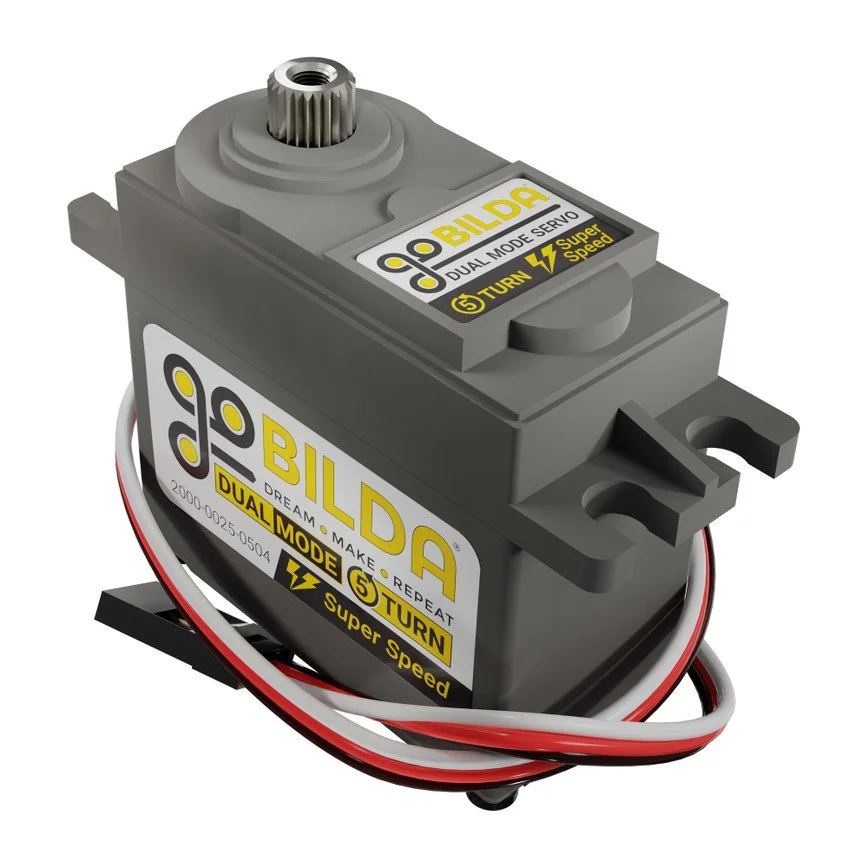
The 2000-Series Dual-Mode servo is a standard-sized servo that can operate in two different modes: 1) Default mode (positional mode), which accepts a PWM control signal, directly determining the angular position of the output shaft, and 2) Continuous-rotation mode, in which PWM controls rotational speed rather than absolute position. This mode allows for dynamic motion or repeated up/down cycles if needed.
Key electrical/mechanical characteristics: the servo operates over a supply voltage range of roughly 4.8 V to 7.4 V. Supporting hardware includes steel gears, dual ball-bearing shaft support, and a 25-tooth spline output. These servos were used to drive the up/down motion of three separate targets via pulley systems — leveraging their positional control for precise placement of targets.
Software
State Diagram
Code
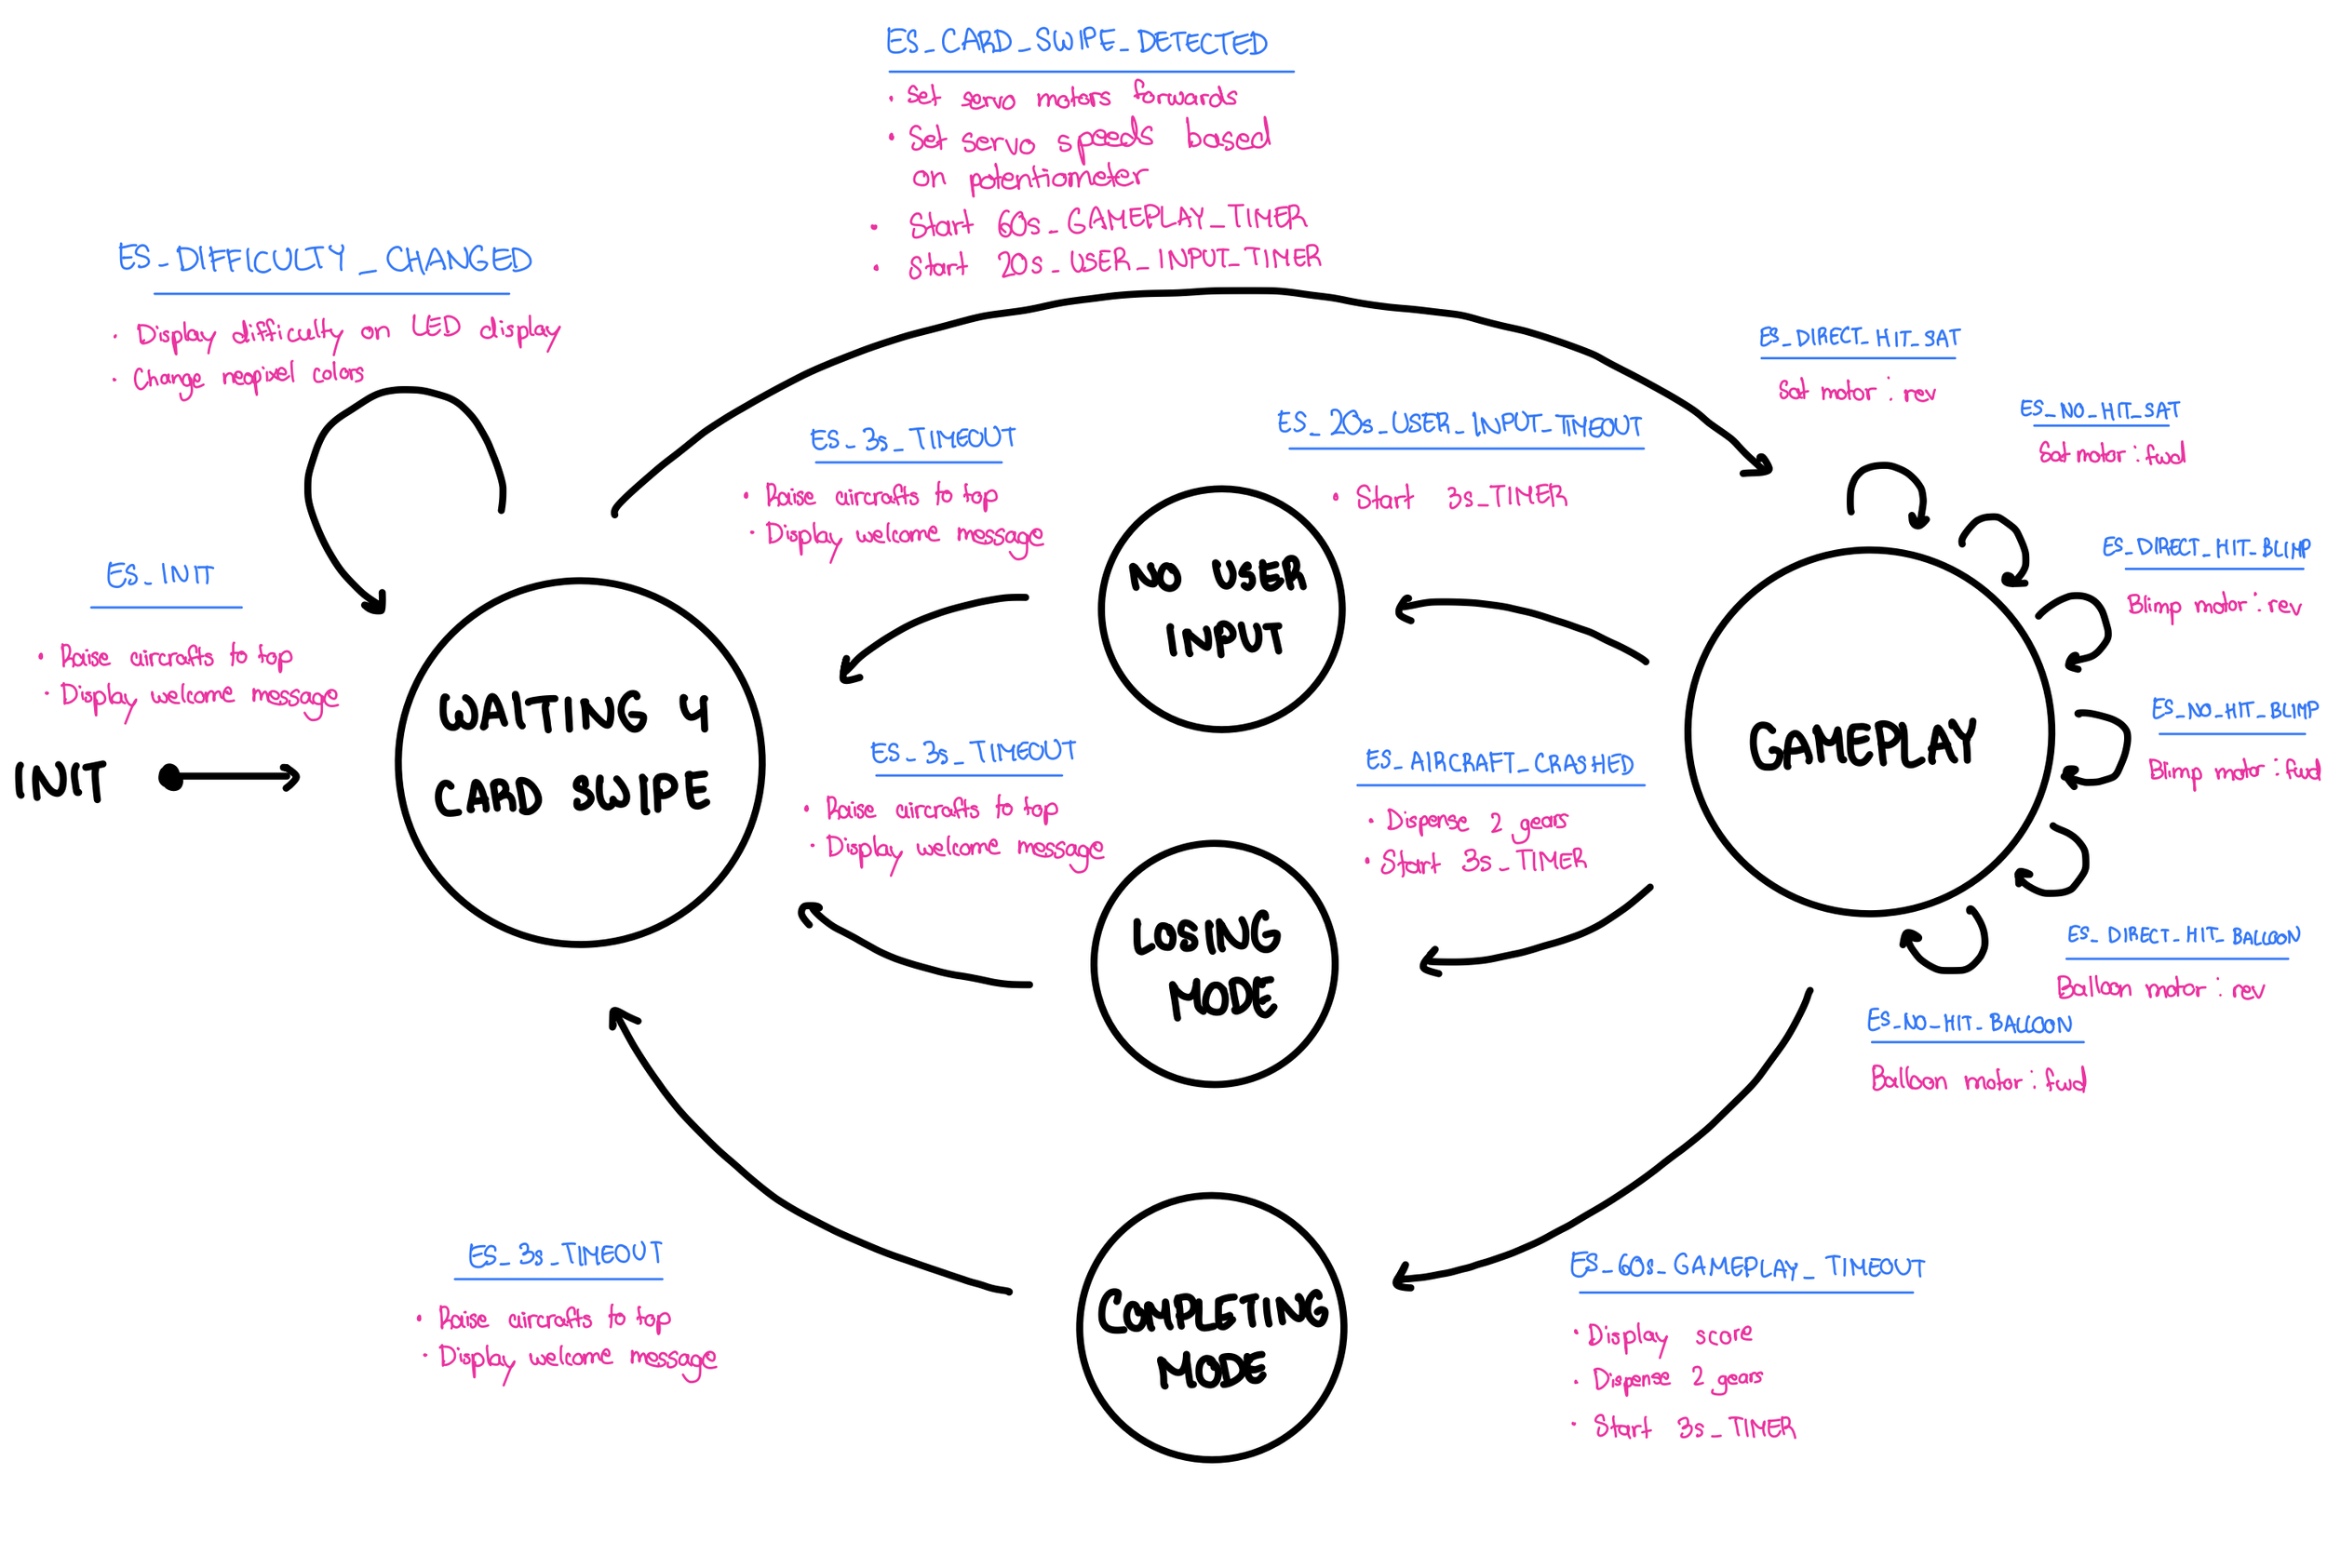
This section outlines the three services we wrote and consist of a top level Game state machine, a Motor control service and an LED service. The entire code repository can be found here.
GameSM
The GameSM controls the main actions of the overall game. This service keeps track of the different states and posts events to the LEDService and MotorCtrl. Game FSM will also handle gameplay and user inactivity timers. There is also a testing mode built in which was used for debugging.
-
DEFINE STATES:
GS_InitPState, GS_WaitingForHandWave, GS_Gameplay,
GS_NoUserInput, GS_LosingMode, GS_CompletingMode,
GS_TestMode
GLOBAL VARIABLES:
CurrentState // current game state
SecondsLeft // remaining game time (0–60 s)
g_Score // accumulated score over one game
MyPriority // service priority in ES framework
INITIALIZE HARDWARE (helper):
FUNCTION GameHW_InitPins():
CONFIGURE beam break pin as digital input with pull-up
CONFIGURE slider pin (AN11) as analog input
CONFIGURE 3 ALS sensor pins (AN12, AN5, AN4) as analog inputs
CONFIGURE ADC auto-scan for AN4, AN5, AN11, AN12
CAPTURE BASELINES (helper):
FUNCTION CaptureALS_Baselines_Init():
FOR i = 1..N samples:
READ ADC_MultiRead into array adc[]
EXTRACT an4, an5, an12 channels from adc[]
ACCUMULATE sums for each channel
COMPUTE average baseline for each channel
CALL Targets_SetBaselines(baseline_AN12, baseline_AN5, baseline_AN4)
FUNCTION InitGameSM(Priority):
SET MyPriority = Priority
CALL GameHW_InitPins()
IF START_IN_TEST_MODE is defined:
SET CurrentState = GS_TestMode
ELSE:
SET CurrentState = GS_InitPState
ENDIF
POST Event: ES_INIT to this service
RETURN success or failure
FUNCTION PostGameSM(Event):
POST Event to this state machine's queue
RETURN success or failure
FUNCTION RunGameSM(Event):
EventType = Event.EventType
SWITCH CurrentState:
CASE GS_InitPState:
IF EventType == ES_INIT:
CALL CaptureALS_Baselines_Init() // average ALS sensors at boot
POST Event ES_LED_SHOW_MESSAGE with param LED_MSG_WELCOME to LEDService
CALL MC_RaiseAllToTop() // move all balloons to top
SET CurrentState = GS_WaitingForHandWave
ENDIF
CASE GS_WaitingForHandWave:
SWITCH EventType:
CASE ES_DIFFICULTY_CHANGED:
pct = Event.EventParam // 0–100%
POST Event ES_LED_SHOW_DIFFICULTY(pct) to LEDService
CALL MC_SetDifficultyPercent(pct) // adjust balloon speed
CASE ES_HAND_WAVE_DETECTED:
g_Score = 0
SecondsLeft = 60
POST Event ES_LED_SHOW_COUNTDOWN(SecondsLeft) to LEDService
START Timer(TID_GAME_60S, 60 000 ms)
START Timer(TID_INACTIVITY_20S, 20 000 ms)
START Timer(TID_TICK_1S, 1 000 ms)
CALL MC_CommandFall(1) // all balloons start falling
CALL MC_CommandFall(2)
CALL MC_CommandFall(3)
SET CurrentState = GS_Gameplay
END SWITCH
CASE GS_Gameplay:
SWITCH EventType:
// Laser hit events – when hit, balloon should rise
CASE DIRECT_HIT_B1:
CALL MC_CommandRise(1)
RESTART Timer(TID_INACTIVITY_20S, 20 000 ms)
CASE DIRECT_HIT_B2:
CALL MC_CommandRise(2)
RESTART Timer(TID_INACTIVITY_20S, 20 000 ms)
CASE DIRECT_HIT_B3:
CALL MC_CommandRise(3)
RESTART Timer(TID_INACTIVITY_20S, 20 000 ms)
// When no hit, balloon should fall
CASE NO_HIT_B1:
CALL MC_CommandFall(1)
CASE NO_HIT_B2:
CALL MC_CommandFall(2)
CASE NO_HIT_B3:
CALL MC_CommandFall(3)
// Timer events
CASE ES_TIMEOUT:
IF Event.EventParam == TID_TICK_1S:
IF SecondsLeft > 0:
DECREMENT SecondsLeft
ENDIF
POST ES_LED_SHOW_COUNTDOWN(SecondsLeft) to LEDService
afloat = MC_CountBalloonsAboveDangerline()
g_Score = g_Score + afloat // scoring: add #safe balloons each second
RESTART Timer(TID_TICK_1S, 1000 ms)
ELSE IF Event.EventParam == TID_GAME_60S:
// Game time finished – victory path
SET CurrentState = GS_CompletingMode
POST ES_LED_SHOW_SCORE(g_Score) to LEDService
START Timer(TID_MODE_3S, 3000 ms)
ELSE IF Event.EventParam == TID_INACTIVITY_20S:
// User did nothing for 20 s – inactivity timeout
SET CurrentState = GS_NoUserInput
START Timer(TID_MODE_3S, 3000 ms)
ENDIF
CASE ES_OBJECT_CRASHED:
// Any balloon hit floor – losing condition
SET CurrentState = GS_LosingMode
POST ES_LED_SHOW_SCORE(g_Score) to LEDService
START Timer(TID_MODE_3S, 3000 ms)
END SWITCH
CASE GS_NoUserInput:
IF EventType == ES_TIMEOUT AND Event.EventParam == TID_MODE_3S:
CALL MC_RaiseAllToTop()
POST ES_LED_SHOW_MESSAGE(LED_MSG_WELCOME) to LEDService
SET CurrentState = GS_WaitingForHandWave
ENDIF
CASE GS_LosingMode:
IF EventType == ES_TIMEOUT AND Event.EventParam == TID_MODE_3S:
CALL MC_RaiseAllToTop()
CALL MC_DispenseTwoGearsOnce() // dispense prize gears
POST ES_LED_SHOW_MESSAGE(LED_MSG_WELCOME) to LEDService
SET CurrentState = GS_WaitingForHandWave
ENDIF
CASE GS_CompletingMode:
IF EventType == ES_TIMEOUT AND Event.EventParam == TID_MODE_3S:
CALL MC_RaiseAllToTop()
CALL MC_DispenseTwoGearsOnce() // dispense prize gears
POST ES_LED_SHOW_MESSAGE(LED_MSG_WELCOME) to LEDService
SET CurrentState = GS_WaitingForHandWave
ENDIF
CASE GS_TestMode:
// Calibration / debug mode driven by keyboard events
// Stop balloon update timer so we can manually move servos
STOP Timer(TID_BALLOON_UPDATE)
IF EventType == ES_NEW_KEY:
k = (char)Event.EventParam
SWITCH k:
CASE '1':
CALL CaptureALS_Baselines_Init()
CASE '2':
PRINT current beam-break input value
CASE '3':
CALL MC_RaiseAllToTop()
CASE 'm':
TEST single servo by setting PWM to a debug pulse width
CASE 'a':
READ ADC_MultiRead
PRINT slider and 3 ALS values
CASE '8':
CALL MC_CommandRise(1)
CASE 'q':
CALL MC_CommandFall(1)
CASE '9':
CALL MC_CommandRise(2)
CASE 'w':
CALL MC_CommandFall(2)
CASE 'f':
CALL MC_CommandRise(3)
CASE 'e':
CALL MC_CommandFall(3)
CASE 'g':
CALL MC_DispenseTwoGearsOnce()
CASE 'd':
CALL MC_DebugPrintAxes()
CASE 'l':
POST ES_LED_SHOW_MESSAGE(LED_MSG_WELCOME) to LEDService
CASE 'x':
POST ES_LED_SHOW_MESSAGE(LED_MSG_WELCOME) to LEDService
SET CurrentState = GS_WaitingForHandWave
START Timer(TID_BALLOON_UPDATE) // restart automatic motor control
END SWITCH
ENDIF
END SWITCH
RETURN ES_NO_EVENT (or ES_ERROR on errors)
FUNCTION QueryGameFSM():
RETURN CurrentState
MotorCtrl
This service is responsible for commanding the motors for each balloon as well as the gear dispenser.
-
DATA STRUCTURES:
STRUCT Axis_t:
pos_ticks // current servo position in timer ticks
tgt_ticks // target position in ticks
max_step // max change per update frame (speed)
floor_ticks // calibrated bottom position (balloon crashed)
ceiling_ticks // calibrated top position
Ax[3] // one Axis_t per balloon (B1, B2, B3)
chan[3] // servo channel mapping for B1, B2, B3
g_crashed // flag: has any balloon already reported a crash?
FUNCTION MotorHW_InitServos():
CONFIGURE PWM library with 5 channels
ASSIGN servo channels to Timer3 at 50 Hz:
Channel 1 -> gear servo (OC1)
Channel 3 -> B1 (OC3)
Channel 4 -> B2 (OC4)
Channel 5 -> B3 (OC5)
MAP PWM channels to pins:
OC1 -> RPB15 (gear)
OC3 -> RPA3 (B1)
OC4 -> RPA4 (B2)
OC5 -> RPA2 (B3)
FUNCTION InitMotorCtrl(Priority):
SET MyPriority = Priority
START Timer(TID_BALLOON_UPDATE, 100 ms) // servo update period
CALL MotorHW_InitServos()
FOR each balloon i in {0,1,2}:
SET Ax[i].ceiling_ticks = calibrated MIN_TICKS for that servo
SET Ax[i].floor_ticks = calibrated MAX_TICKS for that servo
SET Ax[i].pos_ticks = ceiling_ticks (start at top)
SET Ax[i].tgt_ticks = ceiling_ticks
SET Ax[i].max_step = 50 ticks (temporary; overwritten later)
POST Event ES_INIT to this service
RETURN success or failure
FUNCTION PostMotorCtrl(Event):
POST Event to this service's queue
RETURN success or failure
FUNCTION RunMotorCtrl(Event):
IF EventType == ES_TIMEOUT AND EventParam == TID_BALLOON_UPDATE:
IF QueryGameSM() == GS_Gameplay:
FOR each balloon i in {0,1,2}:
delta = Ax[i].tgt_ticks - Ax[i].pos_ticks
LIMIT delta to range [−Ax[i].max_step, +Ax[i].max_step]
Ax[i].pos_ticks = Ax[i].pos_ticks + delta
// Clamp inside calibrated range
IF Ax[i].pos_ticks > Ax[i].floor_ticks:
Ax[i].pos_ticks = Ax[i].floor_ticks
IF Ax[i].pos_ticks < Ax[i].ceiling_ticks:
Ax[i].pos_ticks = Ax[i].ceiling_ticks
// Drive PWM channel with new position
SET PWM on servo channel chan[i] to Ax[i].pos_ticks ticks
// Crash detection
IF Ax[i].pos_ticks >= Ax[i].floor_ticks AND g_crashed == false:
SET g_crashed = true
POST Event ES_OBJECT_CRASHED to GameSM
RESTART Timer(TID_BALLOON_UPDATE, 100 ms)
RETURN ES_NO_EVENT
IF EventType == ES_TIMEOUT AND EventParam == TID_GEAR_SERVO:
// Timer expired means gear servo is at dispensing position
// Move it back to rest position
SET gear servo PWM to rest position ticks
RETURN ES_NO_EVENT
RETURN ES_NO_EVENT
PUBLIC HELPER FUNCTION MC_SetDifficultyPercent(pct):
MIN_STEP_TICKS = 5 // very easy
MAX_STEP_TICKS = 20 // very hard
// Linearly map pct=1..100 onto [MIN_STEP_TICKS..MAX_STEP_TICKS]
step = MIN_STEP_TICKS + (pct − 1) * (MAX_STEP_TICKS − MIN_STEP_TICKS) / 99
FOR each balloon i:
Ax[i].max_step = step
PUBLIC HELPER FUNCTION MC_DispenseTwoGearsOnce():
SET gear servo PWM to dispensing position ticks
START Timer(TID_GEAR_SERVO, 500 ms) // dwell time before returning to rest
PUBLIC HELPER FUNCTION MC_CommandRise(idx):
Ax[idx − 1].tgt_ticks = Ax[idx − 1].ceiling_ticks // move toward top
PUBLIC HELPER FUNCTION MC_CommandFall(idx):
Ax[idx − 1].tgt_ticks = Ax[idx − 1].floor_ticks // move toward bottom
PUBLIC HELPER FUNCTION MC_RaiseAllToTop():
FOR each balloon i:
Ax[i].pos_ticks = Ax[i].ceiling_ticks
Ax[i].tgt_ticks = Ax[i].ceiling_ticks
SET PWM on chan[i] to ceiling_ticks
g_crashed = false // reset crash status
PUBLIC HELPER FUNCTION MC_DebugPrintAxes():
PRINT debug information for each balloon:
pos_ticks, tgt_ticks, floor_ticks, ceiling_ticks
PUBLIC HELPER FUNCTION MC_CountBalloonsAboveDangerline():
count = 0
FOR each balloon i:
dangerLine = floor_ticks + (ceiling_ticks − floor_ticks)/4 // tunable
IF Ax[i].pos_ticks >= dangerLine:
INCREMENT count
RETURN count
LEDService
This service is responsible for controlling the LED display as well as the neopixel array we used.
-
GLOBAL VARIABLES:
MyPriority
g_DisplayInitDone // has MAX7219 init completed?
g_LedPushPending // is there content in buffer to push row-by-row?
LastDifficultyBucket // cached difficulty bucket for NeoPixel coloring
FUNCTION InitLEDService(Priority):
SET MyPriority = Priority
CALL LED_SPI_Init() // configure SPI1 + MAX7219 pins
CALL neopixel_init() // configure NeoPixel output pin
POST Event ES_INIT to this service
RETURN success or failure
FUNCTION PostLEDService(Event):
POST Event to this service's queue
RETURN success or failure
FUNCTION RunLEDService(Event):
SWITCH Event.EventType:
CASE ES_INIT:
IF g_DisplayInitDone == false:
done = DM_TakeInitDisplayStep() // performs one init step
IF done == false:
// Not finished; re-post ES_INIT to continue later
POST ES_INIT to this service again
RETURN ES_NO_EVENT
ELSE:
g_DisplayInitDone = true
ENDIF
CASE ES_LED_SHOW_DIFFICULTY:
pct = (uint8_t)Event.EventParam
CALL LED_RenderDifficulty(pct)
CASE ES_LED_SHOW_COUNTDOWN:
seconds = (uint8_t)Event.EventParam
CALL LED_RenderCountdown(seconds)
CASE ES_LED_SHOW_SCORE:
score = (uint16_t)Event.EventParam
CALL LED_RenderScore(score)
CASE ES_LED_SHOW_MESSAGE:
msgID = (LED_MessageID_t)Event.EventParam
CALL LED_RenderMessage(msgID)
CASE ES_LED_PUSH_STEP:
IF g_LedPushPending == true:
done = DM_TakeDisplayUpdateStep() // push one row to modules
IF done == false:
POST ES_LED_PUSH_STEP again // continue on next dispatch
ELSE:
g_LedPushPending = false // all 8 rows sent
ENDIF
CASE ES_DIFFICULTY_CHANGED:
diffPct = (uint8_t)Event.EventParam
CALL LED_UpdateDifficultyNeopixels(diffPct)
END SWITCH
RETURN ES_NO_EVENT
HELPER FUNCTION LED_SPI_Init():
CONFIGURE SPI1 basic settings via SPI HAL:
master mode, bit time ~100 ns/bit
map SS to RPA0, SDO to RPA1
configure clock polarity/phase
enable 16-bit mode with enhanced buffer
enable SPI1
HELPER FUNCTION LED_RenderDifficulty(pct):
CLAMP pct into [1,100]
FORMAT pct as decimal string into buf[]
CLEAR DM display buffer
FOR each character ch in buf:
ADD ch into DM display buffer
SCROLL display buffer by 4 columns
SET g_LedPushPending = true
POST ES_LED_PUSH_STEP to LEDService
HELPER FUNCTION LED_RenderCountdown(seconds_remaining):
FORMAT seconds_remaining as string into buf[]
CLEAR DM display buffer
FOR each character ch in buf:
ADD ch into DM display buffer
SCROLL display buffer by 4 columns
SET g_LedPushPending = true
POST ES_LED_PUSH_STEP to LEDService
HELPER FUNCTION LED_RenderScore(score):
FORMAT score as decimal string into numBuf[]
CLEAR DM display buffer
PREFIX = "SC:"
FOR each character ch in PREFIX:
ADD ch into DM display buffer
SCROLL display buffer by 4 columns
FOR each character ch in numBuf:
ADD ch into DM display buffer
SCROLL display buffer by 4 columns
SET g_LedPushPending = true
POST ES_LED_PUSH_STEP to LEDService
HELPER FUNCTION LED_RenderMessage(msgID):
IF msgID == LED_MSG_WELCOME:
msg = "WELCOME"
ELSE:
msg = "WELCOME" // default
CLEAR DM display buffer
FOR each character ch in msg:
ADD ch into DM display buffer
SCROLL display buffer by 4 columns
SET g_LedPushPending = true
POST ES_LED_PUSH_STEP to LEDService
HELPER FUNCTION LED_UpdateDifficultyNeopixels(difficultyPercent):
COMPUTE bucket = difficultyPercent / 15 // 0–6
CLAMP bucket to [0,6]
IF bucket == LastDifficultyBucket:
RETURN (no update)
SET LastDifficultyBucket = bucket
CHOOSE (r_full, g_full, b_full) based on bucket:
0 → green
1 → green-ish
2 → yellow-green
3 → yellow
4 → orange
5 → deep orange/red
6 → red
APPLY global brightness scaling to (r,g,b)
CALL neopixel_clear()
FOR each pixel i in 0..NUM_NEOPIXELS−1:
CALL neopixel_set_pixel(i, r, g, b)
CALL neopixel_show() // pushes new color pattern to strip
Gallery